13.8 Installation → I/O Setup
arm’s mounting. The three top right side buttons set the angle to ceiling (180
◦
), wall
(90
◦
), floor (0
◦
). The Tilt buttons can be used to set an arbitrary angle. The buttons
on the lower part of the screen are used to rotate the mounting of the robot arm to
match the actual mounting.
WARNING:
Make sure to use the correct installation settings. Save and load
the installation files along with the program.
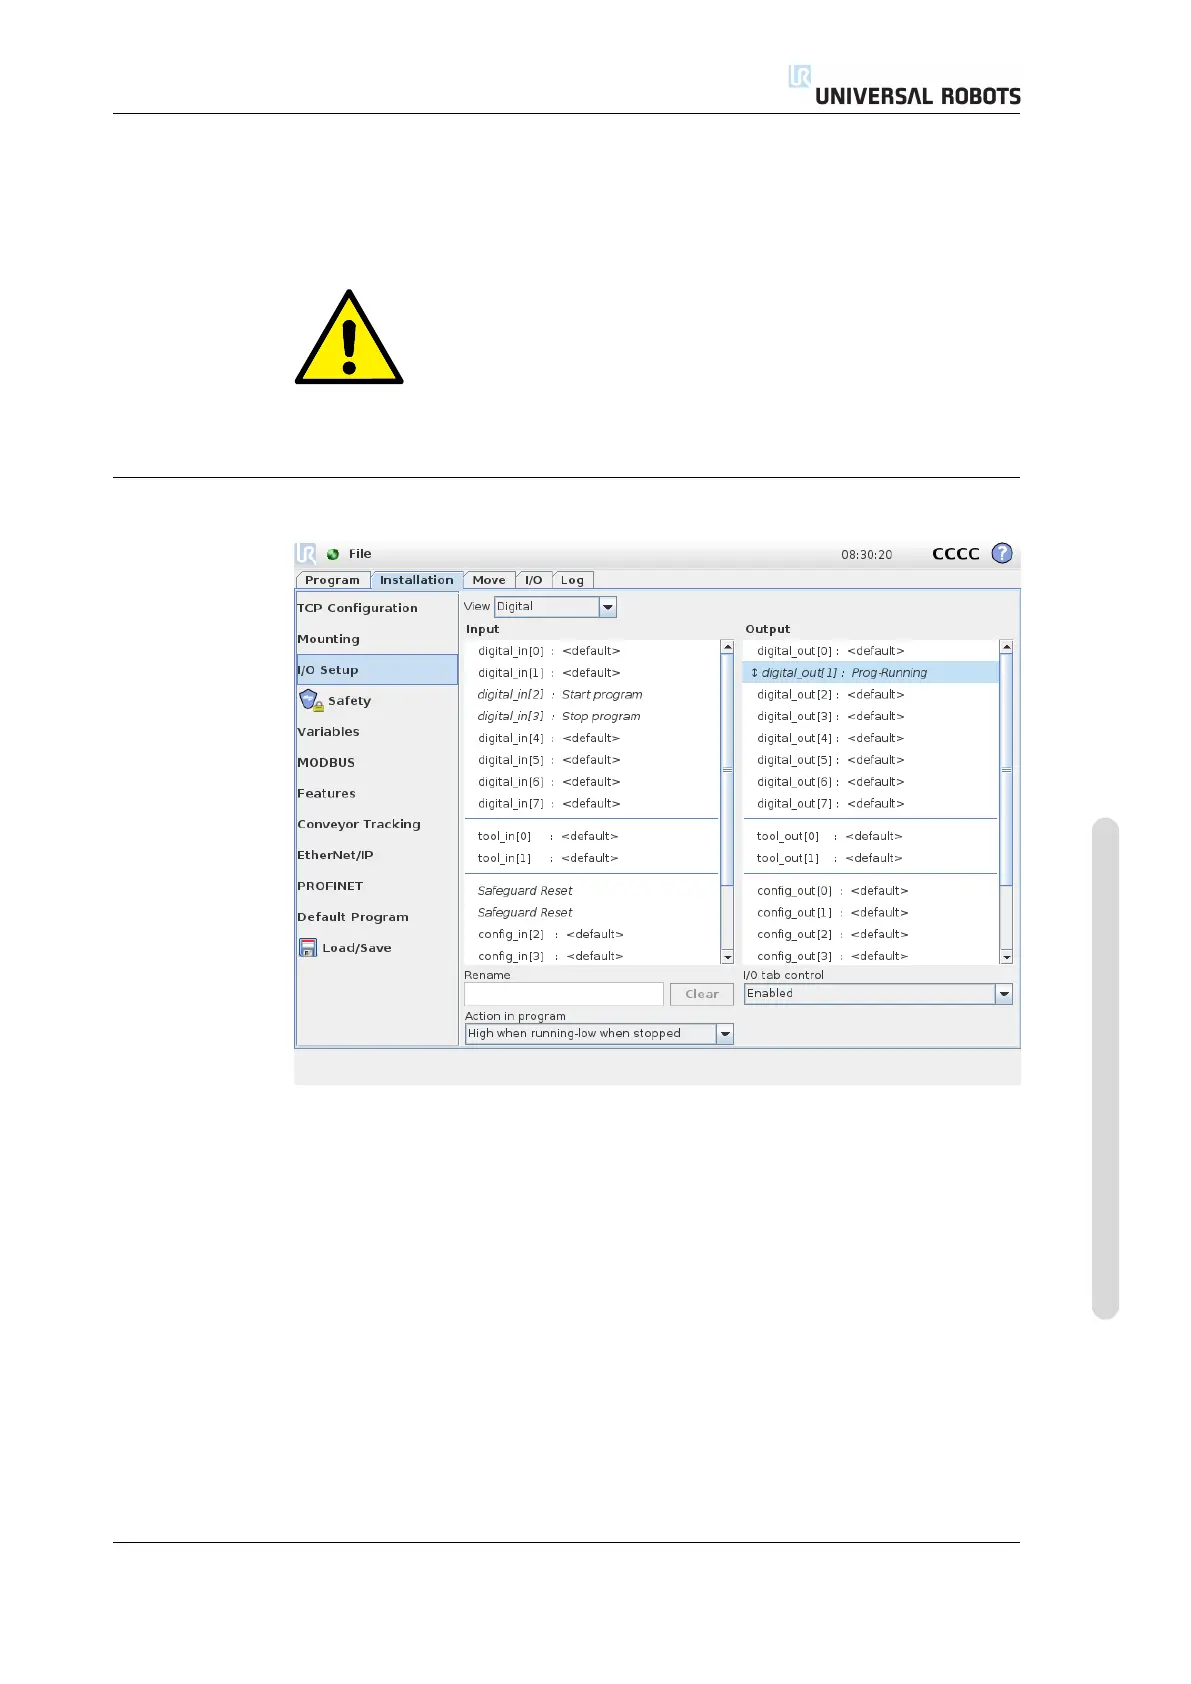
13.8 Installation → I/O Setup
On this screen, the I/O signals available for the robot can be assigned user-defined
names as well as configured with actions and I/O tab control.
The Input and Output sections list types of I/O signals such as:
• Digital (standard general purpose, configurable and tool)
• Analog (standard general purpose and tool)
• MODBUS
• General purpose registers (boolean, integer and float)
The general purpose registers can be accessed by e.g. a fieldbus (such as Profinet
and Ethernet/IP).
Version 3.4.5
Copyright © 2009–2017 by Universal Robots A/S. All rights reserved.
II-45 CB3

 Loading...


