(Continued)
18. Allow the copier to operate for a
minimum of 10 minutes.
19.
Lower the transport latching cover and
the front cover.
20. Wipe the excess oil off the fabric guide
with towels.
21. Remove and discard the media from
under the fabric guide.
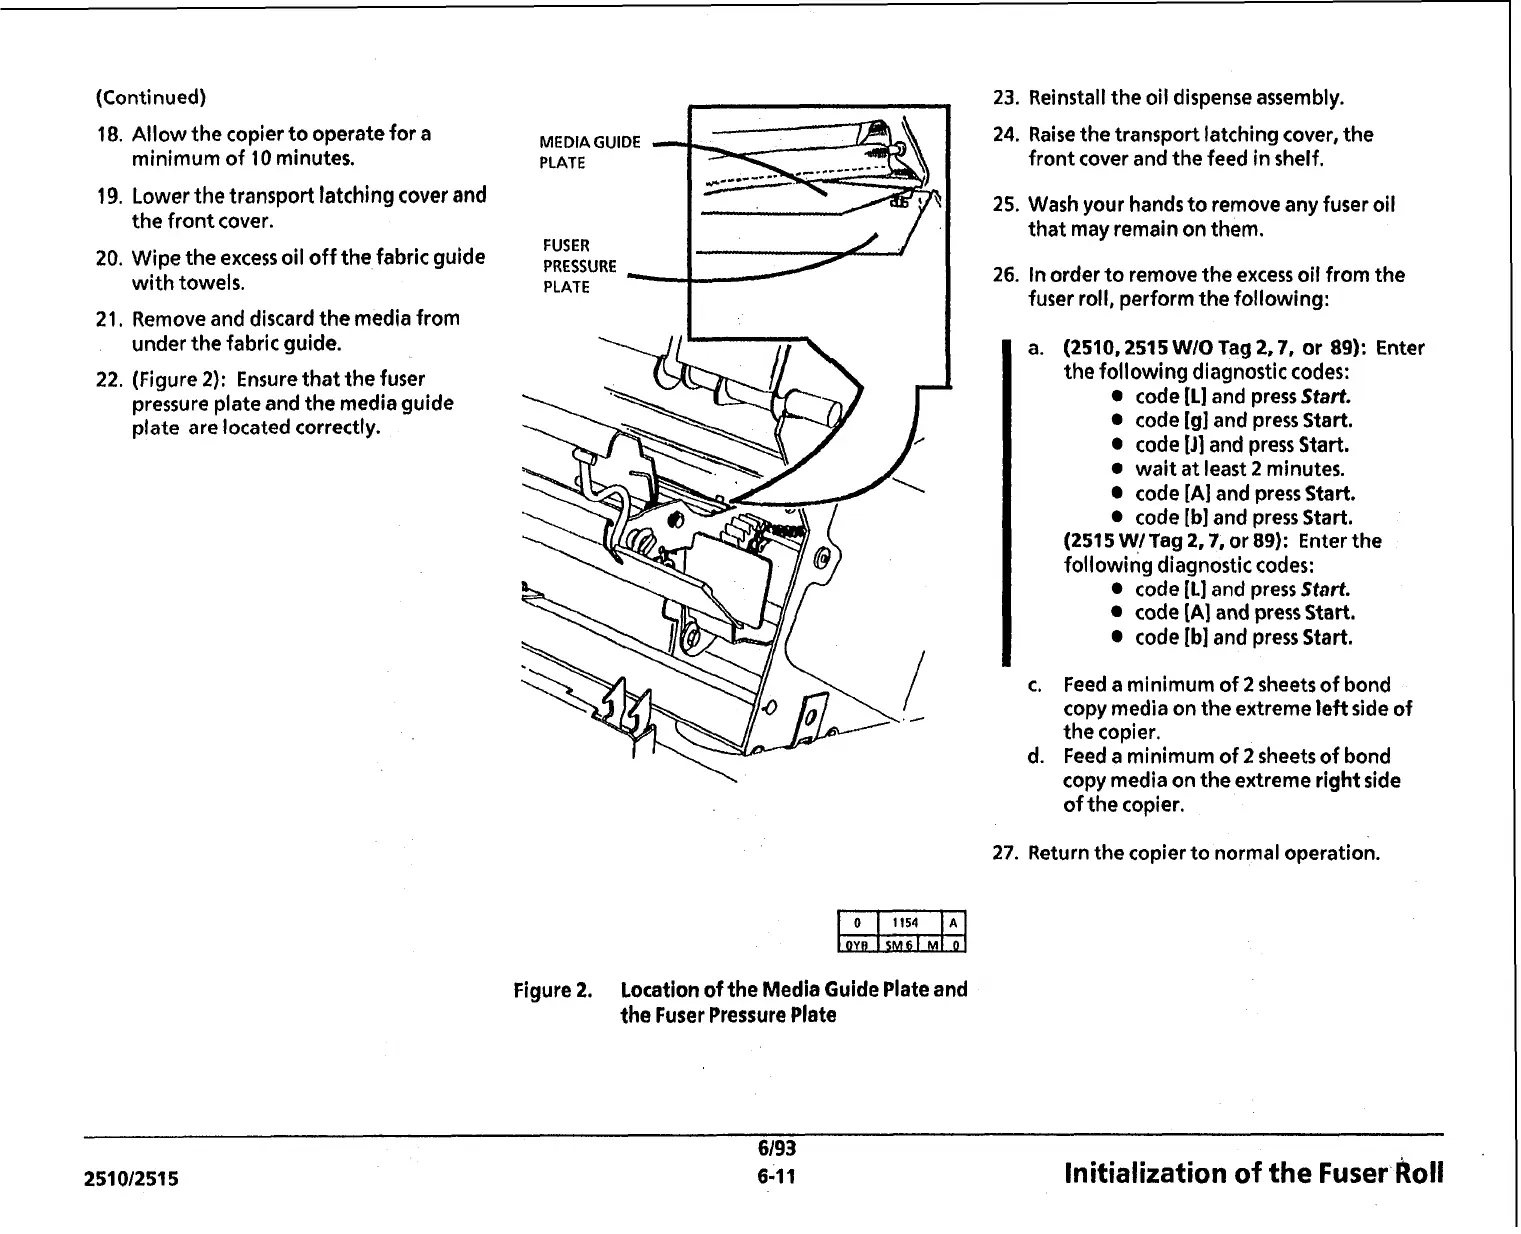
22. (Figure 2): Ensure that the fuser
pressure plate and the media guide
plate are located correctly.
MEDIA Gull
PLATE
FUSER
PRESSURE
PLATE
1
Figure
2.
Location
of
the Media Guide Plate and
the Fuser Pressure Plate
23. Reinstall the oil dispense assembly.
24. Raise the transport latching cover, the
front cover and the feed in shelf.
25. Wash your hands to remove any fuser oil
that may remain on them.
26. In order to remove the excess oil from the
fuser roll, perform the following:
a.
(2510,251 5 WIO
Tag
2,7,
or
89):
Enter
the following diagnostic codes:
code
[L]
and press
Start.
code
[g]
and press Start.
code
[J]
and press Start.
wait at least
2
minutes.
code
[A]
and press
Start.
code
[b]
and press Start.
(2515 WI
Tag
2.7,
or
89):
Enter the
following diagnostic codes:
code
[L]
and press
Start.
code
[A]
and press Start.
code
[b]
and press Start.
c.
Feed a minimum of
2
sheets of bond
copy media on the extreme left side of
the copier.
d. Feed a minimum of
2
sheets of bond
copy media on the extreme right side
of the copier.
27.
Return the copier to normal operation.
6/93
251012515 6-1 1
Initialization of the Fuser
koll
 Loading...


