Adjusting the Z Fold Half Sheet position
Tip
The C Fold, Z Fold, and Z Fold Half Sheet Fold Positions are available only when the
Standard/Booklet Maker Finisher AND optional C/Z Folder is connected.
Note
Adjust Fold Position can be accessed from three separate areas in Common Service
Settings (Tools/administrator mode):
• Tools > System Settings > Common Service Settings > Paper Tray Settings >
Custom Paper Settings
• Tools > System Settings > Common Service Settings > Paper Tray Settings >
Paper Tray Attributes
• Tools > System Settings > Common Service Settings > Maintenance > Finisher
Adjustment
1. Load paper in the desired tray.
2. Login as administrator.
3. Access the Tools tab on the UI.
4. Select System Settings > Common Service Settings.
5. Select one of the following:
• Paper Tray Settings > Custom Paper Settings
• Paper Tray Settings > Paper Tray Attributes
• Maintenance > Finisher Adjustment
6. Select Adjust Fold Position.
7. Select Fold Position Type Setup, and select Change Settings.
8. Select Z Fold Half Sheet- A3, Z Fold Half Sheet- B4, Z Fold Half Sheet-11x17”, or
Z Fold Half Sheet - 8K, and select Change Settings.
9. Select Sample Printout.
10. Select the tray in which you loaded paper, and press the Start button.
An output sample is printed.
11. Select Save.
12. Check the output sample, and measure the A and B fold position movement amounts.
13. Enter the measurement value you obtained in the previous step in Values A & B Before
Adjustment, and the final value you want after adjustment in Desired Values A & B.
Tip
Set value B so that an edge of the paper does not extend past a fold position of the
paper. An edge of paper extending past a fold position of the paper may cause a
paper jam.
14. Select Sample Printout again to print an output sample, and check the adjustment
results.
15. Make adjustments again if necessary.
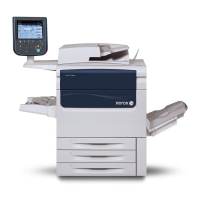
Xerox
®
Color C75 Press9-40
System Administration Guide
Common Service Settings
 Loading...