4-4
IM 04L42B01-01E
4.2 DisplayingtheMeasuredDataasWaveforms,
Values,orBarGraphs
This section explains how to use the trend, digital, and bar graph displays.
For a description of the function, see section 1.3.
Procedure
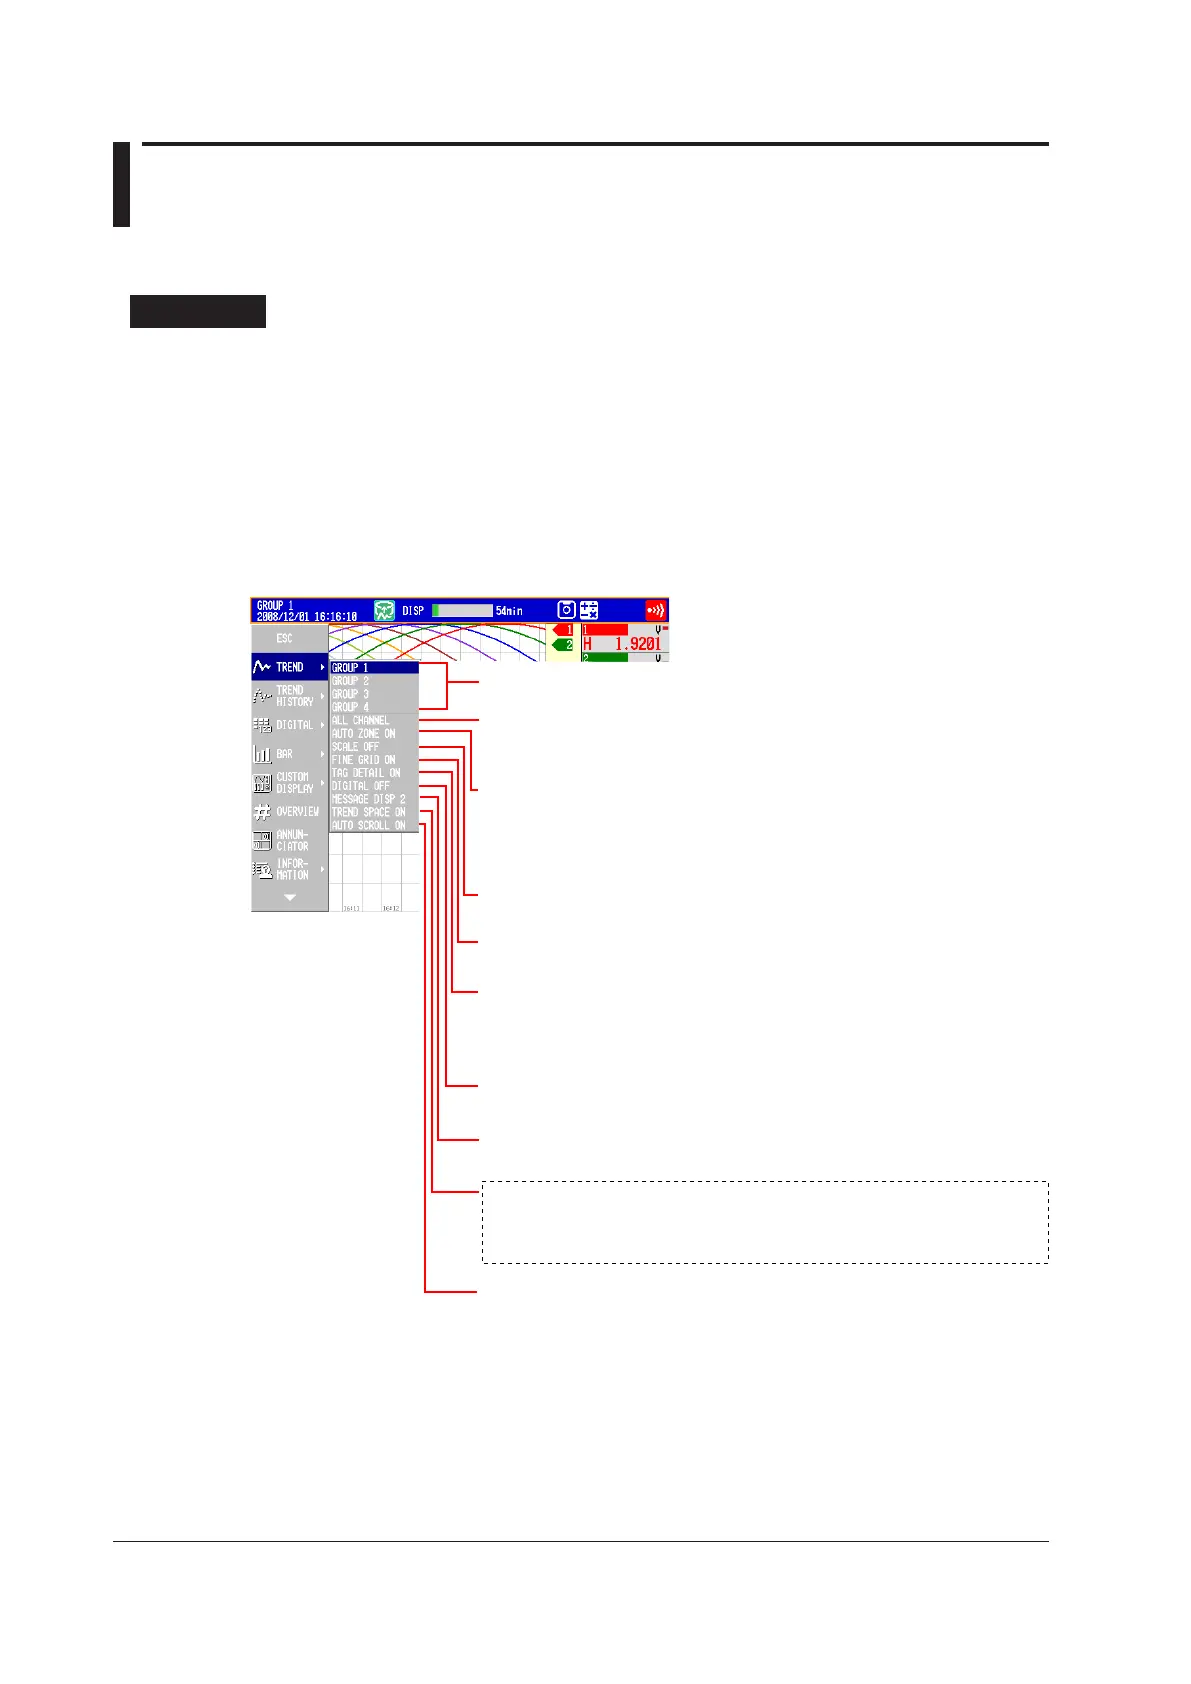
• ShowingtheDisplay
1.
Press DISP/ENTER to show the display selection menu.
2.
Press the arrowkeys to select TREND, DIGITAL, or BAR, and press DISP/
ENTER.
The selected display appears.
• ChangingtheDisplayedContents
1.
Press DISP/ENTER to show the display selection menu.
2.
Press the rightarrowkey to display the sub menu.
3.
Press the upanddownarrowkeys to select the sub menu item.
TREND SPACE ON: Inserts a space at the right edge (horizontal display)
or the top edge (vertical display) in the waveform
display area
TREND SPACE OFF: Does not insert a space
Group name: Displays the group
ALL CHANNEL: Displays the waveforms of all channels
GROUP CHANNEL: Displays the waveforms of the
channels registered to groups
AUTO ZONE ON: Displays trend waveforms
separately by assigning each
channel in the group to separate
display areas (zones)
AUTO ZONE OFF: Does not display waveforms in zones
SCALE ON: Displays the scale
SCALE OFF: Clears the scale
FINE GRID ON: Displays the fine grid
FINE GRID OFF: Clears the fine grid
TAG DETAIL ON: When a tag does not fit into the typical tag display
space, the alarm and measured values are covered
so that the tag can be displayed completely.
TAG DETAIL OFF: Priority is not given to tag display.
DIGITAL OFF: Clears the numeric display section
DIGITAL ON: Displays the numeric display section
MESSAGE DISP1: Displays the messages using display method 1
MESSAGE DISP2: Displays the messages using display method 2
(Not displayed with the default settings. To display, see section 5.18.)
AUTO SCROLL ON: Automatically switches the
displayed groups
AUTO SCROLL OFF: Does not automatically switch
 Loading...