、
77
CHK
ADJ
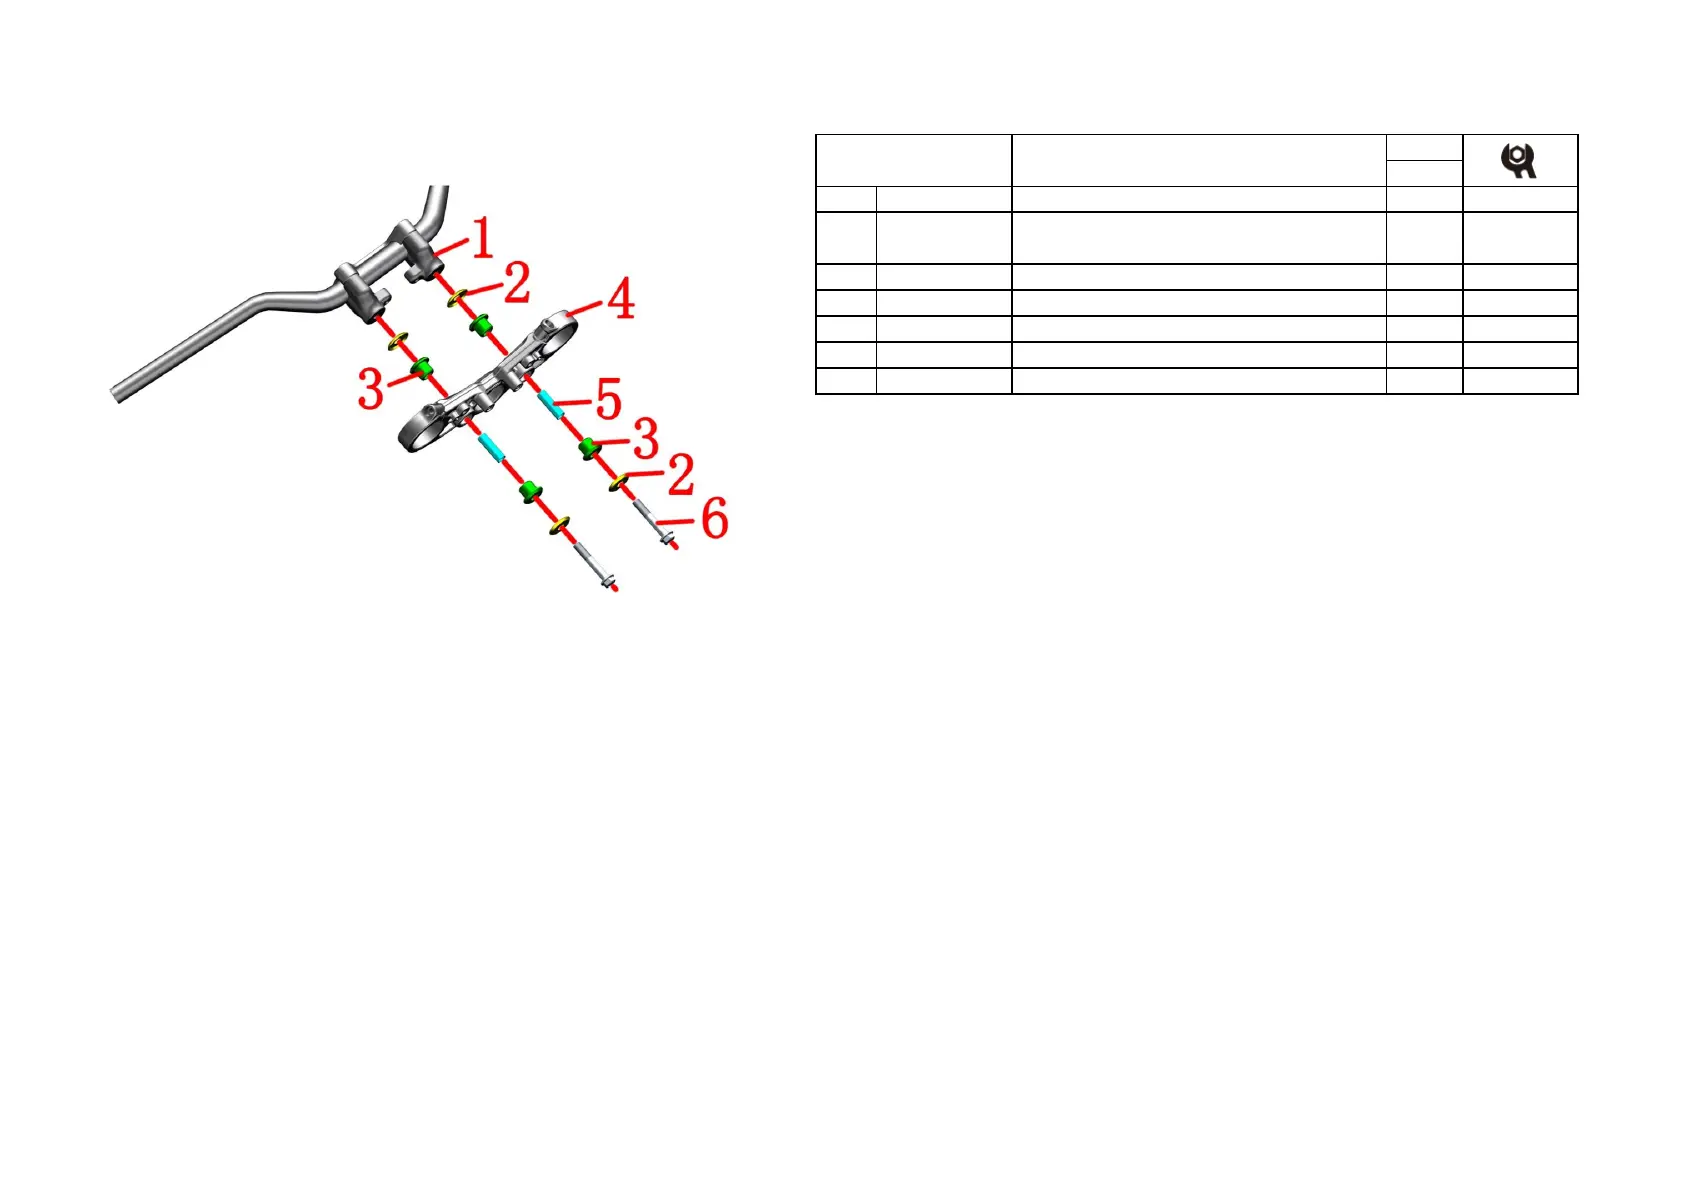
NO. PART NO. PART NAME QTY CAUTION
2 1274200-018000 ZT310-R gasket of upper connecting board 4
3 1246400-049000 ZT350T-D upper plate buffer glue 4
4 4094300-005051 ZT350-X upper connection board (dark gray matte) 1
5 1251700-168000 ZT350T-D bushing φ10×φ13×41 2
6 1250105-280000 GB5789 M10×1.25×60 (level 10.9 dacromet) 2 50N·m
1 4094200-005051
ZT310-R direction handle block M10×1.25 (dark gray
matte/spray paint)
2
Fig.17 FRONT FORK
COMPONENT
Uplink plate, direction handle block component
PROCEDURE:
●Uplink plate and spacer assembly
In order to facilitate the direction of the block, the direction and the upper block should be assembled first to
prevent the block from rotating during the disassembly process. The direction should be wrapped with cotton
or other soft materials to prevent scratching the paint surface.
Old model:Remove nuts ⑺ with a 14# sleeve,remove the gasket⑶, cushion rubber⑷, and bushing
⑹.Remove the upper plate⑸.
If you need to replace the double studs separately, you can lock the two M10×1.5 nuts to each other as
shown in the small figure and then use the sleeve to turn clockwise to remove the studs. When replacing a
new stud, you must apply a threaded fastening to prevent loosening. It is necessary to ensure that the
assembly is in place and firm, and we are not responsible for any damage caused by improper assembly.
The spacer⑴, the upper clamp and the direction handle are disassembled.
New model:Remove bolts⑼ with a 14# sleeve,remove the gasket⑶, cushion rubber⑷, and bushing
⑹.Remove the upper plate⑸.Remove the upper plate⑸.
CAUTION:
●Protect protective measures to prevent scratching the appearance of parts.
●When reassembling, it is necessary to use the direction to ensure that the center and direction of the
spacers on both sides are coaxial with the center. First install 4 pieces of cushioning rubber into the upper
plate and then install the bushing separately. Make sure that the bushing is flush with the cushioning rubber,
otherwise it should be reassembled. When tightening the nut, ensure that the torque is 40N.m. Check the
buffer for spillage and reassemble if necessary.

 Loading...