、
8
CHK
ADJ
NO. PART NO.
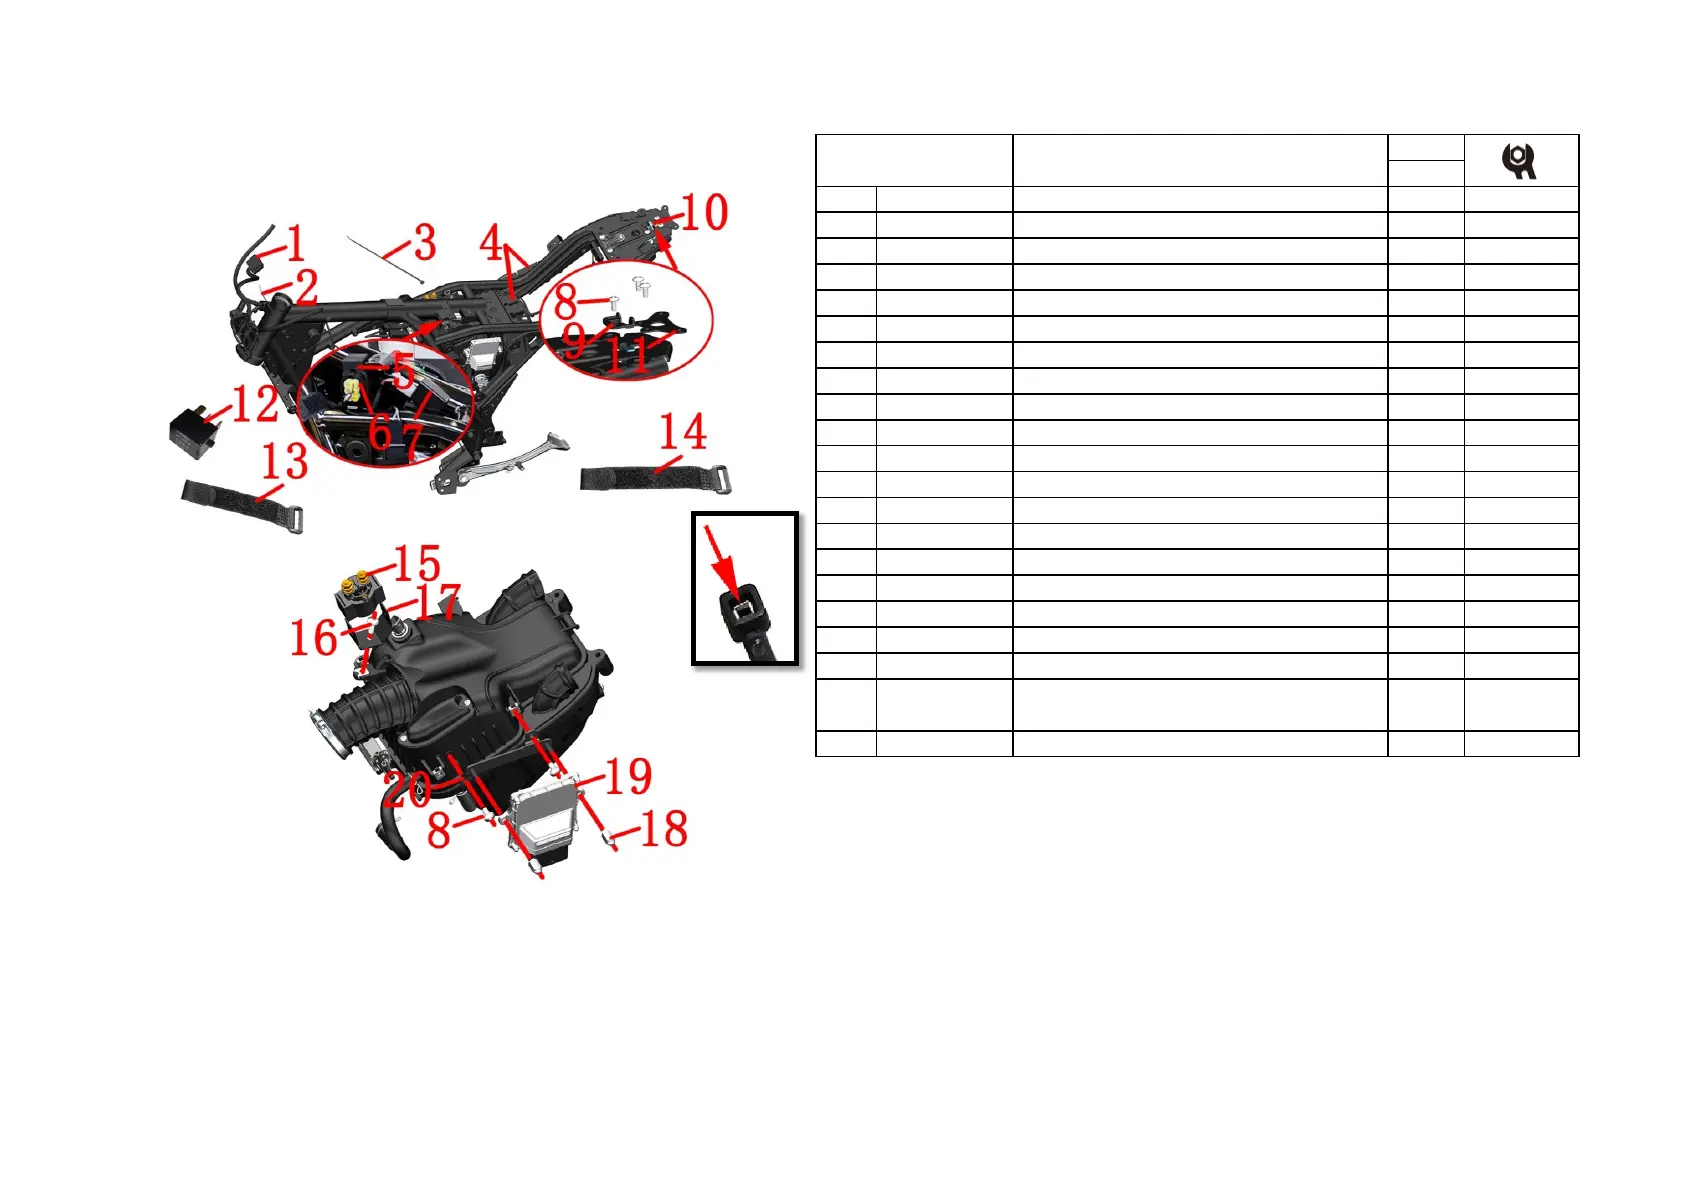
1 1184300-025000
ZT350-S wiring harness assembly-A
1
2 1224100-030000
Pin tie (Black 4.8×130)
1
3 1224100-037000 Grade 0 flame retardant tie (black 3.6×295) 3
4 1244200-103000 ZT310 relay rubber sleeve 5
5 1244100-082000 ZT250-R dump switch sleeve 1
6 1184100-002000 ZT250-S dump switch 1
7 1180300-101000 HJ150-3 square flasher (LED) 1
8 1251100-101000 Non-standard bolt M6×12 (304 stainless steel) 5
9 1224200-205000 ZT310 electronic cushion lock block 1
10 1274100-058000 ZT310 Electric seat lock 1
11 1274300-111000 ZT350-S rear tail skirt bracket 1
12 1184100-017000 ZT250-S fuel-injection relay 5
KH-1A4T
13 1224300-110000 Reverse buckle Velcro strap (20×200mm) 8
14 1224300-111000 Reverse buckle Velcro strap (20×300mm) 4
15 1184300-002000 ZT350 starting relay 1
16 1251100-102000 Non-standard bolt M6×16 (304 stainless steel) 1
17 1274200-171000 ZT310-V relay bracket 1
18 1251300-085093 Non-standard cap nut M6 2
20 1274200-268000 ZT310-VX Bosch ECU bracket 1
Fig.1 FRAME&ELECTRONIC PARTS
COMPONENT
Electronic parts COMPONENT-1
19 1050958-014000
MSE6.0 controller - ZT184MP (matching split sensor /
Euro V)
1
●Flasher and dump switch
Remove the rubber sleeve that connects the flasher ⑺ to the mounting bracket on the frame, and remove
the dump switch with the same method, then separate the dump switch sleeve ⑸.
●Relay and ECU
Pull out the rubber sleeve⑷ on the right side of the frame and upper the air filter,and then pull out the EFI
relay⑿. Find the starting relay⒂ above the air filter, pull off the sheath of the harness, remove the self-
contained nut and remove the relay from the relay support⒄. Remove the bolt ⒃ with 4# hexagon socket
and remove the bracket⒄. Unplug the plug of the engine controller ⒆ on the left and remove the nut ⒅ with
a 10# sleeve. Remove 2 bolts ⑻ with 4# socket head and then remove ECU bracket⒇.
●Seat lock
Take off the plug of the seat lock , and cut off binding ⑶ . Use a 4# inner hexagon to remove the front bolt
⑻, and remove the guide block ⑼; remove the 2 rear bolts and remove the electronic cushion lock ⑽ ankd
the rear tail skirt bracket⑾.
●
Different plug-in methods are different, please unplug all the electrical components connected to the
main thread according to the actual operation. It needs to use a screwdriver, forceps, scissors and
other tools to assist.The binding ⑶ can be picked out by using scissors.Take off straps⒀ and ⒁.
CAUTION:
●Please notice the limit of the bracket when dismantling flasher and dump switch sleeve, beware of
hurting your fingers.
 Loading...