58 Rockwell Automation Publication 442L-UM005B-EN-P - April 2017
Chapter 4 Mounting
Mounting with Mounting Kit 3 and 4
With the aid of mounting kits 3 and 4 (only with mounting kit 1 or 2), you can
align the SafeZone Mini device in two planes. The maximum adjustment angle
is ±11° in both planes.
1. Mount mounting kit 1 or 2 to the SafeZone Mini device.
2. Mount the mounting kit 4 on the mounting surface.
3. Fit the centering pin [4 mm (0.16 in.)] in the central hole on mounting
bracket 4.
4. Fit mounting kit 3 to mounting kit 4 and mount it using two fixing
screws M4 × 10.
5. Then, mount the SafeZone Mini device on mounting kit 3 with the aid
of the threaded holes in mounting kit 1.
6. Adjust the SafeZone Mini device longitudinally and transversely and
then tighten the six fixing screws on the mounting kits.
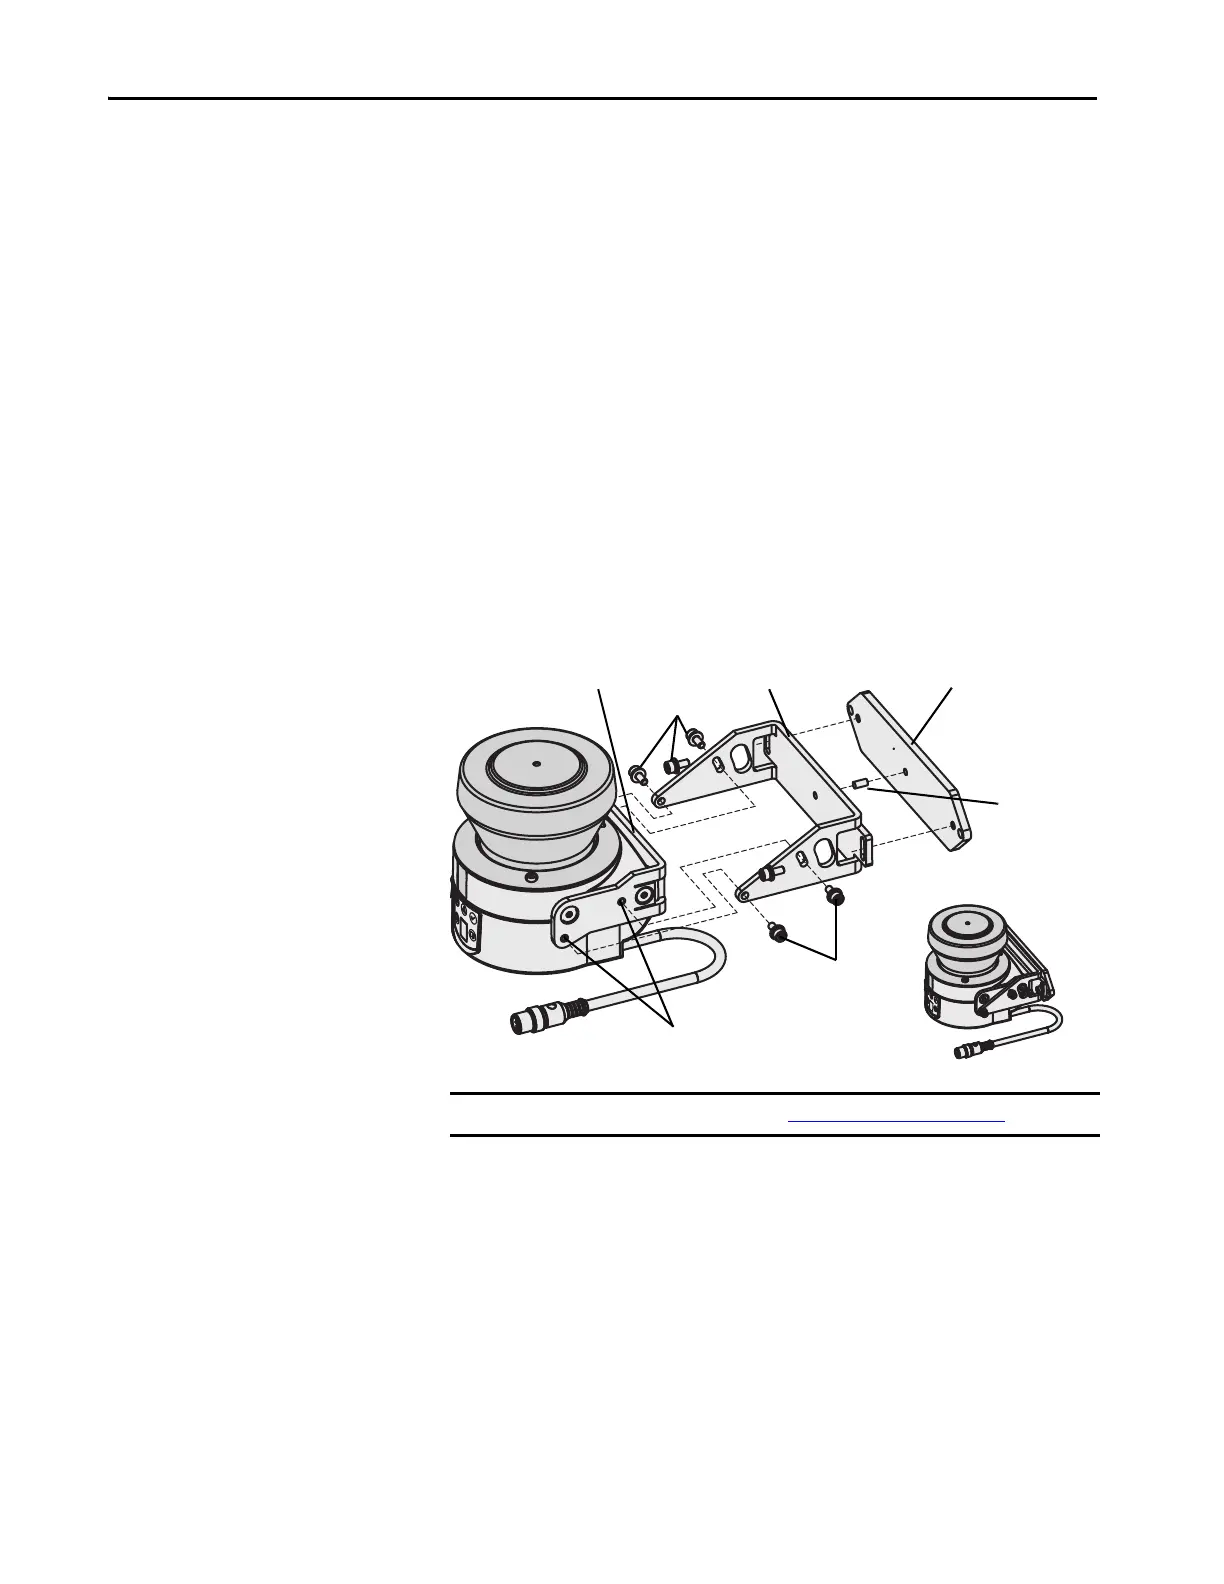
Figure 32 - Mounting with Mounting Kit 2
Information Label Important Information
On completion of mounting, you must affix the self-adhesive information label
Important information supplied:
• Use only the information label in the language that the operators of the
machine can read and understand.
• Place the information label such that it is clearly visible for the operators
during operation. The information label must not be covered even after
additional items have been mounted.
IMPORTANT During mounting, review the Dimension Drawings on page 91
.
Mounting kit 1
Mounting screws
Mounting screws
Threaded holes M4
Mounting kit 3 Mounting kit 4
Centering pin
 Loading...