CHASSIS
7 - 45
RS 125
7.4. CHASSIS
7.4.1. REMOVING THE HANDLEBARS
Read
1.2.1 carefully.
TORQUE WRENCH SETTINGS
Screw (1) 10 Nm (1.0 kgm)
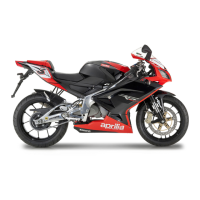
LEFT HANDLEBAR
• Slacken the screw (1) and remove the counterweight
(2).
• Fit the nozzle of an air gun between twistgrip (3) and
handlebar.
• Blow while twisting the nozzle tip. At the same time,
grasp the twistgrip (3) with the other hand and pull
outwards to remove.
• Remove the left light dip switch from the handlebar;
see
7.2.5.
NOTE You need not detach the connector from the wiring.
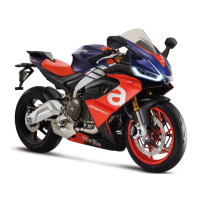
• Release and remove the two screws (4).
• Remove the clamp and move the clutch control aside.
The clutch control is retained by the clutch hose.
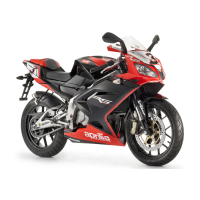
• Release and remove the screw (5).
• Remove the left handlebar.
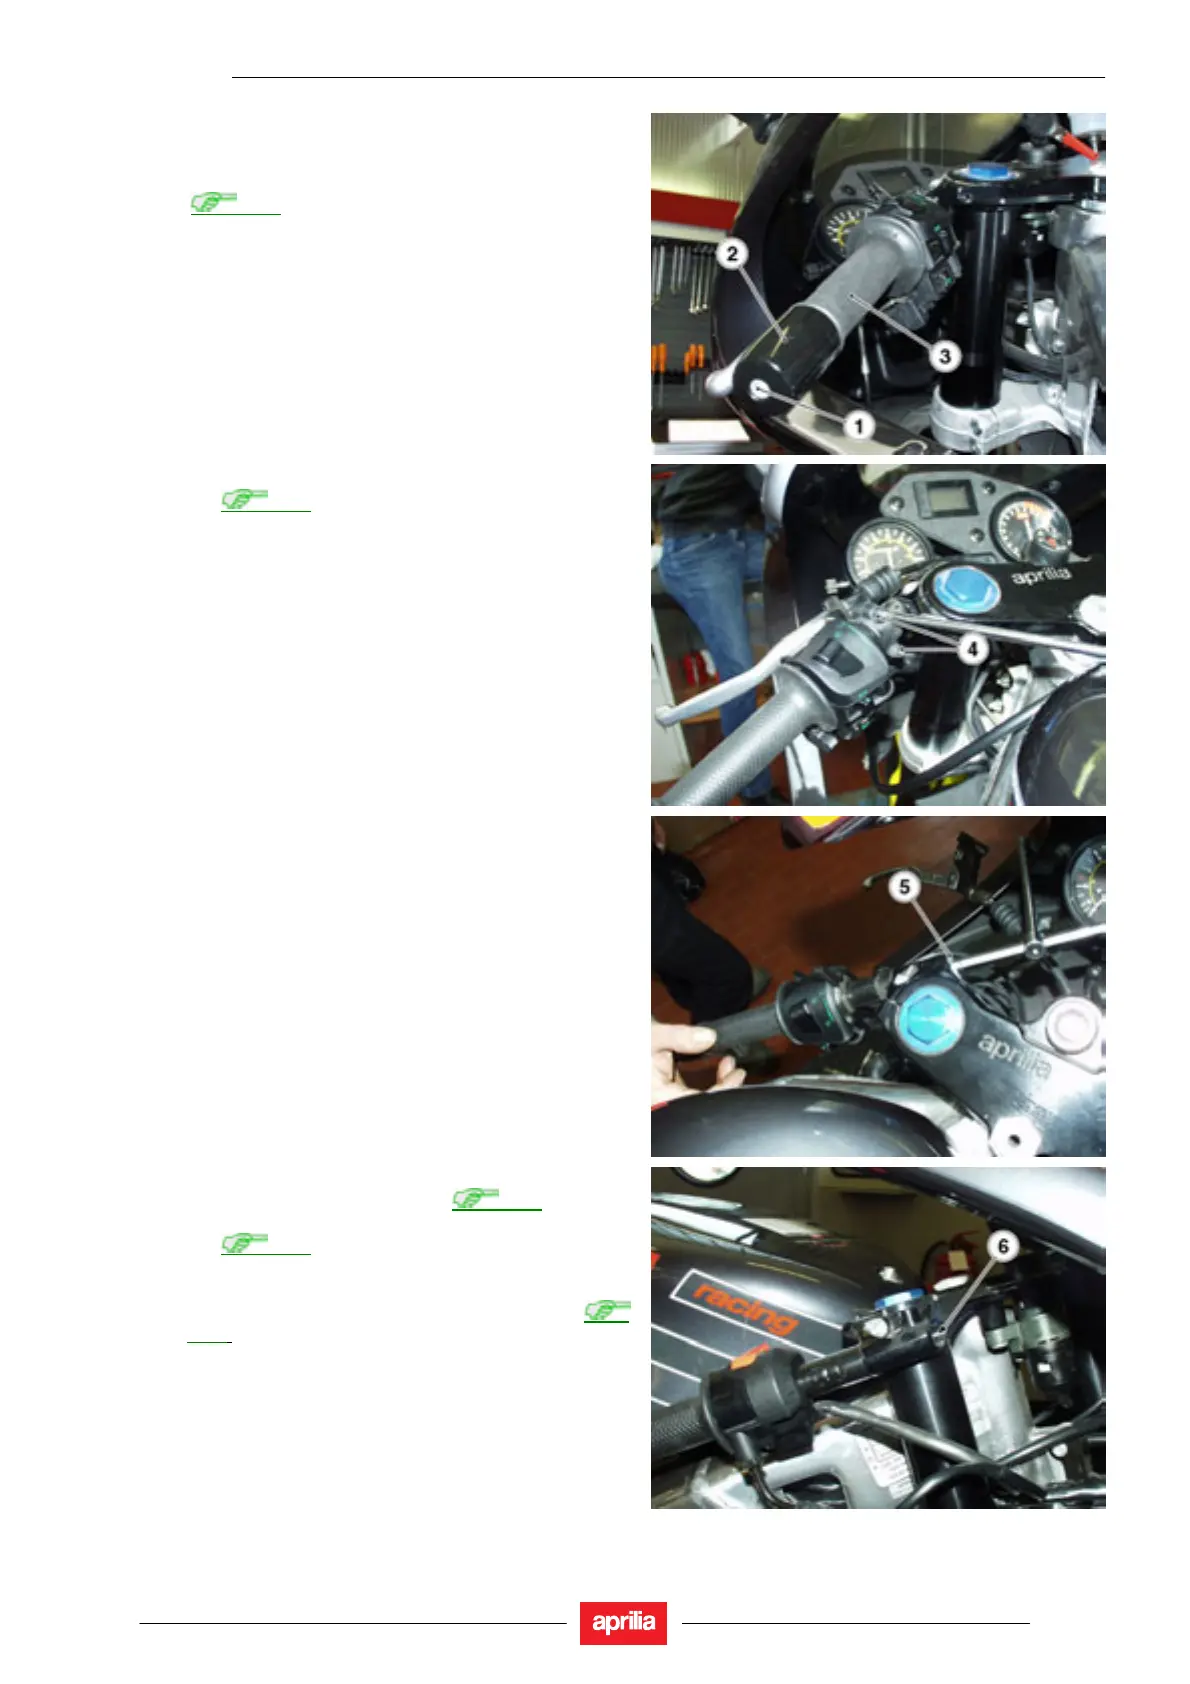
RIGHT HANDLEBAR
• Remove the throttle control; see
7.3.1.
• Remove the right light dip switch from the handlebar;
see
7.2.4.
NOTE You need not detach the connector from the wiring.
• Remove the front brake control partially; see
7.3.3.
• Release and remove the screw (6).
• Remove the right handlebar.
 Loading...