Rev D CHP Max5000 Chassis (Front Fiber Version) 3-13
Installing an Application Module
Modules currently available are listed in Table 3.5.
➤ To install an application module
1. Refer to the system/headend map for the slot location of the application modules.
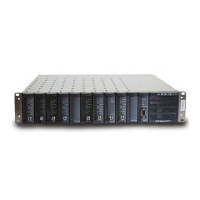
2. Gently insert each module into a slot in the front of the chassis. Be careful to align
the plastic guide rail on the top of the module with the metal guides on the top of
the chassis.
3. Carefully slide the application module into the chassis until it is fully seated in the
backplane. The latch on the front panel locks when the module is fully seated.
4. Secure the module to the chassis with the supplied lock washer and nut (6 to 20
in-lb.) over the F-connector.
5. Repeat Steps 2 through 4 to install the remaining modules in the chassis.
6. Install a blank panel (P/N CHP-BLANK) into each empty slot at the front of the
chassis.
7. Refer to Table 3.5 to configure the corresponding modules.
CAUTION: Some components are sensitive to electrostatic discharge (ESD)! Use a
grounding strap to prevent damage to electronic components by ESD. Do not touch
any components not specifically referred to in these instructions.
CAUTION: Refer to the ARRIS Fiber Care and Cleaning Guide, P/N 1506507, for
important guidelines to follow when installing fiber optic cable.
Note: Modules can be installed and removed with the chassis powered
(hot-swapped).
Note: When a module is installed in a powered chassis, the Status alarm LED on
the front panel may light if signal cables have not been connected to the unit.
Table 3.5 Module Configuration Reference
Module Section
CMM, SMM or SMM-2 Configuring CMM or SMM on page 5-9
SMM-2 SMM-2 Configuration on page 6-11
Dual-input Fixed Output Forward Transmitter Configuring the Transmitter on page 7-8
Dual-input Variable Output Forward Transmitter Configuring the Transmitter on page 8-8
1GHz Dual-input Forward Transmitter Configuring the GFX(V) on page 10-10
Single Channel Return Receiver Configuring the 1RRX on page 11-7
Redundant Dual Channel Return Receiver Configuring the R2RRFF on page 12-10
 Loading...