6. Lamps and lamp houses
3
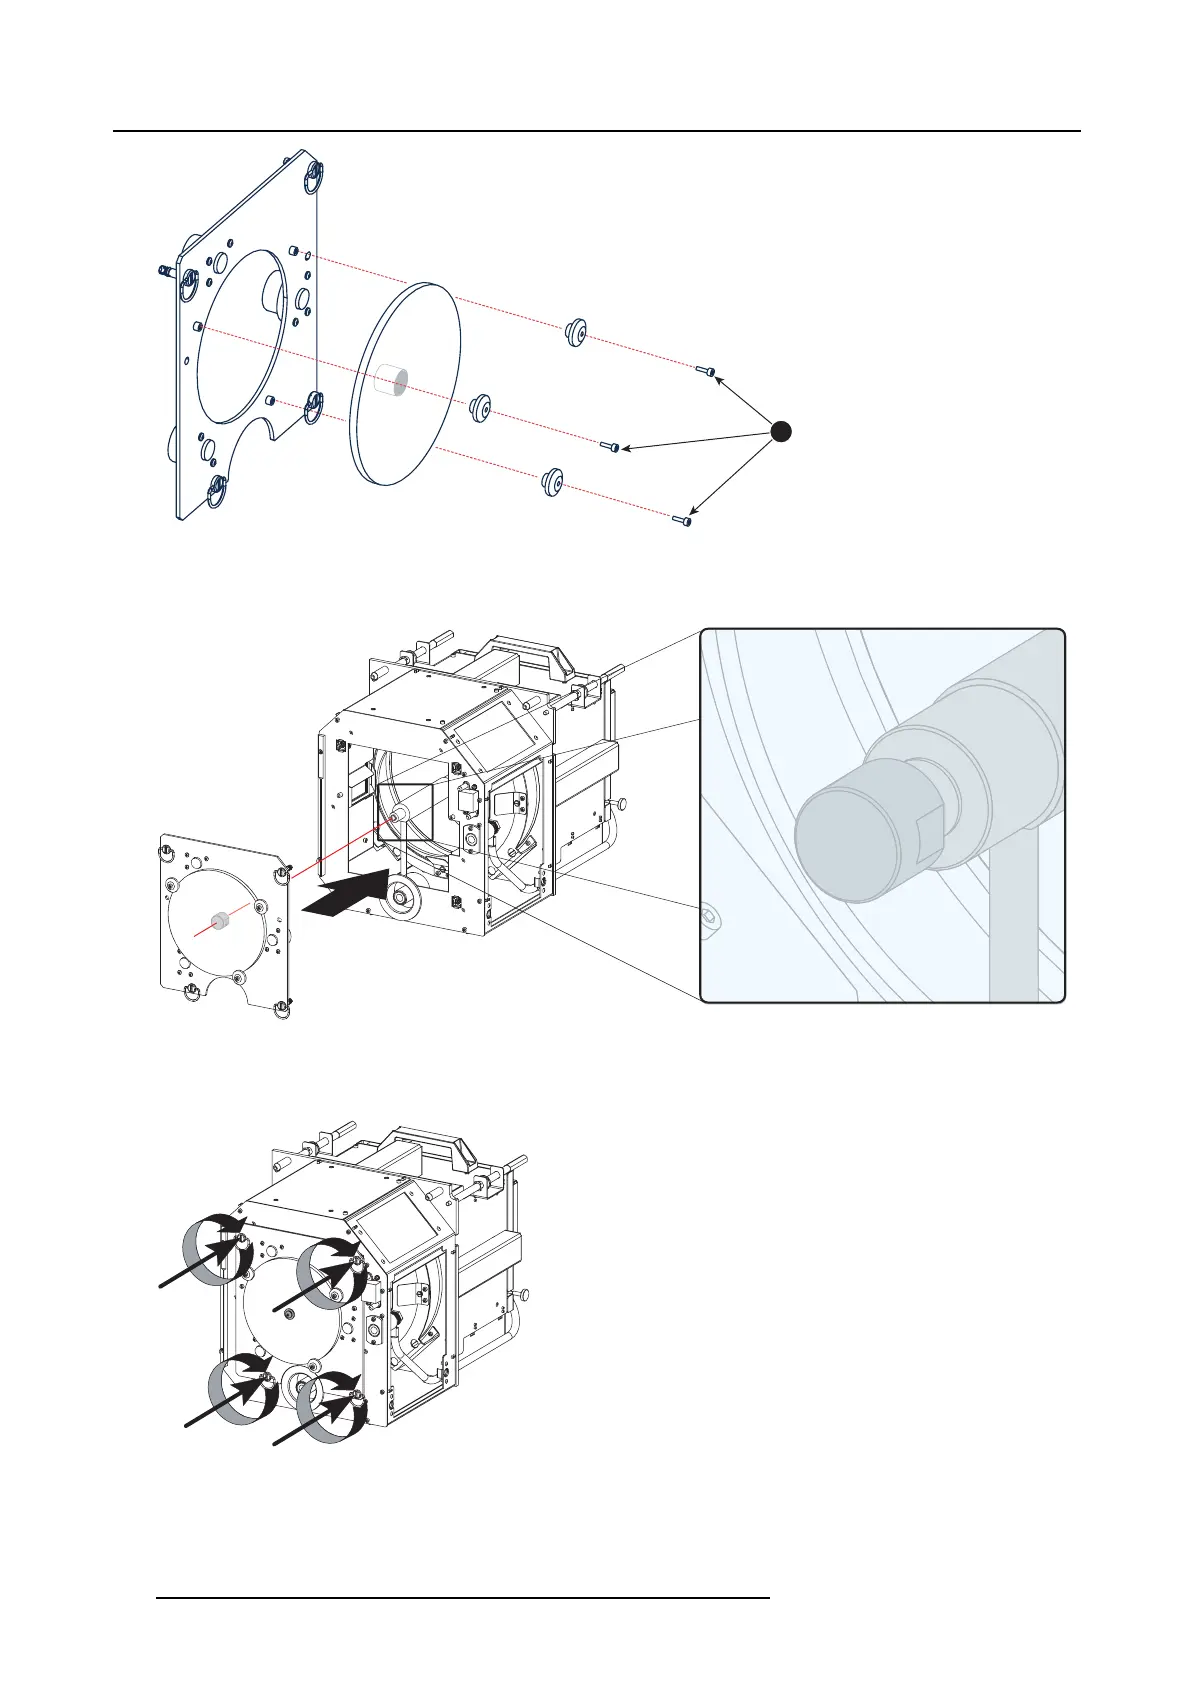
Image 6-35
4. Reinstall the UV blocker assembly as illustrated. M ake sure that the xenon lamp is pr operly supported by the lam p supporting
mechanism in the centre of the UV blocker. Use the opening at the side of the lamp house to guide the supporting pin of the
xenon lamp into the anode supporting mechanism.
Image 6-36
5. Secure the U V blocker by fastening the four reta ining thum bscrews as illustrated.
Note: Please ensure that the retaining thumb screws turning wires a re flash with the cover or interference will occur while
inserting the lamp house into the projector.
Image 6-37
6. Reinstall the side cover of the lamp house as illustrated.
Note: Please ensure that the retaining thumb screws turning wires a re flash with the cover or interference will occur while
inserting the lamp house into the projector.
116
R5905043 DP2K-12C/11CX 19/02/2018
 Loading...


