8. Light processor assembly
8.5 Light processor assembly removal
Necessary tools
• Flat screw driver 6 x 150 or 10 mm nut driver
• Allenwrench4mm
How to remove
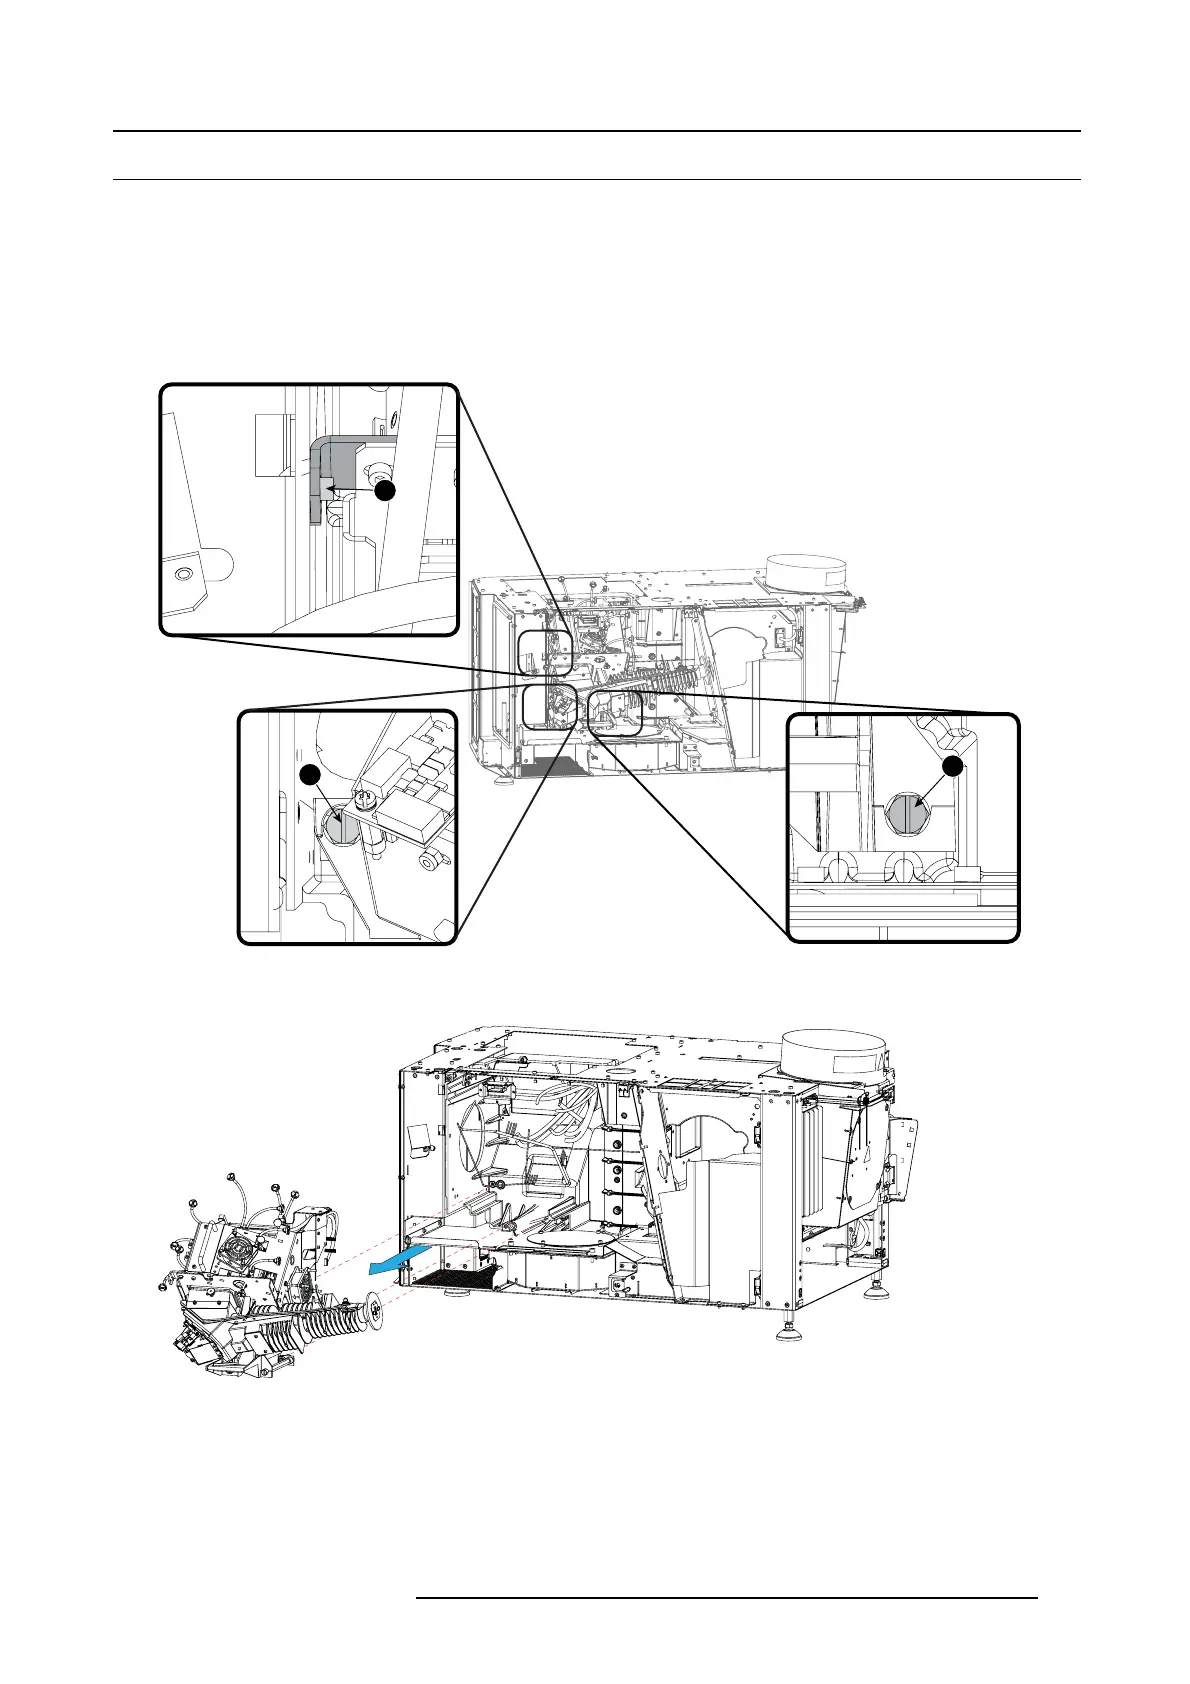
1. Remove the lens (see user guide of the projector).
2. Release the two captive screw s at the base of the light p rocessor (1 and 2). Use a 6 mm flat screw driver on a 10 mm nut driv er.
1
3
2
Image 8-6
Light processor fixations
3. Turn out the hexagon head screw at the left side of the light pr ocessor (3).
Image 8-7
Light processor removal
4. Take the light processor un it b y its han dles and gently pull out the light proc essor assembly of its compartment.
5. Place the light processor a
ssembly on a stable table.
R5905043 DP2K-12C/11CX 19/02/2018
141
 Loading...


