14. Communicator touch panel
14.2 Installing the touch panel interface
Necessary tools
• 17 mm wrench.
• 10 mm wrench.
How to ins tall the touch panel interface upon the DP2K-12C/11CX?
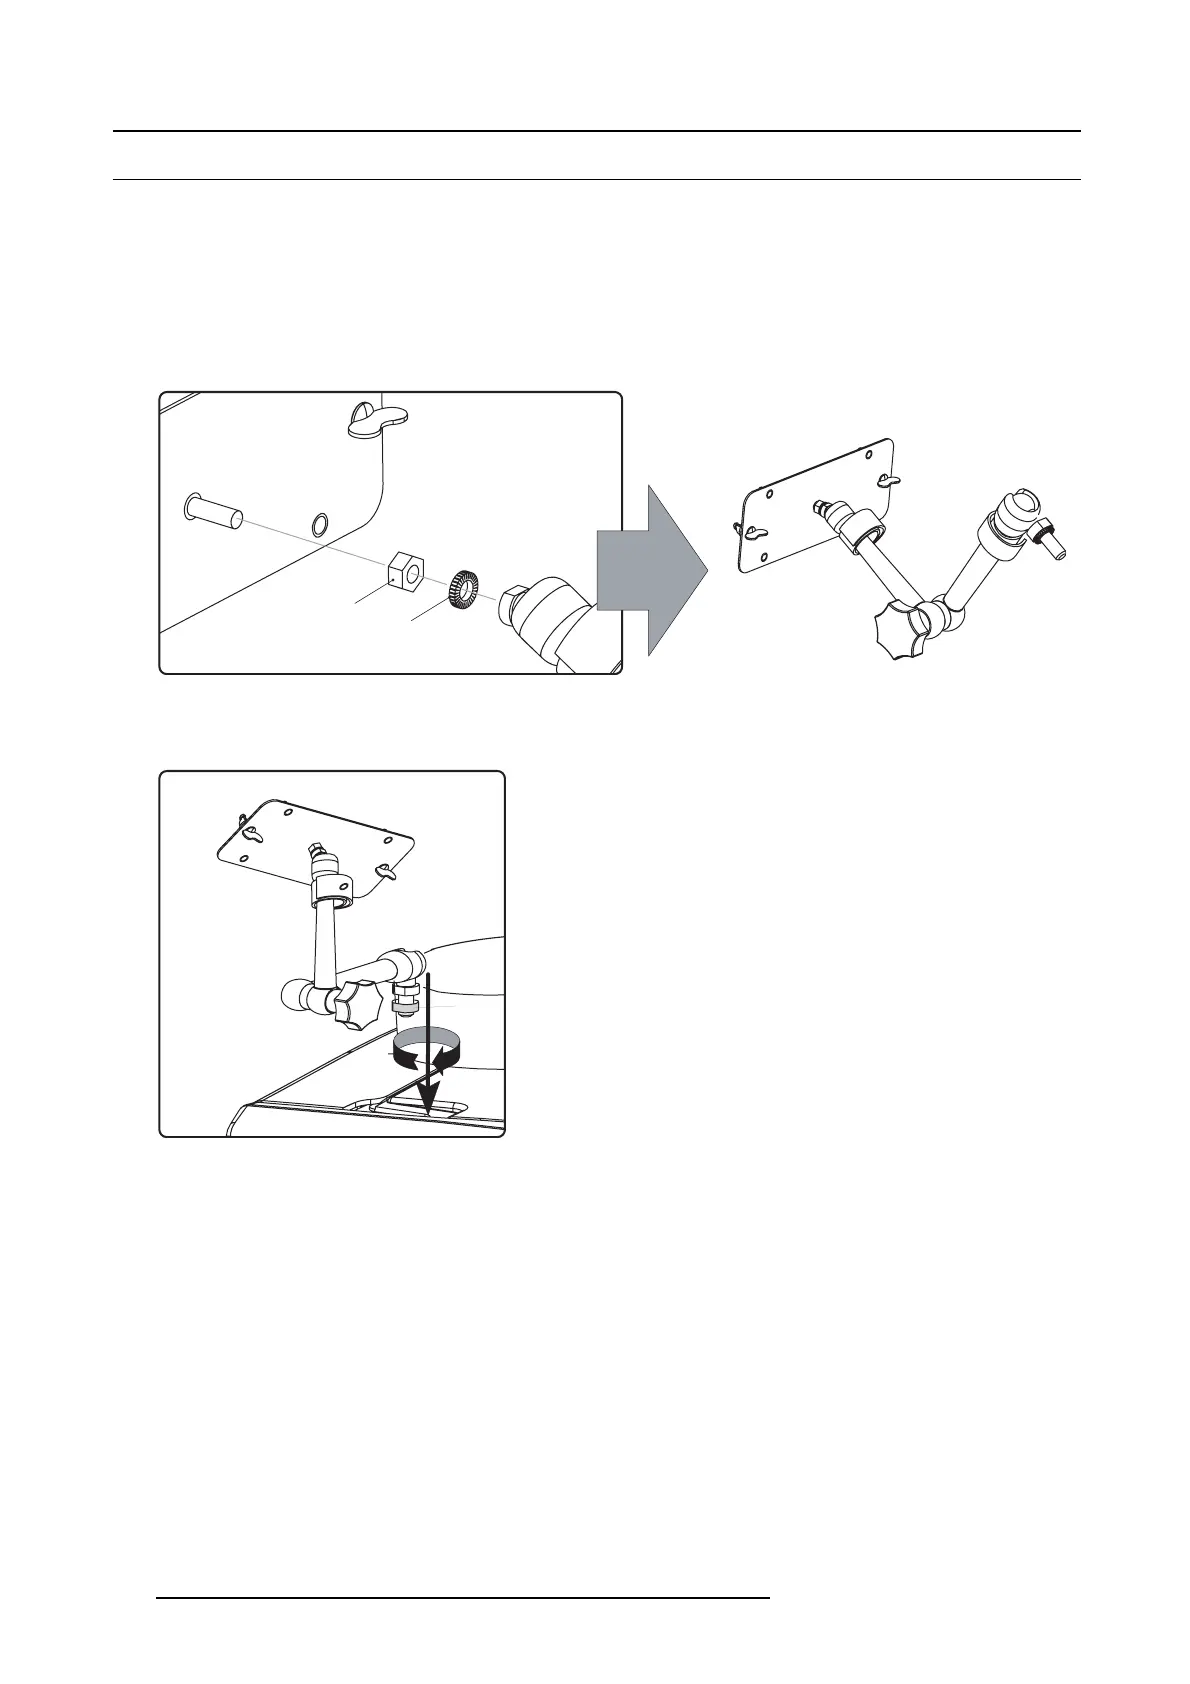
1. Assemble the mounting plate and the swivel arm together as illustrated. First place the nut (N) upon the rod o f the mounting
plate, then add the lock washer (L), then fasten the mounting plate and the swiv el arm together. When the arm
is mounted, tu rn
nut (N) against the arm to secure the position.
N
L
Image 14-3
Assemble swivel arm
2. Slide a washer (M) over the base of the swivel arm and Insert the base of the sw ivel arm into the m ounting hole at the top of the
DP2K-12C/11CXa s illustrated.
M
Image 14-4
Mount swivel arm
3. Place the touch panel interface u pon the mounting plate of the swivel arm and fasten the two wing nuts (W) as illustrated.
264
R5905043 DP2K-12C/11CX 19/02/2018
 Loading...


