8. Light processor assembly
8.14 Replacing of the notch filt er
The Light Processor and the N otch Filter are matched. When replacing the Light Processo r the Notch Filter
needs to be replaced as w ell. T he Light P roces sor spare part kit contains the matched No tch filter.
To access the old Notch Filter, installed inside the projector, the left s ide cover and side cover plate h as to be
removed from the projector. T his procedu re assum es that t he left side cover and side cover plate are already
removed from the projector.
Matching Notch Filter
On the front side of the Light Processor either a G r een, Red, Yellow or no colored dot is applied. (green, r ed or yellow). The Notch
Filter has only a Green or a Red colored dot.
Light Processo r
→
Matching Notch Filter
GREEN
→
GREEN
RED
→
RED
YELLOW
→
GREEN or RED
No colored dot.
→
GREEN
Necessary tools
Allen wrench 3 mm
Necessary parts
• Red labeled notch filter
• Green labeled notch filter
How to remove
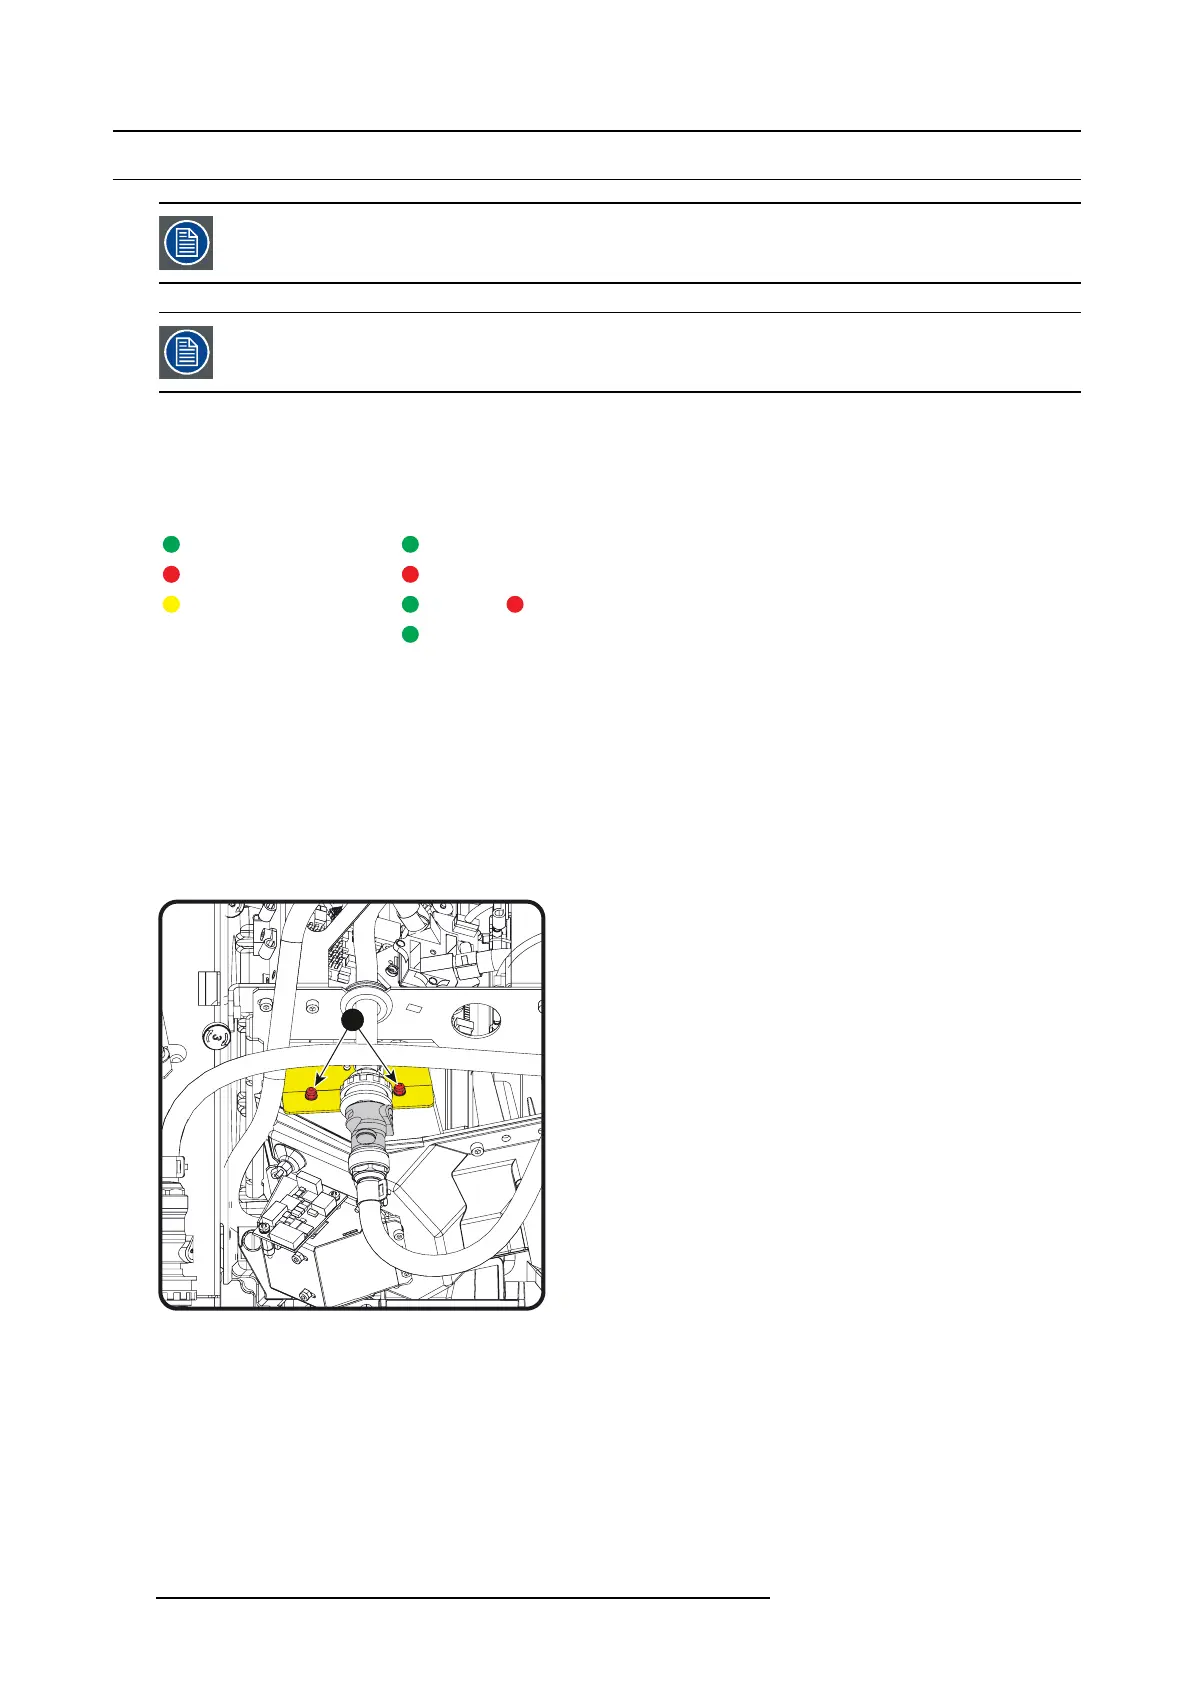
1. Turn out both fixationbolts(B).Usea3mmAllenwrench.
B
Image 8-22
2. Slide out the old notch filter.
Note: It can be necessary to open the c ooling circuit to get acces s to the n otch filter.
The old notch filter w ill not be reused.
3. Check the prism color dot or the colored dot on the removed notch filter.
To check the prism color dot, look into the lens holder.
To check the notch filter dot, see next to the handle.
154
R5905043 DP2K-12C/11CX 19/02/2018
 Loading...


