7. Cold mirror assembly
7.4 Installation of the cold m irror assembly
The cold mirror cann ot be rep laced separately. Always replace the w hole assem bly (m irror + heat sin k + fan).
Necessary tools
• 3 mm Allen wrench
• Nut driver 7 mm
When unpacking the cold mirror assembly, check if there is no foam p iece between the support plate and the
backside of the cold m irror. If so, remove that p iece g ently.
Remove the protective layer on the mirror side. Do not touch the m irror with your fingers or o ther object.
How to install the cold mirror assembly
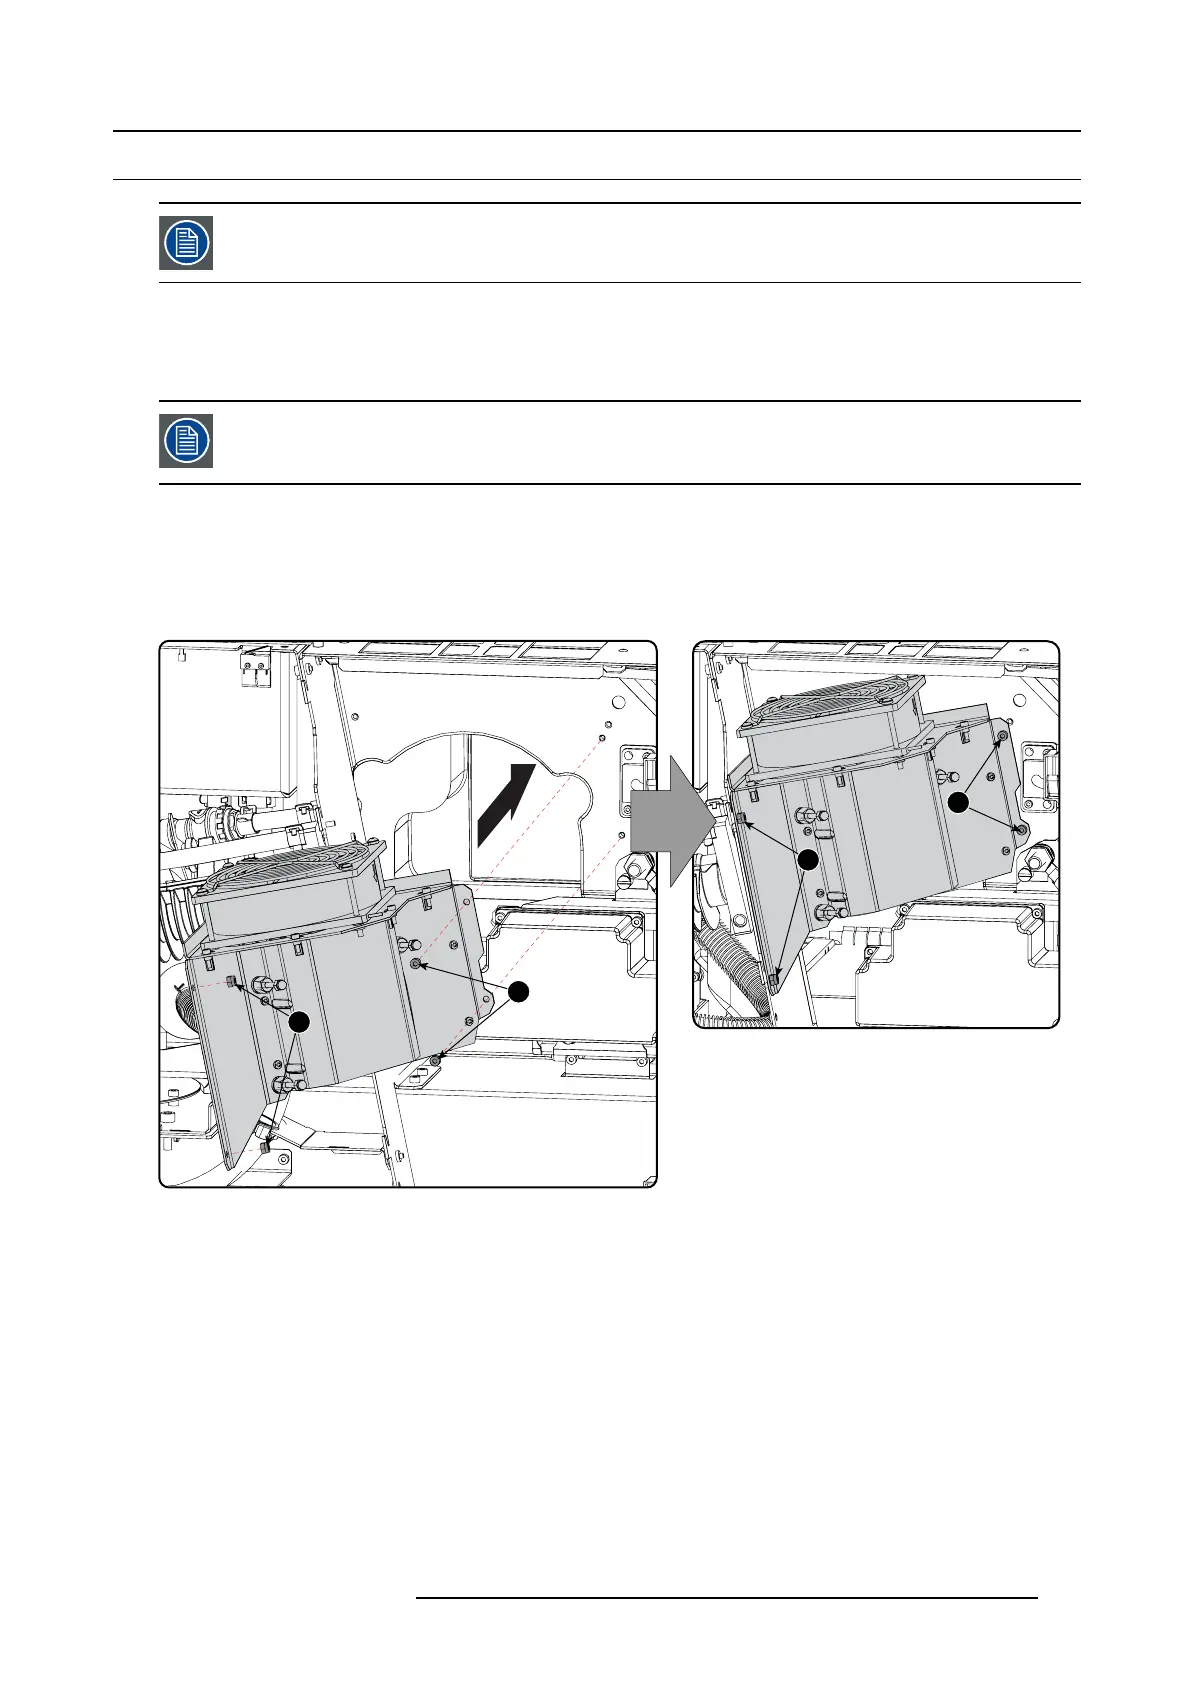
1. Insert the cold m irror assemb ly on its p lace and hold the cold mirror assembly in its place. Sec ure with the two nuts (reference
1) at the left side. Use a 7 mm nut driver.
Caution: Make sure that the wire unit of t he fan does not get jammed between the as sem bly and the projector chassis.
Caution: Do not touch the surface of the cold m irror.
2
1
2
1
Image 7-7
Mount cold mirror
2. Fasten the right side of the cold mirror as sem bly u sing two hexagon socket hea d c ap screws (reference 2). U se a 3 mm Allen
wrench.
3. Reconnect the wire unit (reference 3) of the fan.
R5905043 DP2K-12C/11CX 19/02/2018 129
 Loading...


