6. Lamps and lamp houses
6.9 Replacement of the UV blocker
This procedure is o nly valid w hen replacing a n UV blocker with an glued o r screwed anode support.
This procedure requires that the lamp house is removed from the projector. See proced ure "Re mo val of the
lamp house", page 96.
CAUTION: The person that pe rforms this pro cedure MUST be wearing a full face shield with neck pro tector, a
welder’s jacket and clean leather g loves with w rist protectors. This is required to safely dism antle or assemble
the lamp house, which contains a xeno n lamp.
Necessary tools
2,5 mm Allen wrench.
How to replace the UV blocker
1. Ensure that you wear protective clothing, a full face shield and protective gloves.
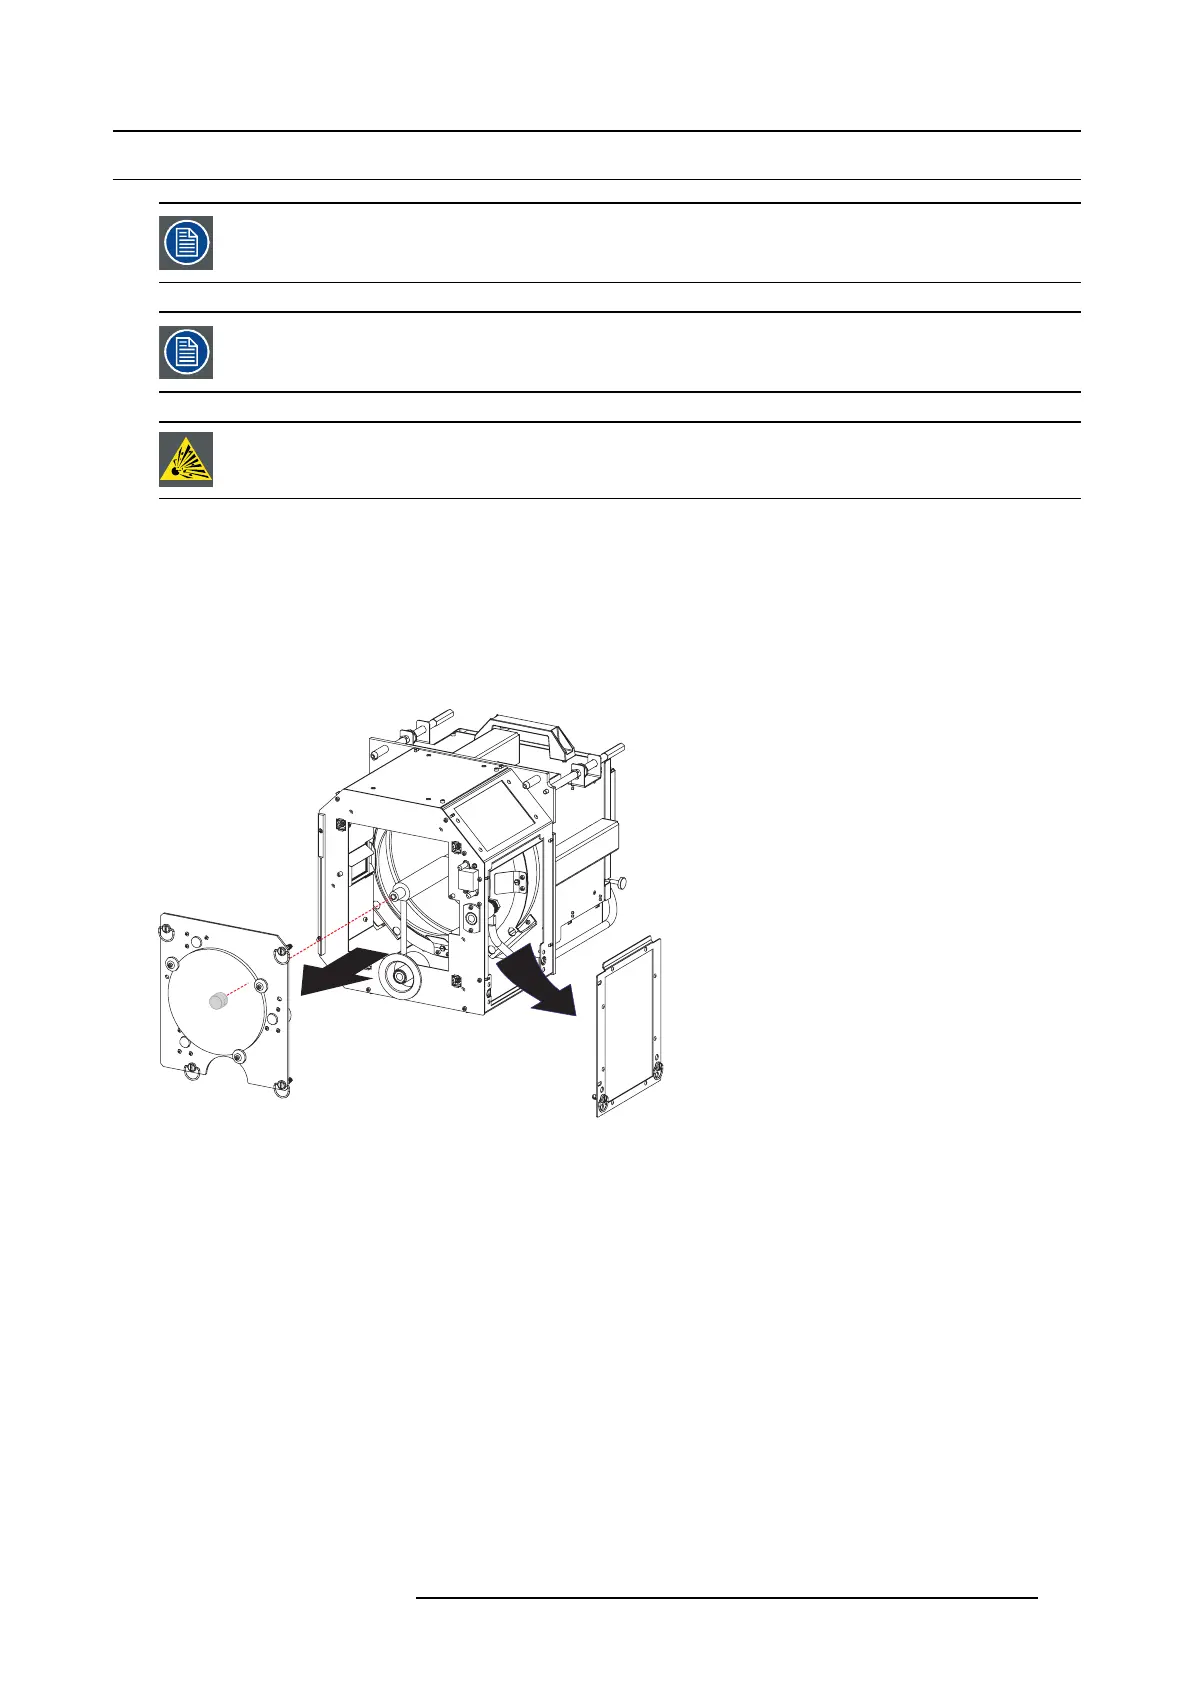
2. Remove first t he lamps house side c over and then the lamp house UV blocker assembly by releasing the retaining thumbscrews
as illustrated. Support the x enon lamp while removing the UV blocker assembly.
Image 6-34
3. Replace the UV blocker with integrated anode support as illustrated. Us e a 2,5 m m Allen wrench to loos en/fasten the three
hexagon socket head cap screws (reference 3). Make sure that the anode support is on the inner side of the assembly.
Caution: Do no t touch the new UV blocker with bare fingers. You should w ear clean leather glove s to protect your hands
against the danger of explosion of the high pressurized xenon lamp and to a void that the U V blocker gets contam-
inated with grease or dirt. You m ay wear latex or cotton glov es in c ase there is no danger of a highly pressurized
xenon lamp.
R5905043 DP2K-12C/11CX 19/02/2018
115
 Loading...


