19
Workshop Manual
Smart Tachograph EFAS-4.10/4.11
Warning When changing the battery, ensure that the tachograph EFAS is constantly connected to the supply voltage
(12 V or 24 V via connector A, white). Otherwise, the warranty becomes invalid when the battery is removed,
since the tachograph assumes that the cover has been opened without authorization..
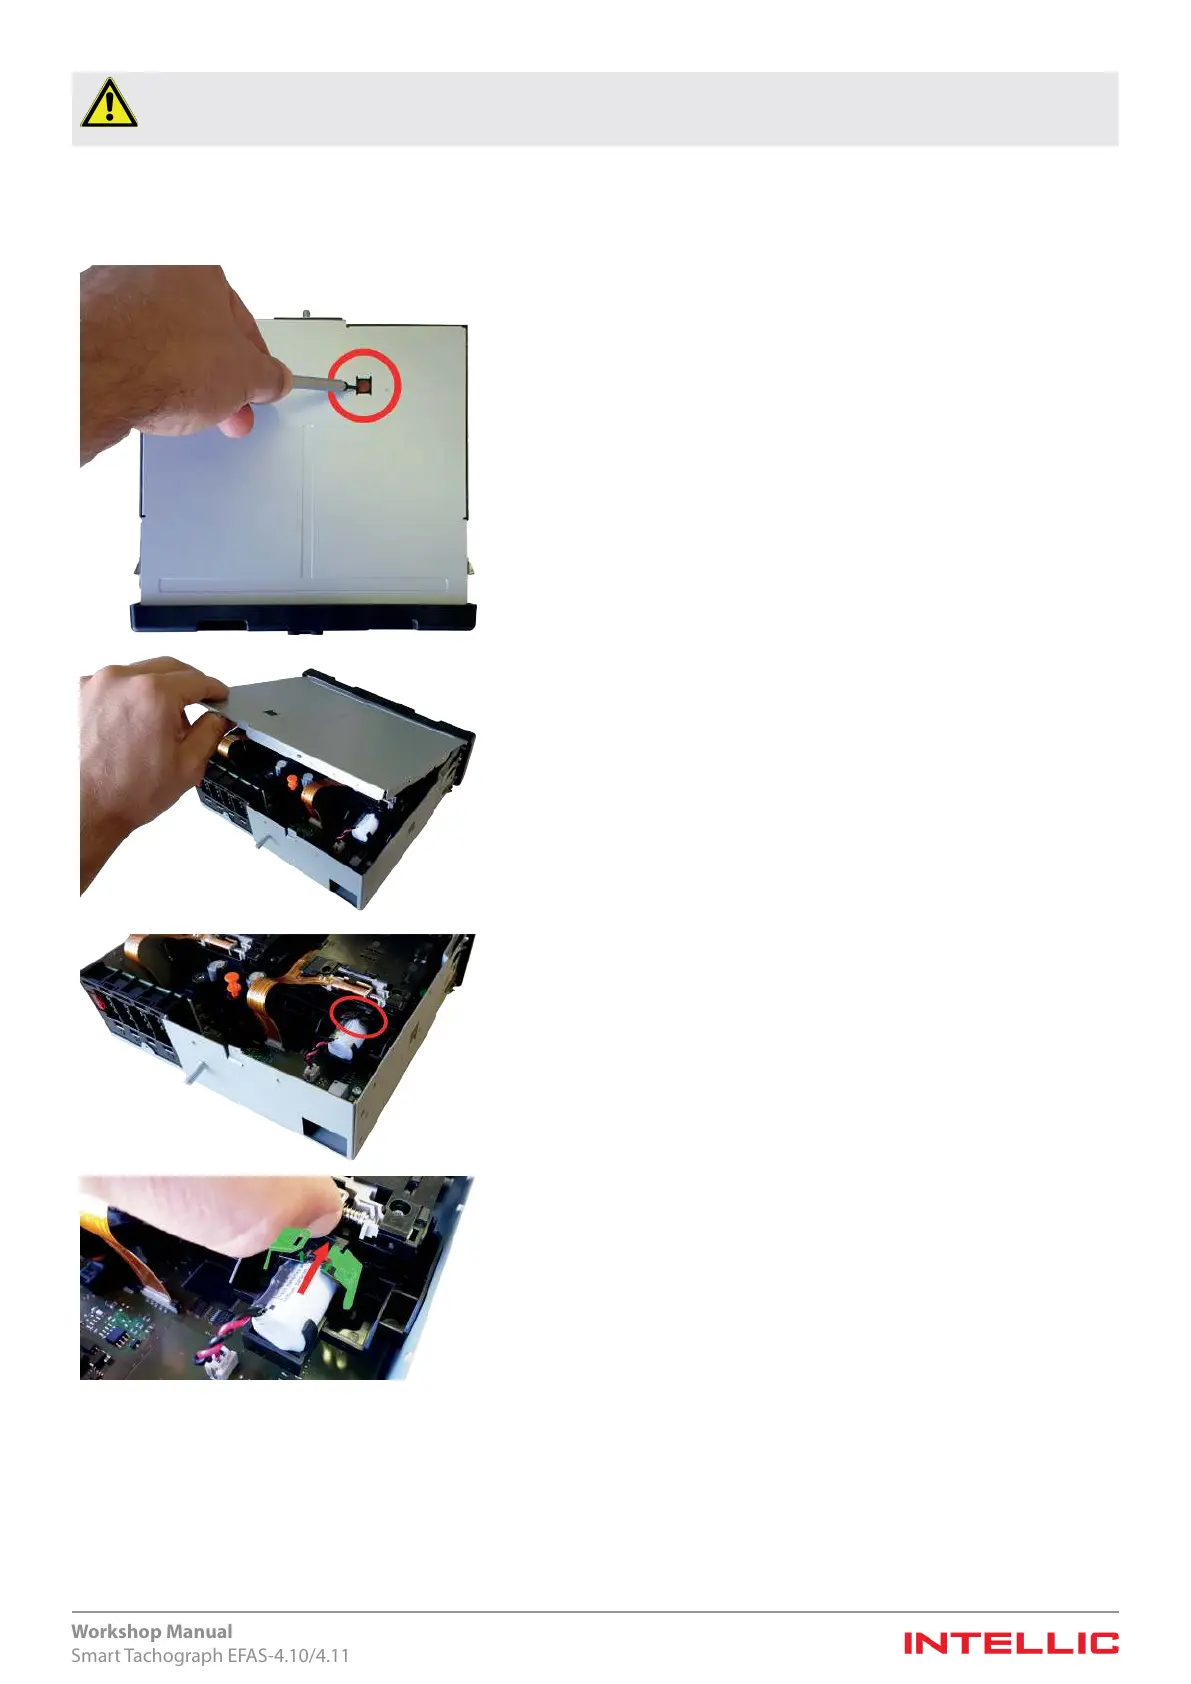
Position the device in such a manner that the underside of the device is turned towards you. Remove the seal on the base plate
using an appropriate tool. Make sure that all residues have been removed.
Figure 11 — Battery replacement, step1
Use a screwdriver (TORX, T10) to remove the M3x6 screw. This releases
the seal holder from the base plate. Make sure that the screw and the seal
holder do not get lost.
Figure 12 — Battery replacement, step 2
Slide the cover gasket backwards over the wiring harness. Remove the
base plate with a screwdriver by prying the rear panel until it unlatches,
and rotate it forwards.
Figure 13 — Battery replacement, step 3
Now open the battery clip as illustrated below (red circle).
Figure 14 — Battery replacement, step 4
Remove the battery from its holder, as shown in the gure.
Then pull the battery cable out of its connector.
6.2.6.2 Installing the battery
Use only the approved batteries as specied in Chapter 18.
Battery installation is in the reverse order of section 6.2.6.1. Conduct the following steps:
y Insert the plug connector on the battery cable into the socket on the mainboard of the EFAS. The plug connector is coded
and can, thus, not be inserted with wrong polarity.
y Slide the battery into the holder so that the resistor mounted on the outside of the battery points upward.

 Loading...