23
Workshop Manual
Smart Tachograph EFAS-4.10/4.11
3
rd
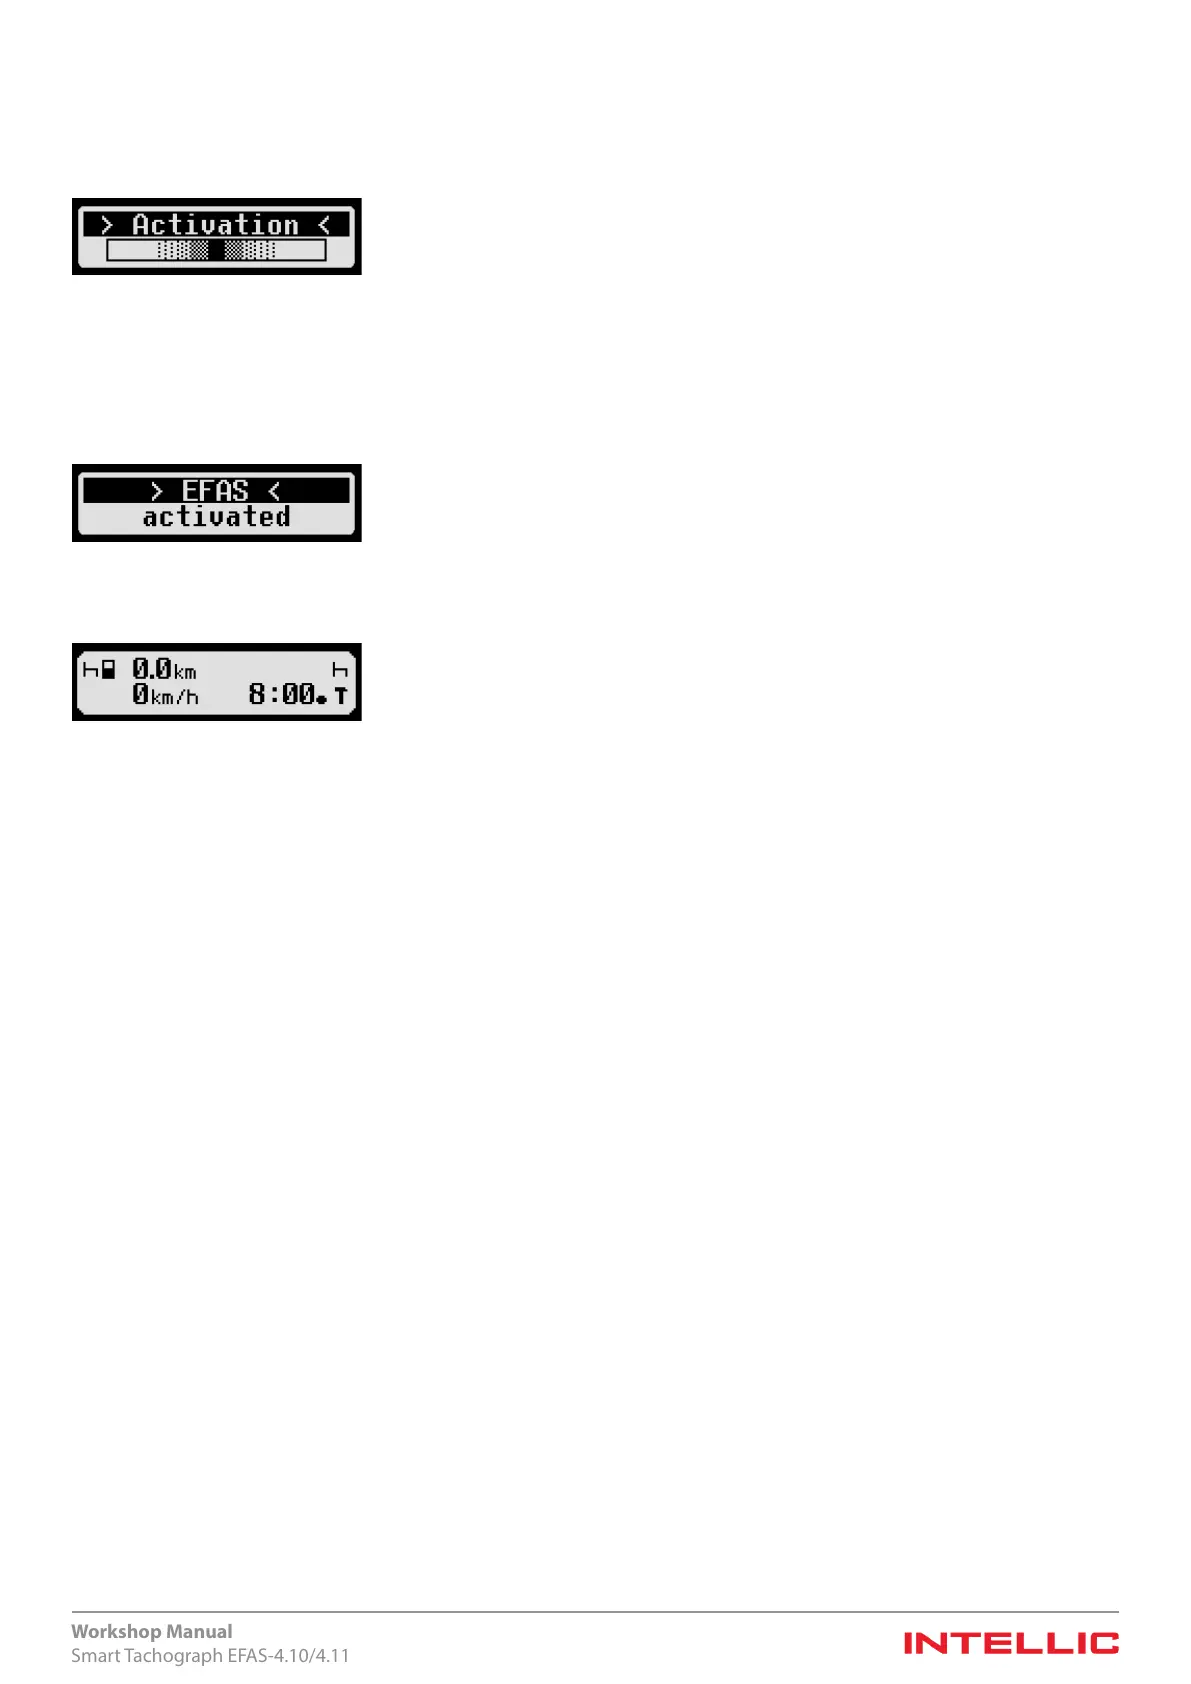
step: Activation and automatic motion sensor pairing
The EFAS tachograph is now activated. This process can take up to three minutes. A progress bar is displayed while this is hap-
pening. No information on the progress of the pairing process is displayed. During this time, the tachograph is connected to the
motion sensor to form a functional unit.
Figure 27 — Activation
The automatic pairing only takes place when a workshop smart-card is inserted for the rst time. If not motion sensor is con-
nected the tachograph will be activated and, when the smart-card is removed, an error message will be displayed indicating that
the pairing process failed. In this case the pairing process must be launched manually at a later point in time (see section6.5).
The following is displayed following successful activation:
Figure 28 — “Activated” display following successful activation
The EFAS device shows its standard display after activation.
Figure 29 — Standard display after activation
The activation process ends when the smart-card symbol stops blinking. The tachograph is now in
CALIBRATION mode.
If the card symbol continues to blink, the smart-card is not yet fully available and the user cannot switch to another display
during this time.
If an error occurs while the motion sensor is being paired, the pairing process is aborted. An error message is displayed.
When pairing is performed manually, the instrument used to perform the pairing (calibration device of the EFAS Service Tool)
will display a corresponding message about the successful pairing operation. If the pairing operation is not successful, an error
message will be displayed and logged in the mass memory when the smart-card is removed.
A successful pairing operation can be checked in the printout “Technical data” in the section on motion sensor data (symbol:
)
before the workshop smart-card is removed.
The following data concerning the sensor are displayed if pairing was successful.
Motion sensor key data in the printout “Technical data”:
y Serial number
y Date of manufacture
y Type code
y Manufacturer code
y Type approval number
y Date of rst installation or rst pairing with a tachograph
6.4.1 Sample printouts “Technical Data
The printout ‘Technical data’ can be used to determine the status of the tachograph with regard to activation (1), initial instal-
lation (2), installation (4) and periodic inspection (3). The number in brackets indicates the calibration purpose; see appendix
Purposes of calibration. The following printouts show this as an example.
 Loading...