32
Workshop Manual
Smart Tachograph EFAS-4.10/4.11
7.5 Fleet Management System FMS
The following functions are available when the FMS unit is attached to the EFAS device and activated:
y Remote download of driver smart-card data to the company server
y Remote download of mass memory data (vehicle data)
7.6 Removing the printer paper container and inserting the printer paper roll
This section explains how to remove the printer paper container in order to be able to insert a new paper roll.
Hazard Only change printer paper when the vehicle is safely parked. Otherwise you will be distracted by trac and
might cause an accident.
Hazard The printing head is hot immediately after data have been printed out. After printing, wait a short while before
removing the printer paper container. Otherwise you risk burning yourself on the print head.
Note Use only approved thermal paper rolls for the EFAS tachograph.
Note Always ensure that you have an adequate supply of thermal printing paper with you.
Note Handle the printer with care. Avoid it getting soiled. Remove any traces of soiling with a small brush.
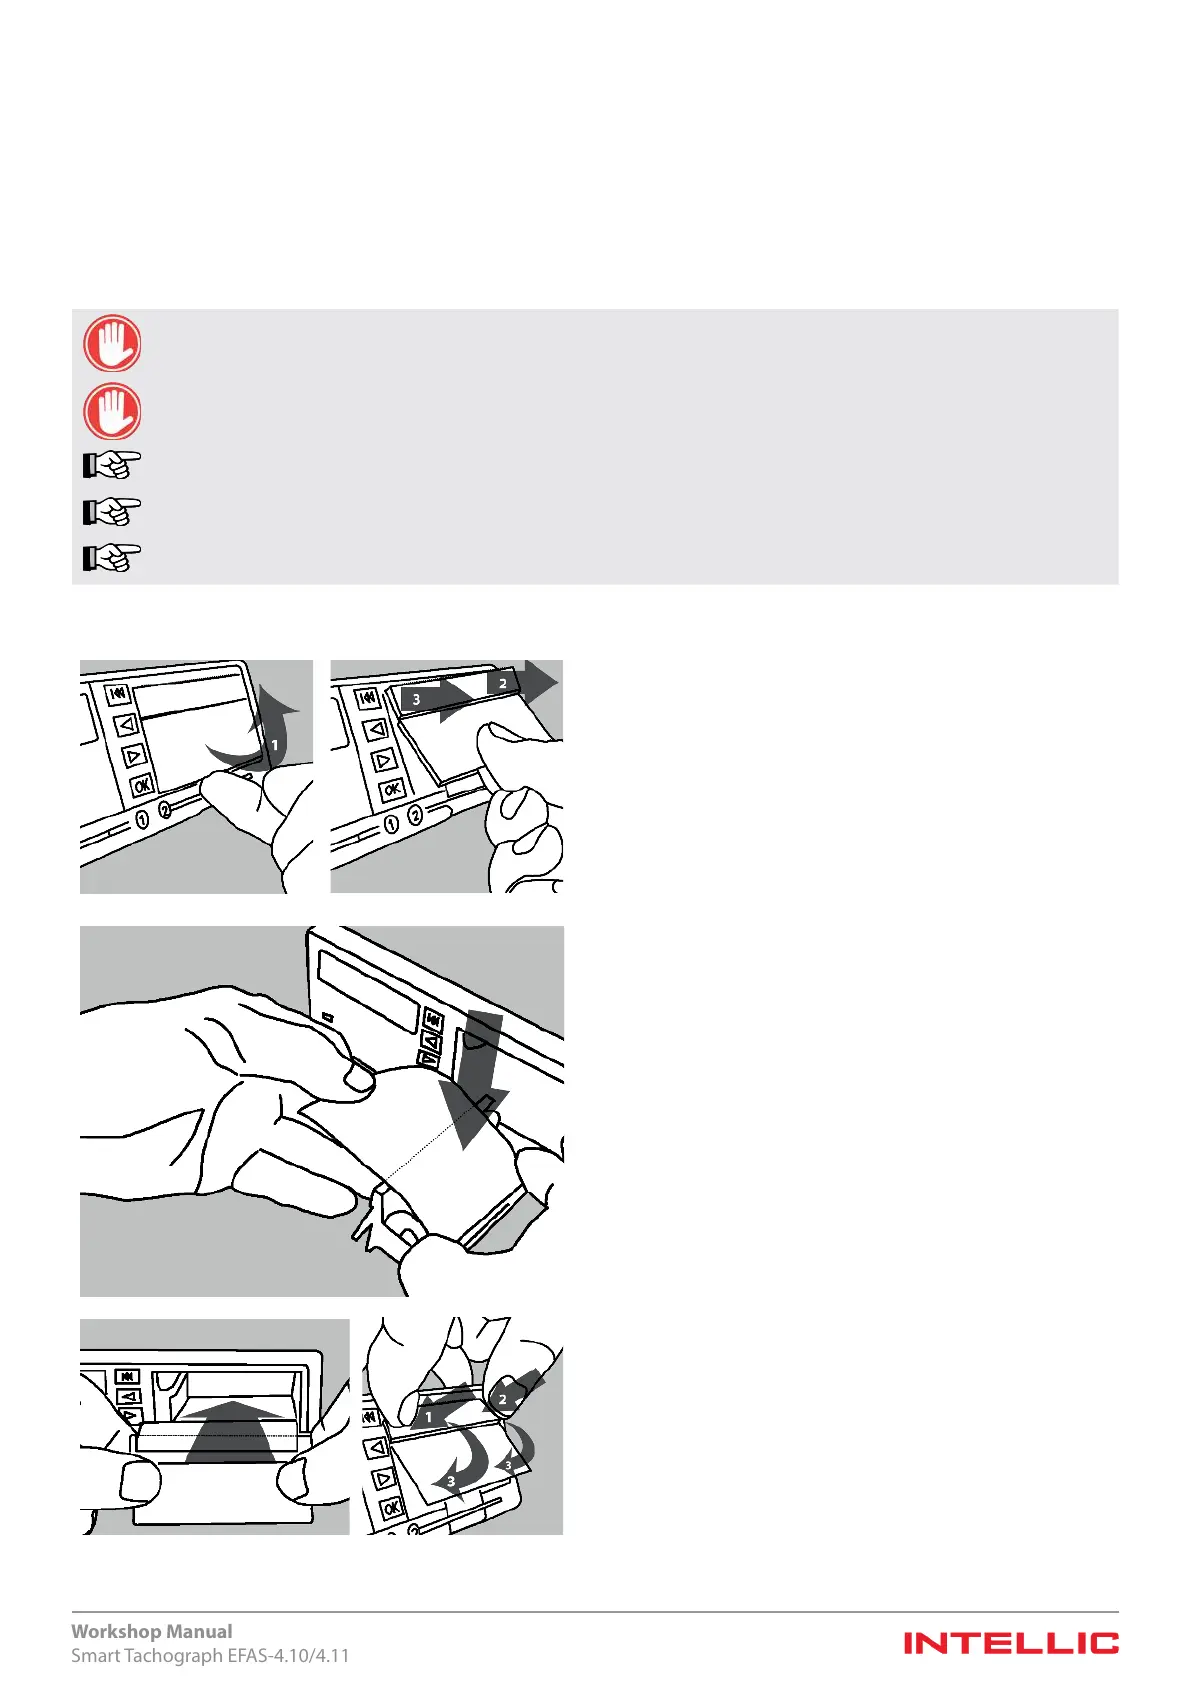
The following describes how to replace the printer paper:
Figure 43 — Removing the printer paper container
Unlock the printer paper container by slightly lifting the printer
cover (1). Then pull the printer paper container forward. Make
sure that, as shown in the picture, a pull is rst applied to the
right side (2) and then to the left side (3) of the printer paper
container.
Figure 44 — Inserting the Printer Paper Roll
Remove the adhesive strip from the new paper roll and place
the paper roll in the paper container. Pay attention to the
rolling direction. The printed back of the paper must be facing
downwards.
Figure 45 — Inserting the printer paper container and closing the
printer
Push the printer paper container into the tachograph as far as
it will go. Make sure that shortly before the stop a pressure is
applied to the left side (1) and then to the right side (2) of the
printer basket. Then lock the printer basket by pressing down
the printer cover with both thumbs (3).
Tear o the remaining paper.
 Loading...