EA1-MG6-USER-M Hardware User Manual, 1st Ed. Rev C, 09/10
1–14
Chapter 1: Getting Started
1
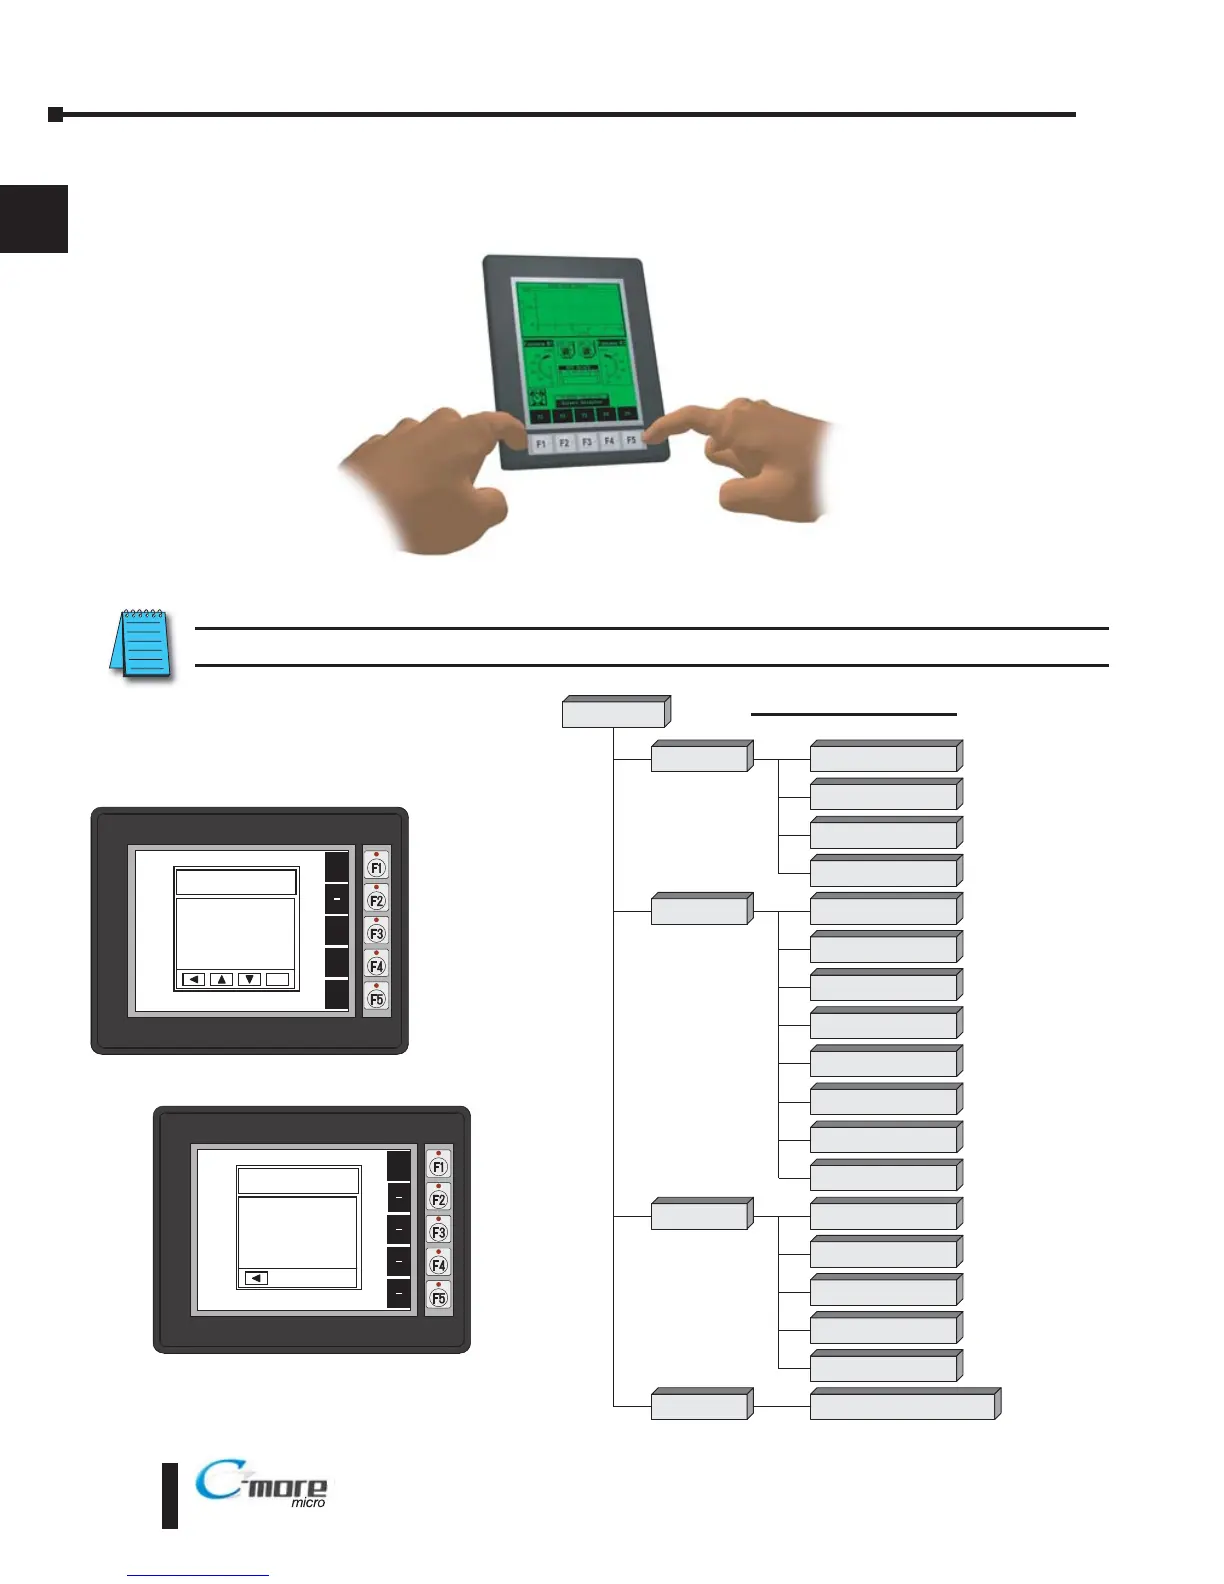
Step 8 – Accessing the C-more 6” Micro-Graphic Panel Setup Screens
To access the Setup Menu of the panel’s setup screens, press the the BAK [F1] and ENT [F5]
function keys simultaneously for three (3) seconds.
From the Setup Menu, information about the panel can be obtained, settings can be adjusted,
and panel functions can be tested.
NOTE: See Chapter 5: System Setup Screens for details on using the setup screen settings and functions.
BAK
1 Information >
2 Setting >
3 Test Menu >
4 Exit >
UP
DWN
ENT
ENT
SETUP MENU
BAK
Total
1835008 Bytes
Usage
26206 Bytes
Free
1808802 Bytes
MEMORY
Setup Menu
[pg 5 5]
1 Information
[pg 5 6]
1 Memory
[pg 5 6]
2 Setting
[pg 5 7]
1 LCD Contrast
[pg 5 7]
2 Backlight
[pg 5 8]
3 Beep
[pg 5 10]
4 Calibration
[pg 5 11]
5 Clear User Memory
[pg 5 12]
1 Serial Port1 Loop Back Test
[pg 5 15]
2
Ser al Port2 Loop Back Tes
t
[pg 5 16]
3 PLC Enquiry Test
[pg 5 17]
Do you want to exit from System Screen?
No[F1] / Yes[F5]
3 Test Menu
[pg 5 15]
4 Exit
[pg 5 18]
2 Protocol
[pg 5 6]
3 Extens ons
[pg 5 6]
4 Versions
[pg 5 6]
6 Reset to Factory Default
[pg 5 12]
7 Hourglass
[pg 5 13]
8 Rotation
[pg 5 14]
4 Buzzer Test
[pg 5 17]
5 Touch Panel Test
[pg 5 18]
 Loading...