EA1-MG6-USER-M Hardware User Manual, 1st Ed. Rev C, 09/10
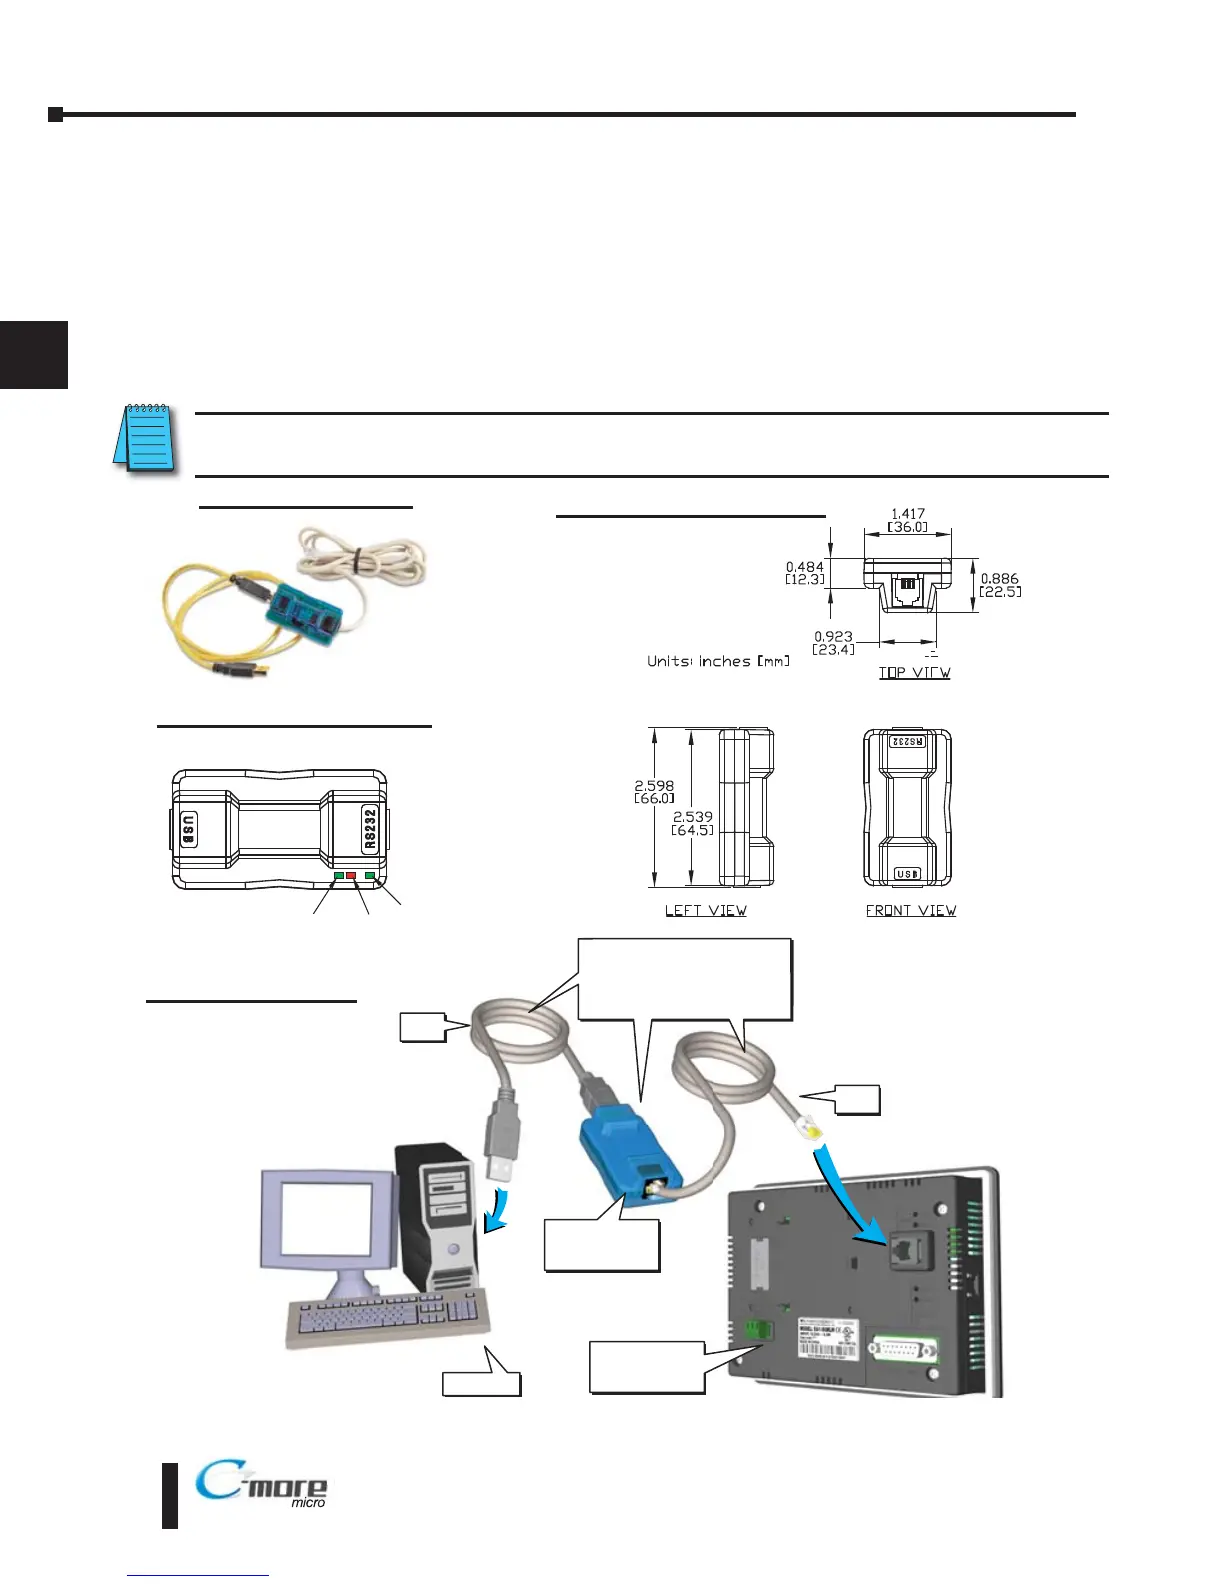
USB to RS-232 Programming Cable Assembly
Using the C-more Micro-Graphic Programming Software for project development, the
C-more 6” Micro-Graphic panel can be connected to a PC (personal computer) by using the
USB-to-RS-232 cable assembly, part number EA-MG-PGM-CBL.
• Connect the USB programming cable ( included) from a USB port type A on the PC to the USB type
B port on the converter (included). Next connect the serial programming cable from the converter’s
RJ12 port to the panel’s RJ12 serial port. The panel receives power from the USB port of the PC that
it is connected to through the USB to RS-232 converter assembly.
NOTE: Install C-more Micro-Graphic Programming software before connecting the panel to the PC to ensure
the panel drivers install correctly.
 Loading...