FROM
THE
IMAGE
SELECTION
SCREEN
Print
Orders
:t
+~+
'"
~
([IJ24)
FUNC.
(0]26)
E?I
POINTS
TO
CHECK
You
can mark
in
advance the still
images you want
to
print and set the
desired number
of
copies as a print
order. Later, you can easily print out the
print orders
by
connecting the
camcorder
to
a PictBridge-compatible
printer ([IJ 77).
You
can set print orders
for
up
to
998 still images.
Selecting
Still
Images
for Printing
(Print
Order)
Set the print orders before connecting
the
USB cable
to
the camcorder.
Press
....
or
~
to
select
the
still
image
you
want
to
mark
with
a
print
order.
2
Press
@
to
set
the
print
order.
The number
of
copies appears in
orange in the
box
next
to
the print
order symbol
.Q,.
IFUNC·I ¢ I
.Q,
PRINT
ORDER
./J.
Press
@
.Q.[Qj:
The image selection screen
appears.
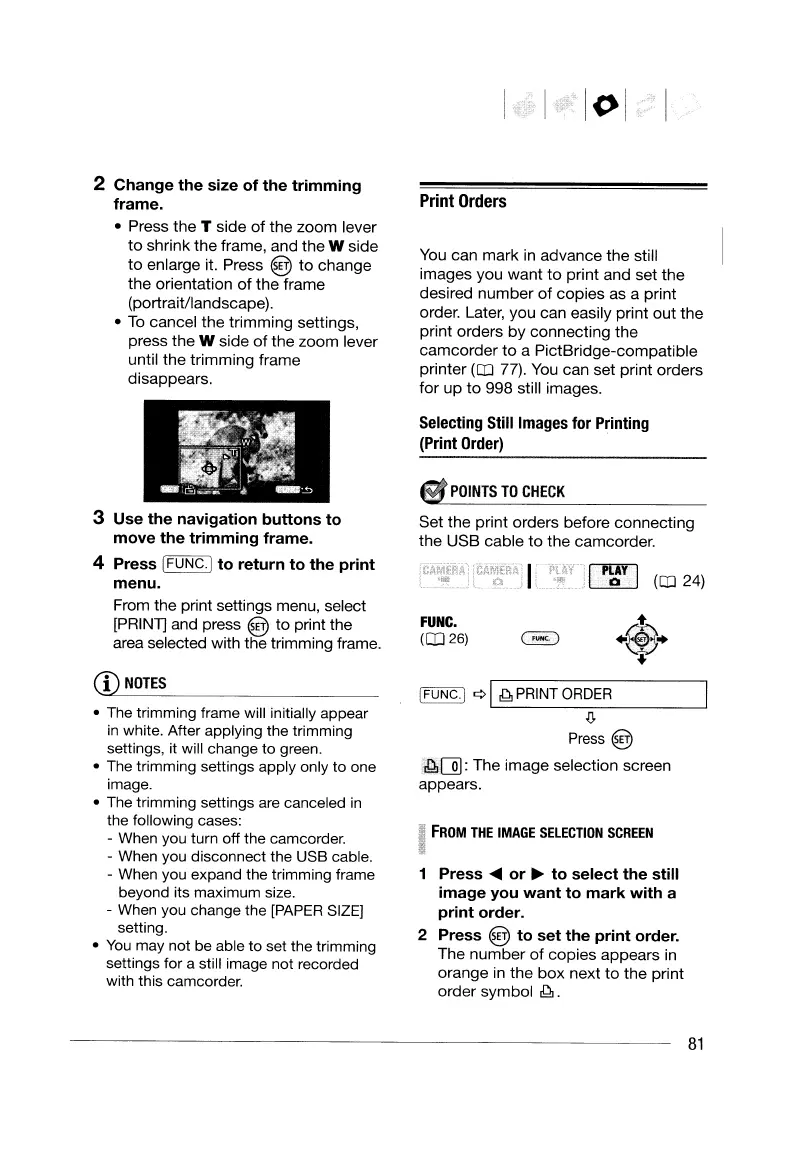
3
Use
the
navigation
buttons
to
move
the
trimming
frame.
4
Press
(FUNC·I
to
return
to
the
print
menu.
From the print settings menu, select
[PRIN1] and press
@ to print the
area selected with the trimming frame.
2
Change
the
size
of
the
trimming
frame.
• Press the T side
of
the zoom lever
to
shrink the frame, and the W side
to enlarge it. Press
@
to
change
the orientation
of
the frame
(portrait/landscape).
•
To
cancel the trimming settings,
press the
W side
of
the zoom lever
until the trimming frame
disappears.
CD
NOTES
• The trimming frame will initially appear
in
white. After applying the trimming
settings, it will change to green.
•
The
trimming settings apply only to one
image.
• The trimming settings
are
canceled
in
the following cases:
-
When
you turn off the camcorder.
-
When
you disconnect the
USB
cable.
-
When
you expand the trimming frame
beyond its maximum size.
-
When
you
change the
[PAPER
SIZE]
setting.
•
You
may
not be able to set the trimming
settings for a still image not recorded
with this camcorder.
81
FROM
THE
IMAGE
SELECTION
SCREEN
Print
Orders
:t
+~+
'"
~
([IJ24)
FUNC.
(0]26)
E?I
POINTS
TO
CHECK
You
can mark
in
advance the still
images you want
to
print and set the
desired number
of
copies as a print
order. Later, you can easily print out the
print orders
by
connecting the
camcorder
to
a PictBridge-compatible
printer ([IJ 77).
You
can set print orders
for
up
to
998 still images.
Selecting
Still
Images
for Printing
(Print
Order)
Set the print orders before connecting
the
USB cable
to
the camcorder.
Press
....
or
~
to
select
the
still
image
you
want
to
mark
with
a
print
order.
2
Press
@
to
set
the
print
order.
The number
of
copies appears in
orange in the
box
next
to
the print
order symbol
.Q,.
IFUNC·I ¢ I
.Q,
PRINT
ORDER
./J.
Press
@
.Q.[Qj:
The image selection screen
appears.
3
Use
the
navigation
buttons
to
move
the
trimming
frame.
4
Press
(FUNC·I
to
return
to
the
print
menu.
From the print settings menu, select
[PRIN1] and press
@ to print the
area selected with the trimming frame.
2
Change
the
size
of
the
trimming
frame.
• Press the T side
of
the zoom lever
to
shrink the frame, and the W side
to enlarge it. Press
@
to
change
the orientation
of
the frame
(portrait/landscape).
•
To
cancel the trimming settings,
press the
W side
of
the zoom lever
until the trimming frame
disappears.
CD
NOTES
• The trimming frame will initially appear
in
white. After applying the trimming
settings, it will change to green.
•
The
trimming settings apply only to one
image.
• The trimming settings
are
canceled
in
the following cases:
-
When
you turn off the camcorder.
-
When
you disconnect the
USB
cable.
-
When
you expand the trimming frame
beyond its maximum size.
-
When
you
change the
[PAPER
SIZE]
setting.
•
You
may
not be able to set the trimming
settings for a still image not recorded
with this camcorder.
81
 Loading...