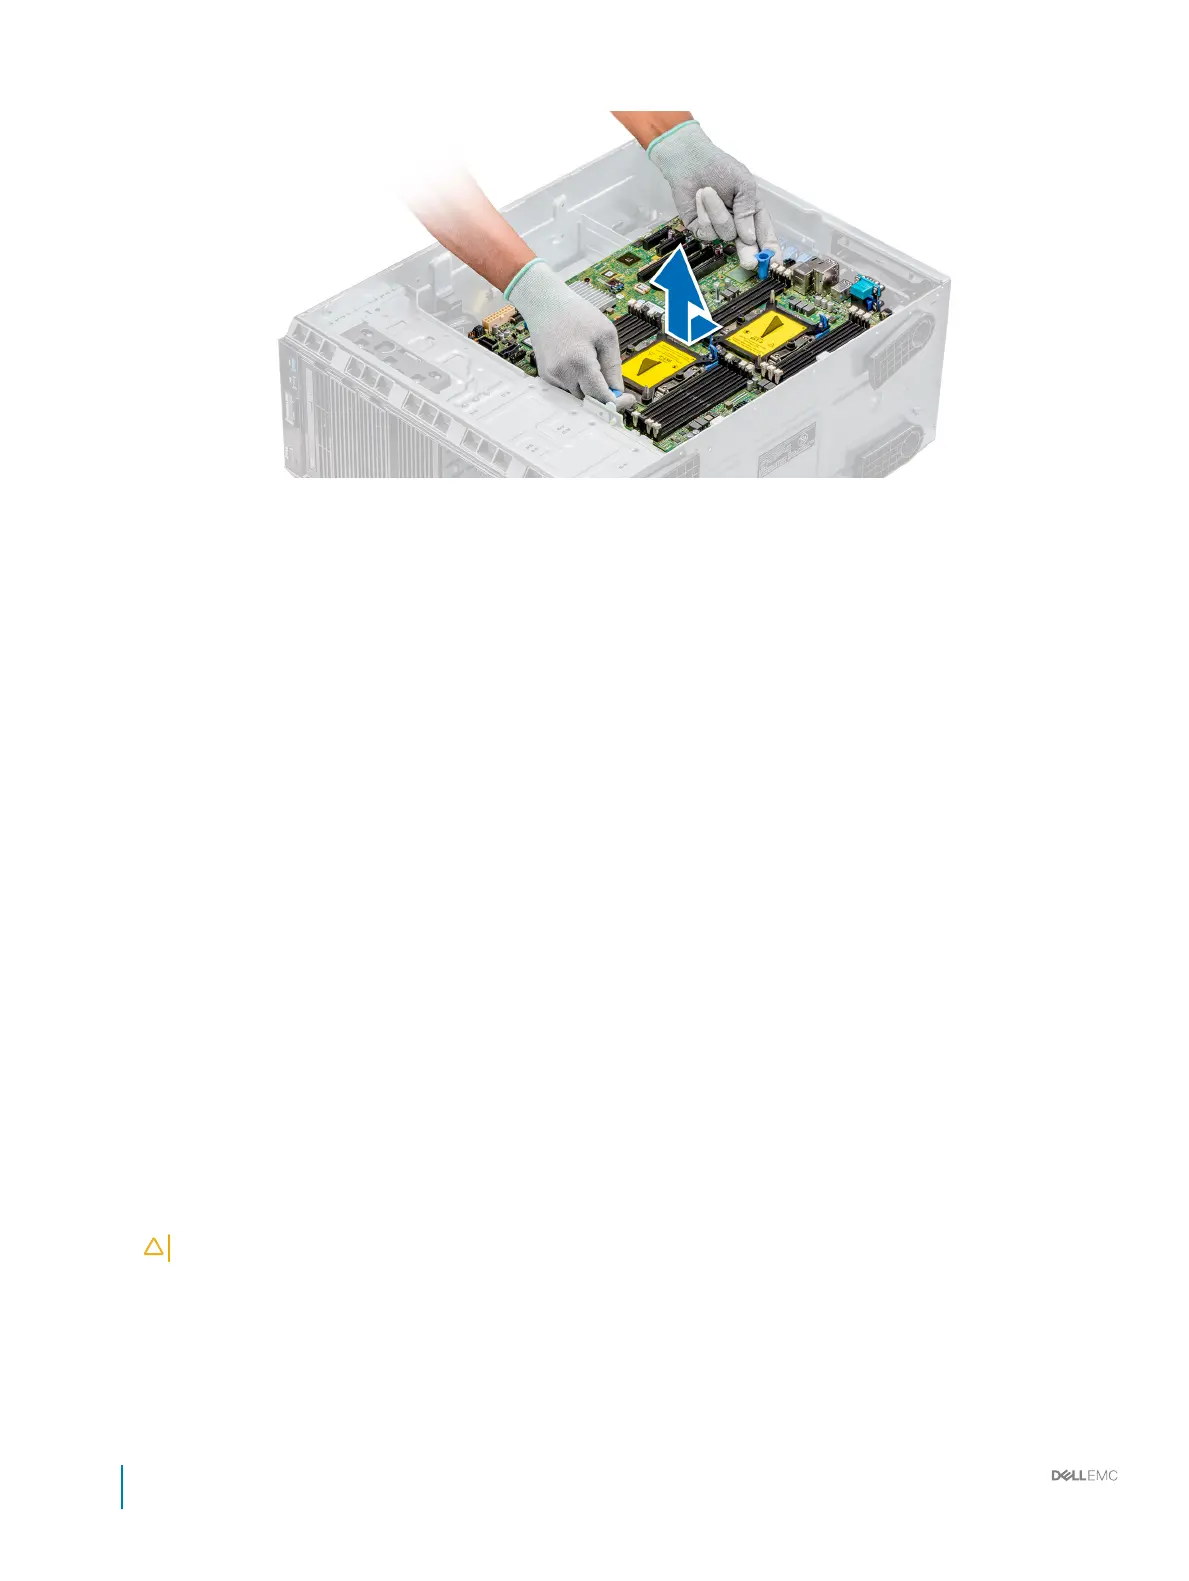
Figure 85. Removing the system board
Next step
Install the system board.
Related link
Removing the air shroud
Removing the internal cooling fan
Removing the expansion card holder
Removing a expansion card
Removing the optional IDSDM or vFlash card
Optional internal USB memory key
Replacing optional internal USB memory key
Removing a processor and heat sink module
Removing a memory module
Trusted Platform Module
Replacing the Trusted Platform Module
Initializing TPM for BitLocker users
Initializing the TPM 1.2 for TXT users
Installing the system board
Installing the system board
Prerequisite
Follow the safety guidelines listed in Safety instructions.
Steps
1 Unpack the new system board assembly.
CAUTION
: Do not lift the system board by holding a memory module, processor, or other components.
2 Holding the post, incline the system board, and lower the system board into the chassis.
3 Holding the system board holder, push the system board toward the back of the system such that the ports on the system board align
with the corresponding slots on the chassis.
136
Installation and Service Manual
Installing and removing system components
 Loading...


