TIG welding
CAUTION!
Risk of injury and damage from electric shock.
As soon as the mains switch is in the "I" position, the tungsten electrode of the welding
torch is LIVE. Make sure that the tungsten electrode does not touch any persons or elec-
trically conducting or earthed parts (e.g. housing, etc.)
1
Move the mains switch to the "I" position: all the indicators on the control panel light
up briefly
2
Press the Process button to select the TIG welding process:
The welding voltage is connected to the welding socket with a 3-second time lag.
NOTE!
Parameters that have been set on a system component control panel (e.g. wire
feed unit or remote control) might not be able to be changed on the power
source control panel.
3
Press the Parameter selection button. The LED indicator on the button must light up.
4
Use the adjusting dial to set the desired amperage.
The amperage value is shown in the left-hand digital display.
All welding parameter set values that have been set using the adjusting dial remain
stored until the next time they are changed. This applies even if the power source is
switched off and on again in the meantime.
5
Open the gas stop valve on the TIG gas valve torch
6
Set the desired shielding gas flow rate on the pressure regulator
7
Start welding (ignite the arc)
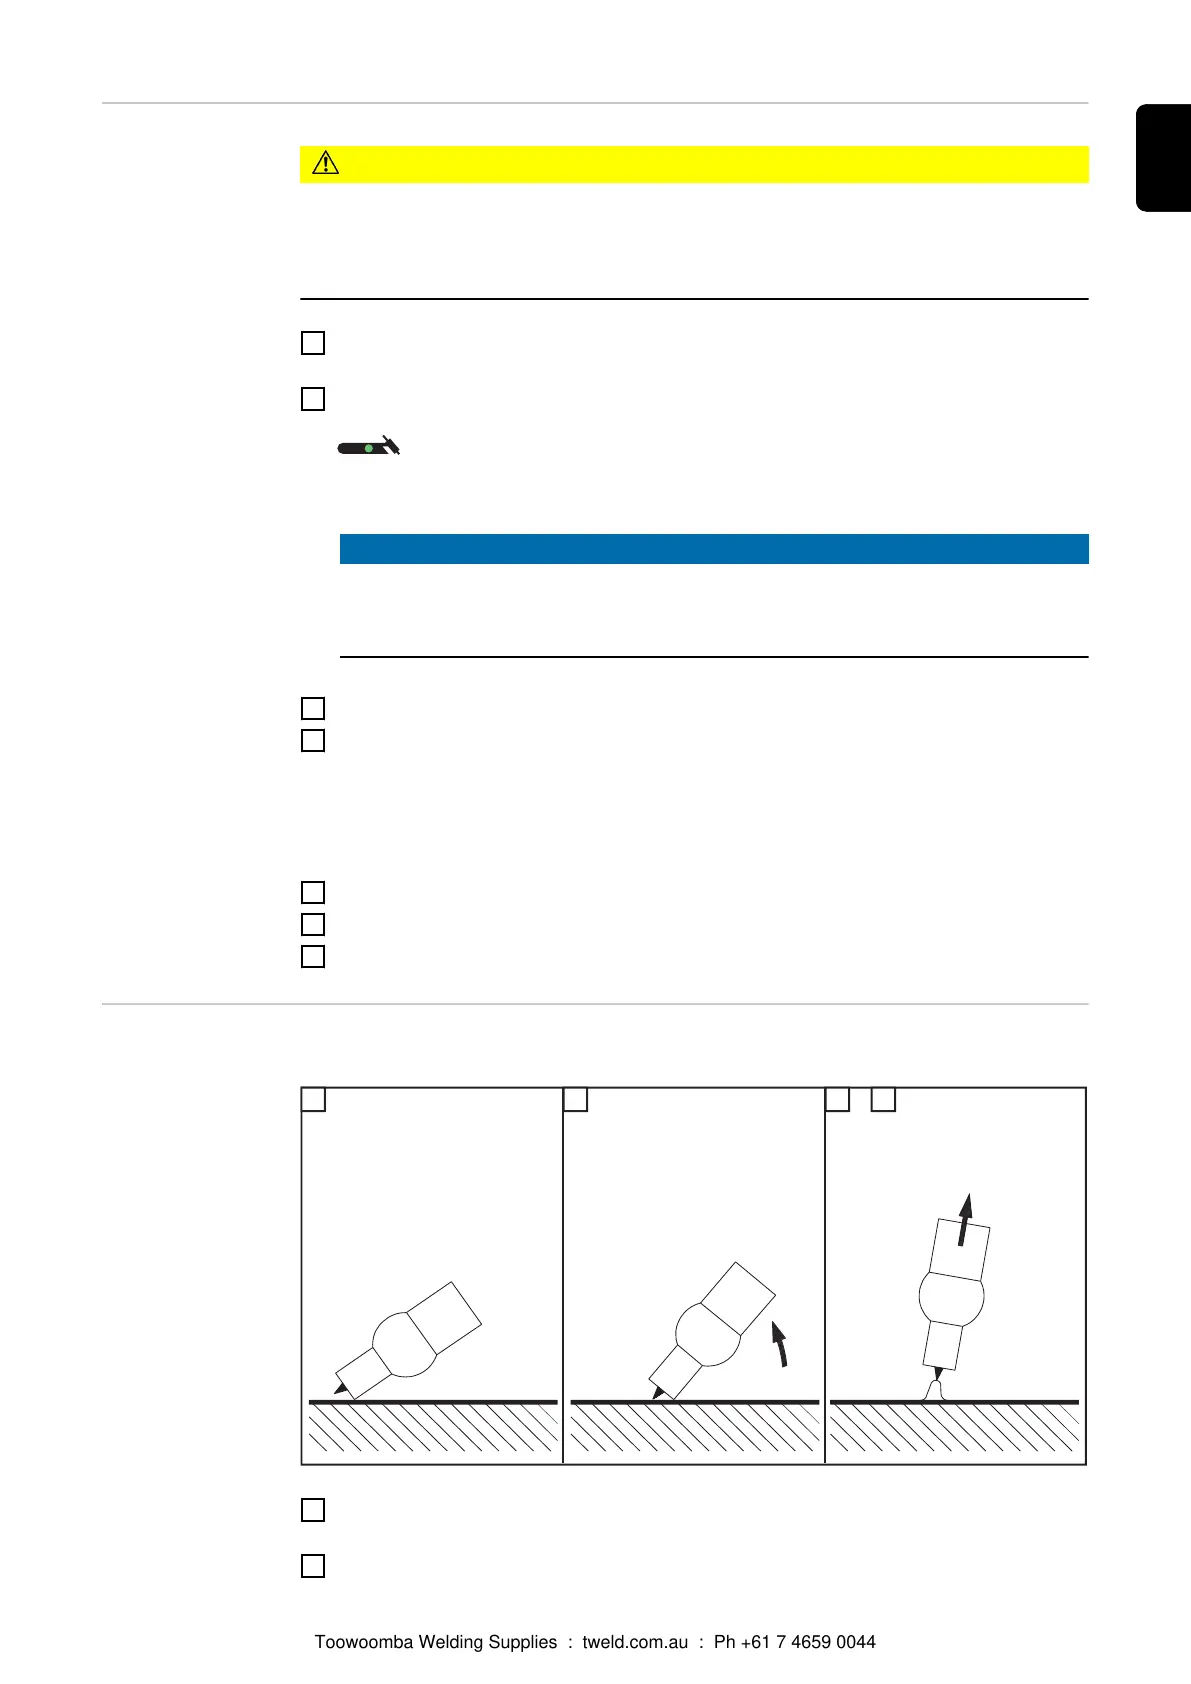
Igniting the arc The welding arc is ignited by touching the workpiece with the tungsten electrode.
1
Place the gas nozzle on the ignition location so that there is a gap of 2-3 mm (0.08 -
0.12 in.) between the tip of the tungsten electrode and the workpiece
2
Gradually tilt the welding torch up until the tungsten electrode touches the workpiece
117
EN
Toowoomba Welding Supplies : tweld.com.au : Ph +61 7 4659 0044
 Loading...