Note
The picture should be in JPG or JPEG format and smaller than 200 KB.
6. Oponal: Enable V
erify by Device to check whether the facial recognion device managed in
the client can recognize the face in the photo.
Note
This funcon is hidden or shown according to the device capacity.
7. Conrm to add the person.
-
Click Add t
o add the person and close the Add Person window.
-
Click Add and New to add the person and connue to add other persons .
9.4.5 Take a Photo via Client
When adding a person, you can take a photo of the her/him via the client and set this photo as the
person's prole.
Before You Start
Make sure PC running the client has a camera or you have connected other USB camera to the PC.
Steps
1. Enter Person module.
2. Select an organizaon in the organizaon list to add the person and click Add t
o enter Add
Person window.
Note
Enter the person's basic informaon rst. For details, refer to Congure Basic Informaon .
3. Click Add F
ace in the Basic Informaon area.
4. Select Take Photo to enter Take Photo window.
5. Oponal: Enable V
erify by Device to check whether the captured face photo can meet the
uploading requirements.
Note
This funcon is hidden or shown according to the device capacity.
6. T
ake a photo.
1) Face to the camera and make sure your face is in the middle of the collecng window.
2) Click
to capture a face photo.
3) Oponal: Click to capture again.
4)
Click OK to save the captured photo.
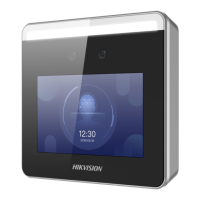
DS-K1T341A Series Face Recognion Terminal User Manual
103
 Loading...