– 127 –
WARNING :
To protect against possible personal injury due to abrupt start of the machine, be sure to start the
following work after turning the power o and ascertaining that the motor is at rest.
WARNING :
To protect against possible personal injury due to abrupt start of the machine, be sure to start the
following work after turning the power o and ascertaining that the motor is at rest.
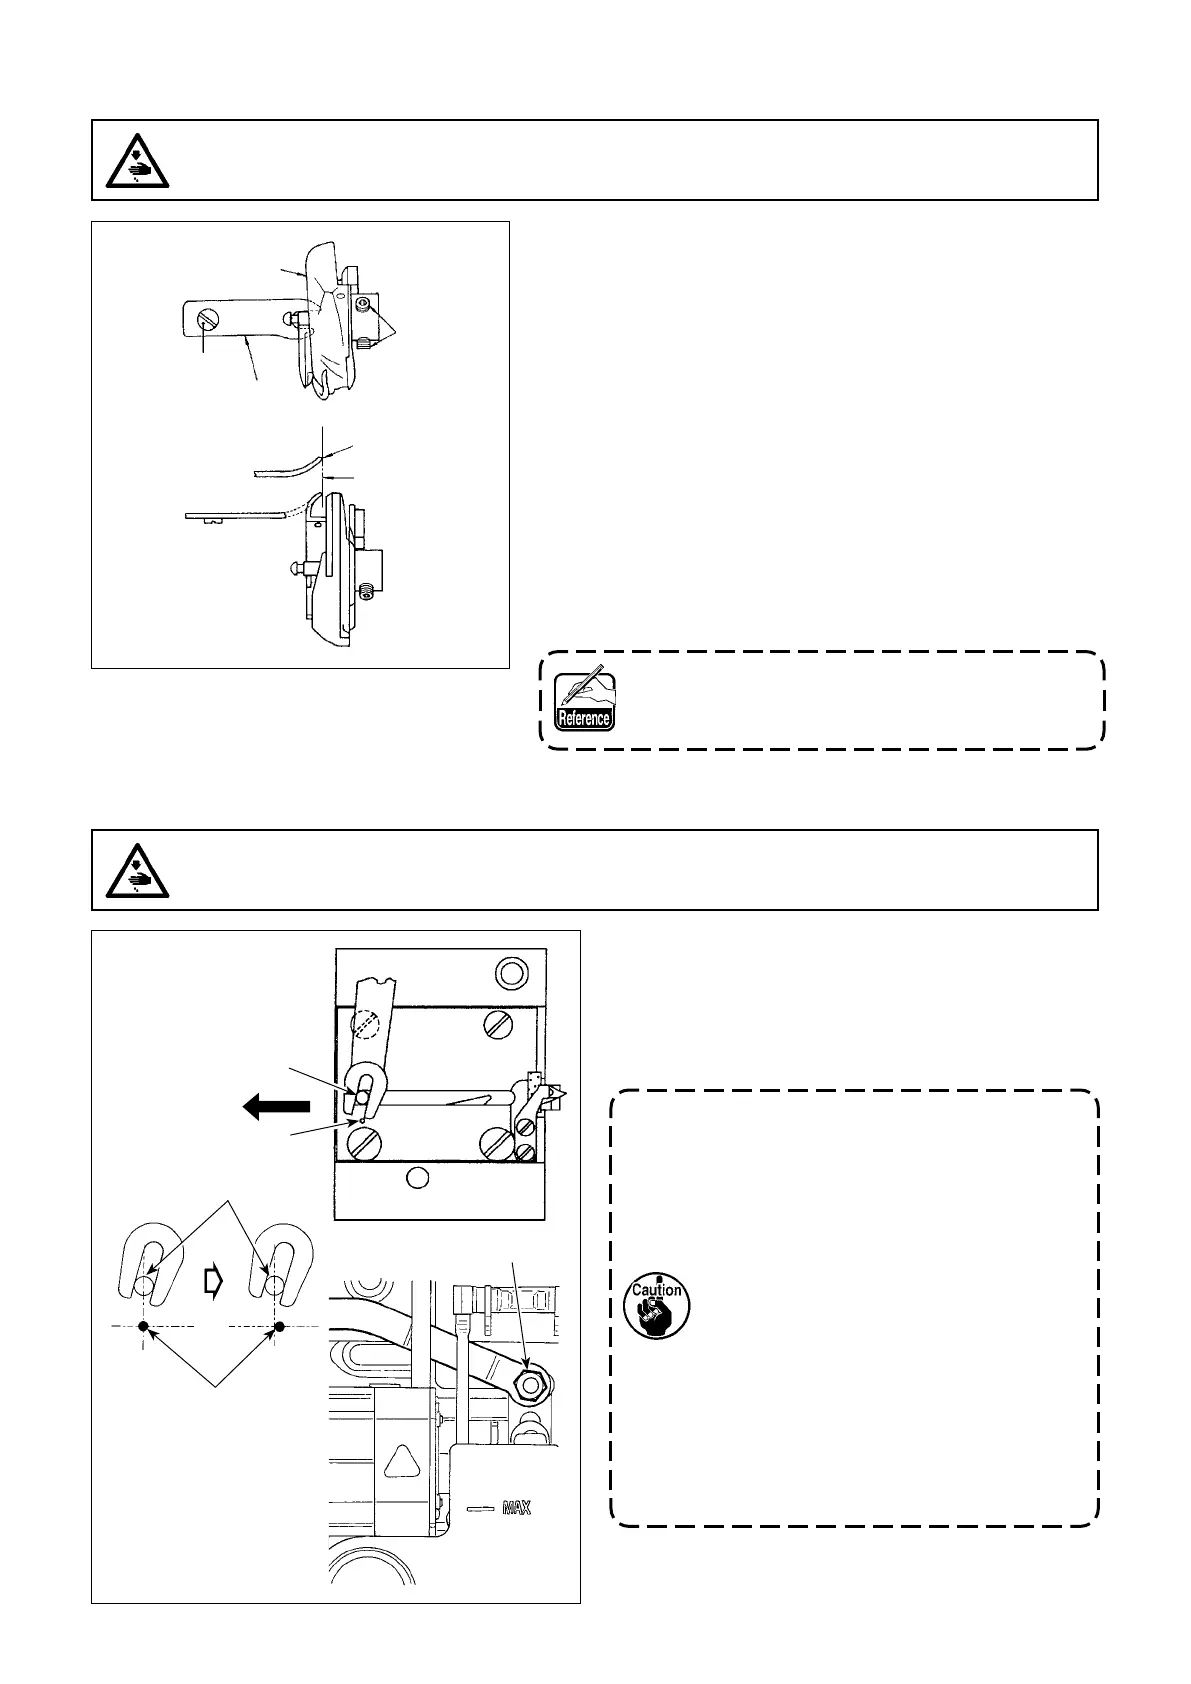
7-4. Attaching / removing the hook
When you replace the sewing hook, remove it in the follow-
ing procedures ;
1) Turn the handwheel until the needle reaches to its high-
est position.
2) Remove the needle, presser foot, throat plate, feed dog
and bobbin case from the machine.
3) Remove the setscrew
and take out the bobbin case
positioning nger
.
4) Loosen the two screws
and remove the sewing hook
.
Reverse the above procedures when inserting the sewing
hook. At this time, make sure that top end
of the bobbin
case positioning nger is aligned with line
. as shown in
the gure on the left. Never let
protrude from line
.
Part No. of hook
is 22525877.
Do not use the hook other than that designated
by JUKI.
7-5. Adjusting the thread trimmer
(1) Initial position of the moving knife
When the moving knife is in its initial position, the
moving knife pin
should be aligned with the en-
graved marker dot
as shown in the gure on the
left.
1. When the gauge size which is more
than that delivered as standard or the
gauge size of other manufactures is
used, and the counter knife interferes
with the feed dog, loosen nut
,
move the initial position of moving
knife pin
to the left from engraved
maker dot
by approximately one
half of engraved marker dot
and x
the pin.
2. Guarantee of the sharpness of the
thread trimmer knife unit is #80 to
#50. When using thick threads thick-
er than these Nos., replace the knife
with thread trimmer knife unit for thick
thread (Part No. : 22556054).
 Loading...