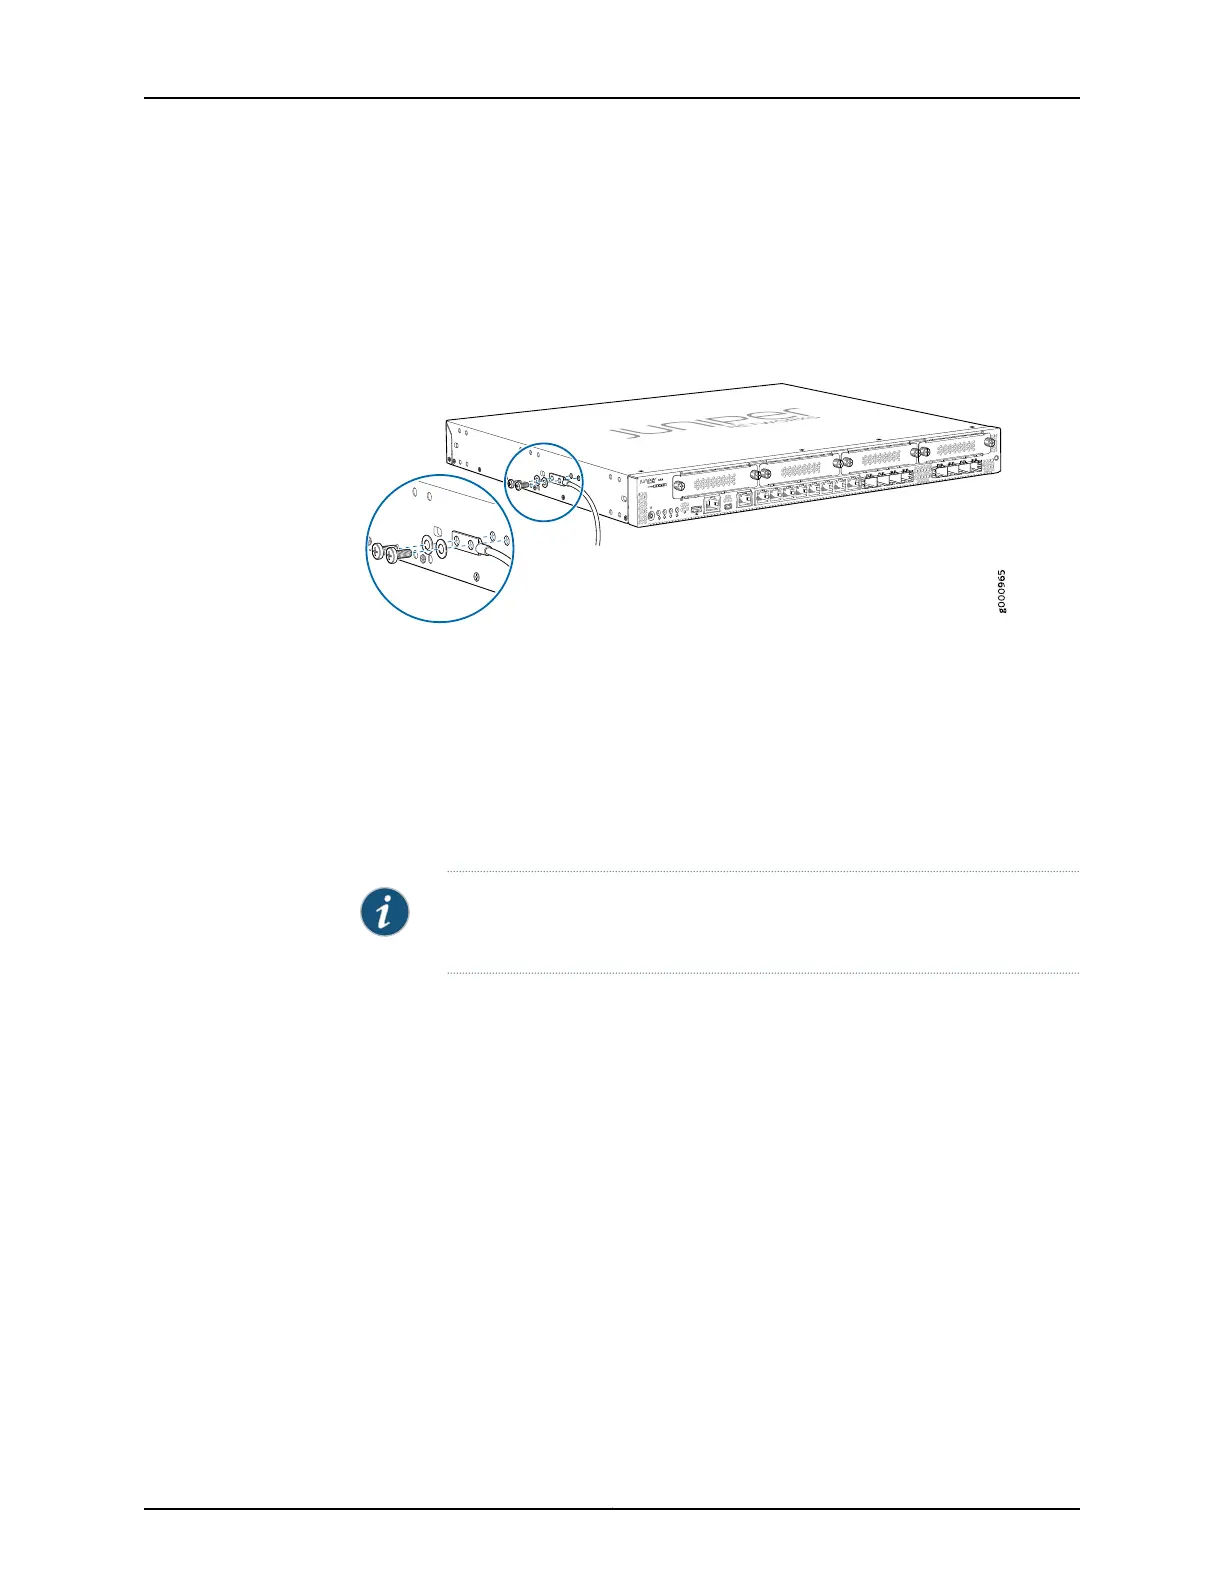
3. Connect the grounding cable to a proper earth ground.
4. Place the grounding cable lug over the grounding point (sized for metric M5 x 0.8,
12-mm-long grounding screws) on the side of the chassis.
Figure 12: Connecting the Grounding Cable to the SRX345 Services
Gateway
5. Secure the grounding cable lug to the grounding point, first with the washer, then with
the screws.
6. Dress the grounding cable and verify that it does not touch or block access to the
services gateway components and that it does not drape where people could trip on
it.
NOTE: The device should be permanently connected to ground during
operation.
Related
Documentation
• Required Tools and Parts for Grounding the SRX345 Services Gateway on page 55
• SRX345 Services Gateway Grounding Specifications on page 55
57Copyright © 2017, Juniper Networks, Inc.
Chapter 15: Connecting the SRX345 Services Gateway to Ground
 Loading...


