.
MAINTENANCE
SERVICE PROCEDURE
MAINTENANCE
SERVICE PROCEDURE
4. Use a clean cloth or brush to remove the dirt stuck to the cover
and the inside of the air cleaner body.
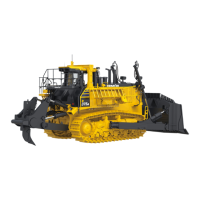
5.
Direct dry compressed air (Max. 0.69 MPa (7 kgf/cm
2
, 99.4
PSI)) from the inside of the outer element along its folds. Then
direct the compressed air from the outside along the folds, and
again from the inside.
1) Check that the inner element is not loose. If it is loose,
insert it securely.
2)
If the yellow piston overlaps the outer element red zone
immediately after the outer element is cleaned, replace the
inner and outer elements.
6.
Remove the cloth or tape cover installed in Step 3.
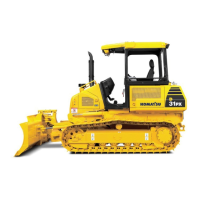
7. If small holes or thinner parts are found on the element when
it is checked with an electric bulb after cleaning and drying,
replace the element.
NOTICE
Do not use an element whose folds or gasket or seal are damaged.
When cleaning the element, do not hit it or beat it against something.
8.
After replacing the element, press the dust indicator button to
reset it.
The yellow piston will return to its original position.
REPLACING INNER ELEMENT
1.
First remove the outer element, and then remove the inner
element.
2.
Cover the air connector side (outlet side) with a clean cloth or
tape.
3. Clean the air cleaner body interior, then remove the cover
installed in Step 2.
4.
Fit a new inner element to the connector.
Do not clean and reinstall a inner element.
5.
Install the outer element and the cover.
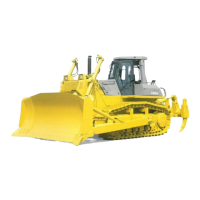
CHECK ELECTRICAL INTAKE AIR HEATER
Check before the cold season starts (once a year).
Remove the electric heater from the engine intake manifold and check for wire disconnections and dirt clung to it.
When checking and installing the electric heater, replace its gasket with a new part.
4 - 24
 Loading...