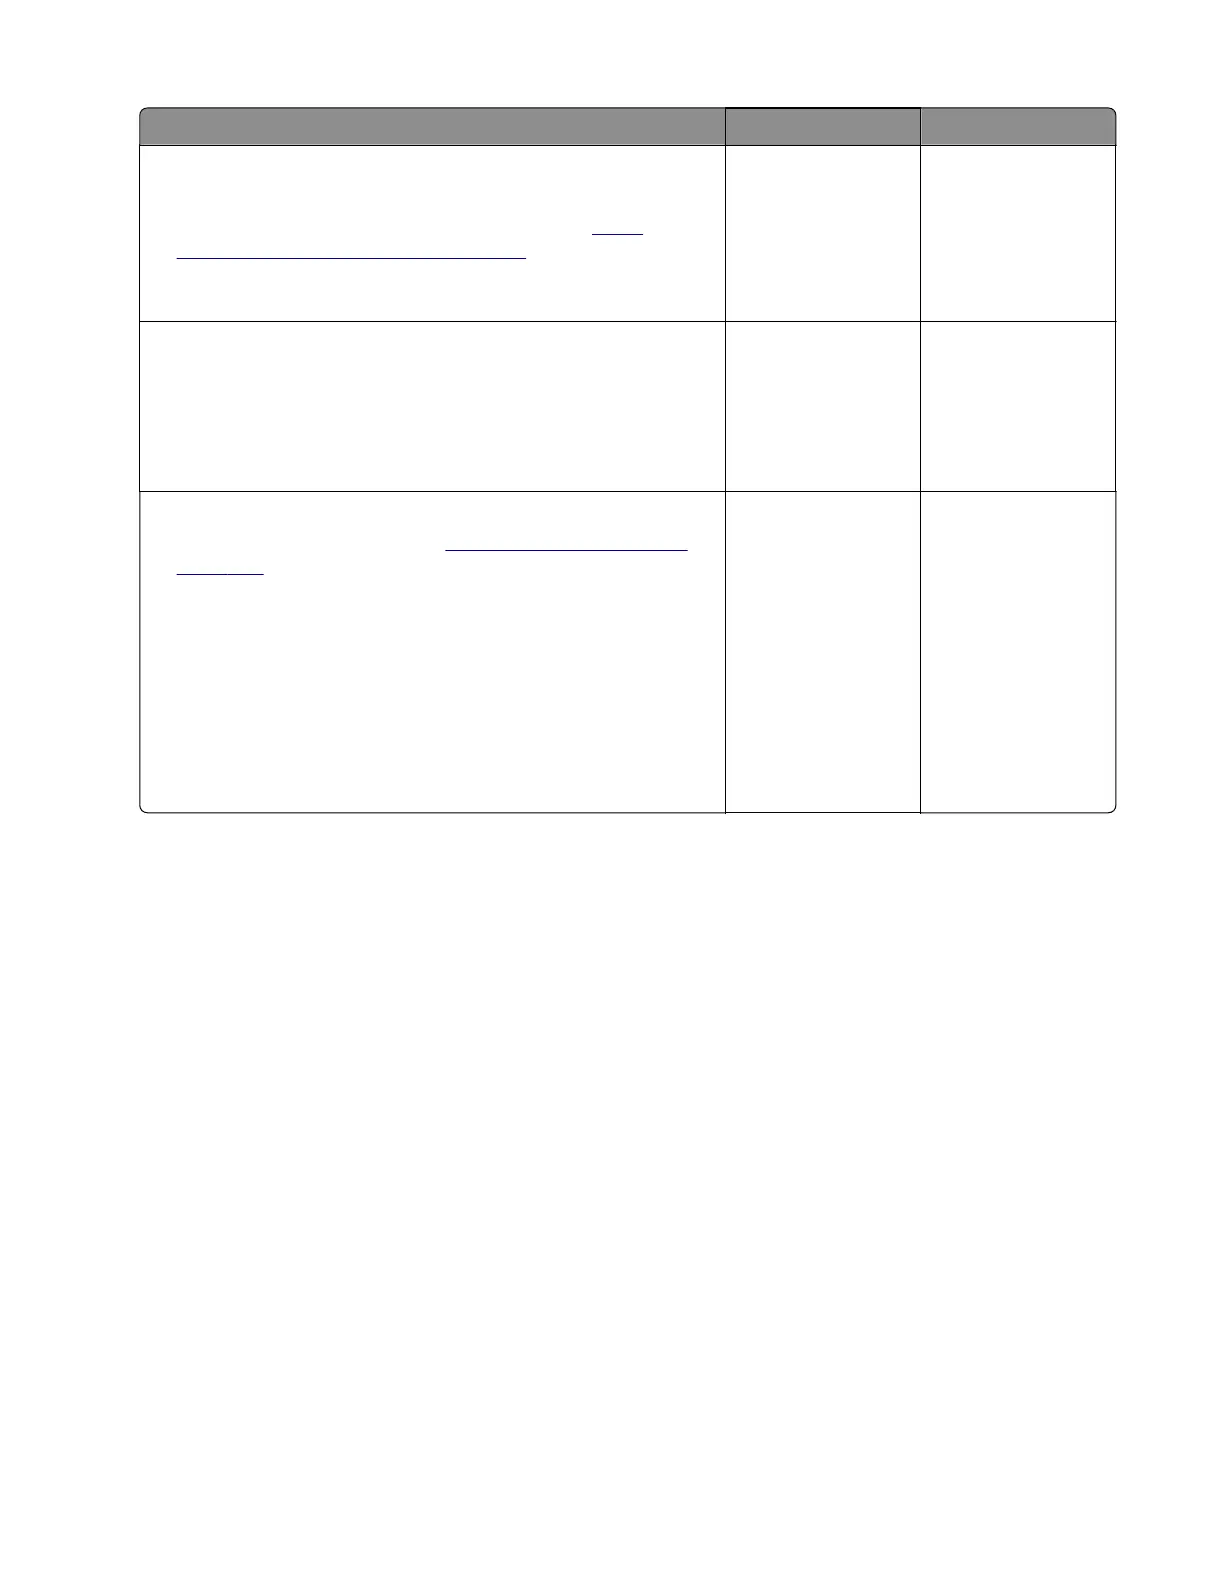
Action Yes No
Step 6
a Reinstall, repair, or replace the TPS sled and wiper mechanism.
b Perform the auto alignment service check. See “Auto
alignment service check” on page 236.
Does the problem remain?
Go to step 7. The problem is
solved.
Step 7
Check the cable on the sensor (TPS) and on the JTPSAA1
connector on the controller board for proper connection, and
reseat if necessary.
Does the problem remain?
Go to step 8. The problem is
solved.
Step 8
a Replace the sensor (TPS). See “Sensor (TPS) removal” on
page 325.
b Enter the Diagnostics menu, and then navigate to:
Printer setup > EP setup > Toner patch sensor adjust
c On the sensor gain characterization row, touch Start.
d On the sensor gain verification row, touch Start.
e On the sensor gain verification section of the test page, check
the average signal values of the patch number.
Are the values within the requirement?
The problem is
solved.
Contact the next
level of support.
Auto alignment service check
Pre‑check procedure
1
Enter the Diagnostics menu, and then navigate to:
Printer setup > EP setup > Toner patch sensor adjust > Clean sensing and laser optics
2 Allow the cleaning operation to run for three minutes.
3 Enter the Diagnostics menu, and then navigate to:
Printer diagnostics & adjustments > Color alignment adjust
4 On the AA adjustment row, touch Start.
Note: This triggers the auto align routine which performs the color alignment error corrections.
The following lists the dierent auto align routine results:
• AA Result 1—Failed to complete
• AA Result 2—Normal data deficient
• AA Result 3—All OK, normal data within limits
• AA Result 4—Normal exceeds sense limits
• AA Result 5—Normal exceeds margin limits
• AA Result 6—All OK, normal corrections applied
5028
Diagnostic information
236
 Loading...


