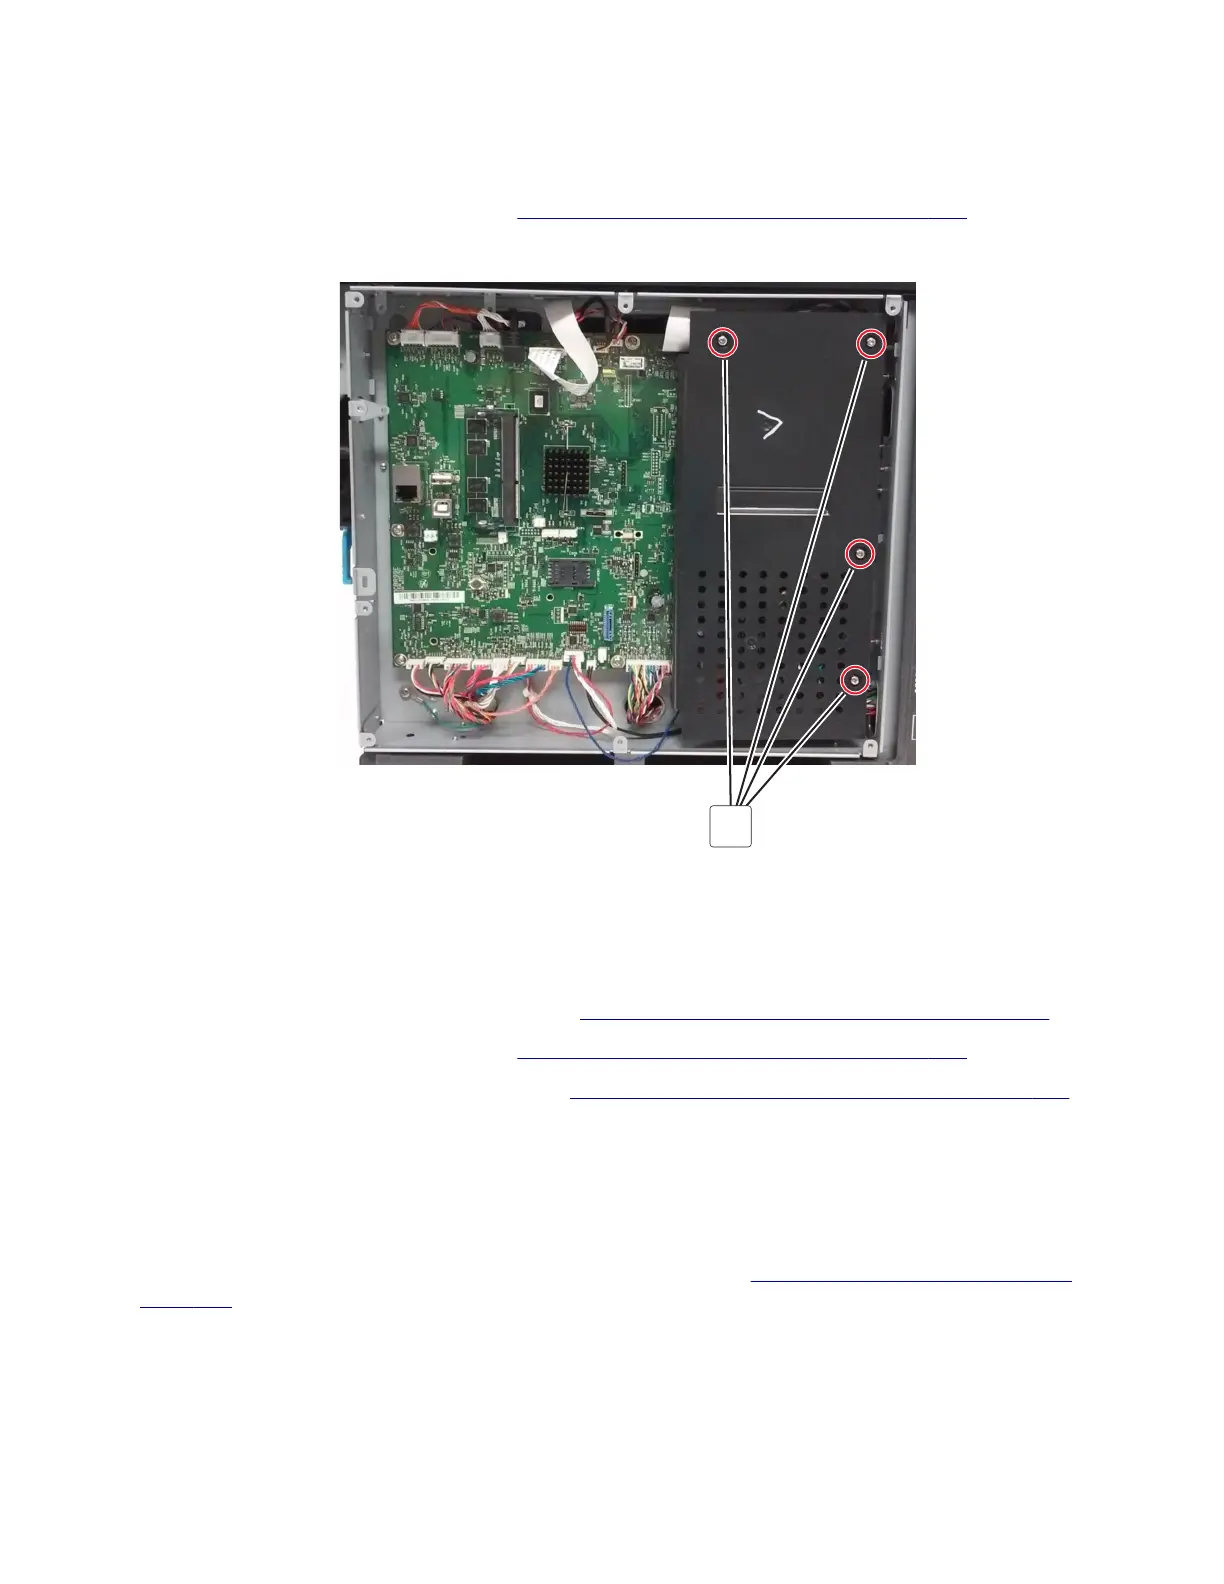
Inner controller board shield removal
Note: This is not a FRU.
1 Remove the controller board shield. See “Controller board shield removal” on page 356.
2 Remove the four screws (A), and then remove the inner controller board shield.
A
Controller board removal
Warning—Potential Damage: The controller board may contain a secure element SIM card that must be
transferred from the old controller board to the new controller board. This SIM card contains software and
security settings that are unique to the printer. See
“Secure element SIM card removal” on page 360.
1 Remove the controller board shield. See “Controller board shield removal” on page 356.
2 Remove the inner controller board shield. See “Inner controller board shield removal” on page 357.
3 Remove all option cards from the controller board.
4 Disconnect all the cables from the controller board.
Warning—Potential Damage: When removing the TPS cable from JTPSAA1 connector, gently pry the
cable connector from the controller board connector. Do not pull the cable by the wires.
Warning—Potential Damage: Do not yank the ribbon cables. See
“Disconnecting ribbon cables” on
page 260.
5028
Repair information
357
 Loading...


