A test page showing the margins is generated.
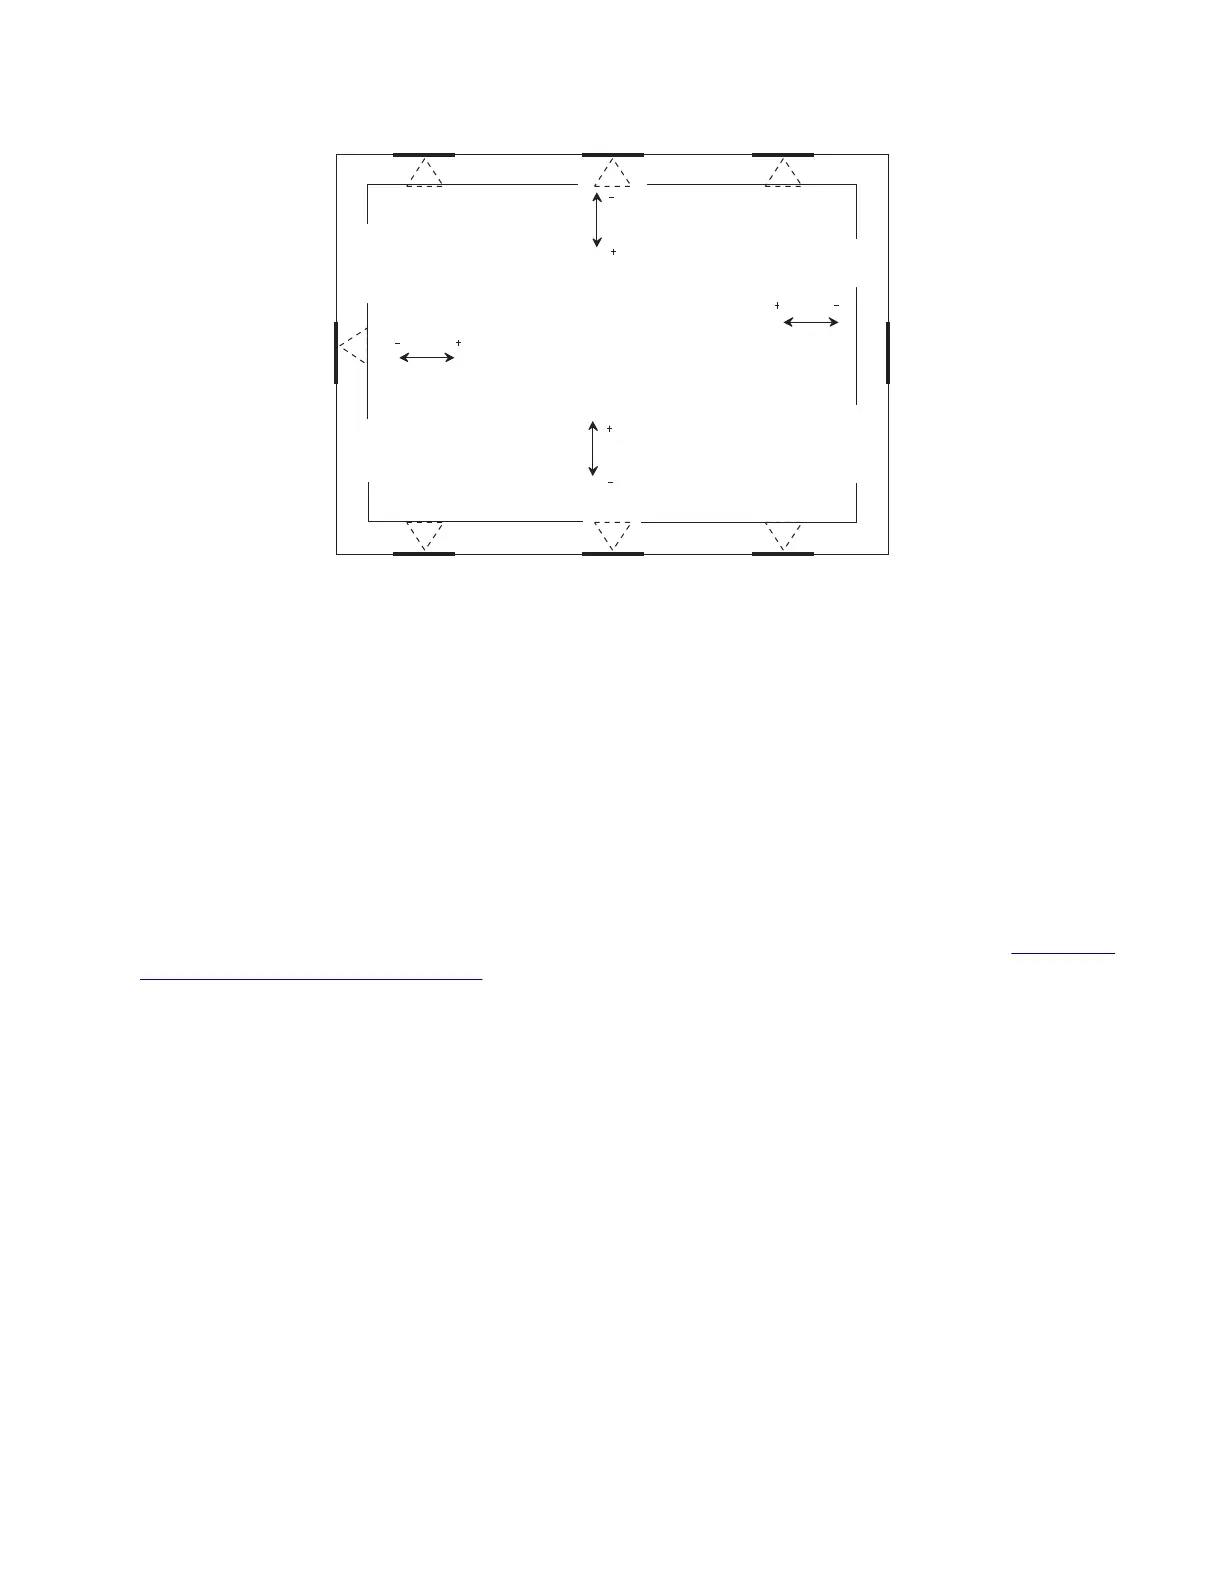
Left
Bottom
Right
Top
Adjusting the margins
Note: The procedure may not work for old
firmware
versions. Make sure that the latest
firmware
version is
installed.
1 Refer to the test page generated for margin alignment.
Check the arrows along the margin.
• The arrows should be completely visible along the edge.
• The tip of the arrows should point to the edge.
If the arrows are misaligned, then adjust the Top margin setting:
Enter the Diagnostics menu, and then navigate to Printer diagnostics & adjustments > Registration adjust
> Top Margin.
2 If necessary, perform printhead alignment until the test page arrows are squarely aligned. See “Printhead
alignment adjustment” on page 261.
Note: After printhead alignment, make sure that the three printhead screws are tightened.
3 Generate a new test page for margin alignment, check the arrows, and if necessary, adjust the following
settings:
• Top margin
• Bottom margin
• Left margin
• Right margin
Note: Correcting the printhead and margin settings is necessary before proceeding with the Color
alignment procedure.
5028
Repair information
264
 Loading...


