Function and Performance Checking Method 5-11
in the Patient Management area.
Press <End Exam> during image scanning
⚫ Press <Review> key.
⚫ Click [Exit] on the Review screen; or, press
<Review> again, or, press <Esc> key
⚫ The system enters into image review mode.
⚫ The system exits image review mode.
⚫ Click [iVision] on the other menu; or press
user-defined iVision key.
⚫ Select the contents to be demonstrated,
and select the demo mode in the iVision
screen. Then select an item already added
to the list and click [Start]
⚫ When the demonstration is finished, click
[Exit] or press <Esc>.
⚫ Open iVision screen:
⚫ Demonstration begins.
⚫ Image files are played according to file
names one by one (including the image of
system-relevant and PC-compatible format).
⚫ The system exits the demonstration.
Press <iStation> key to enter patient information
management (iStation page)
The saved patient information (images) can be
found, and the patient information can be:
⚫ Backed up/ Restored
⚫ Sent (To DICOM or USB disk etc. )
5.5 Performance Test
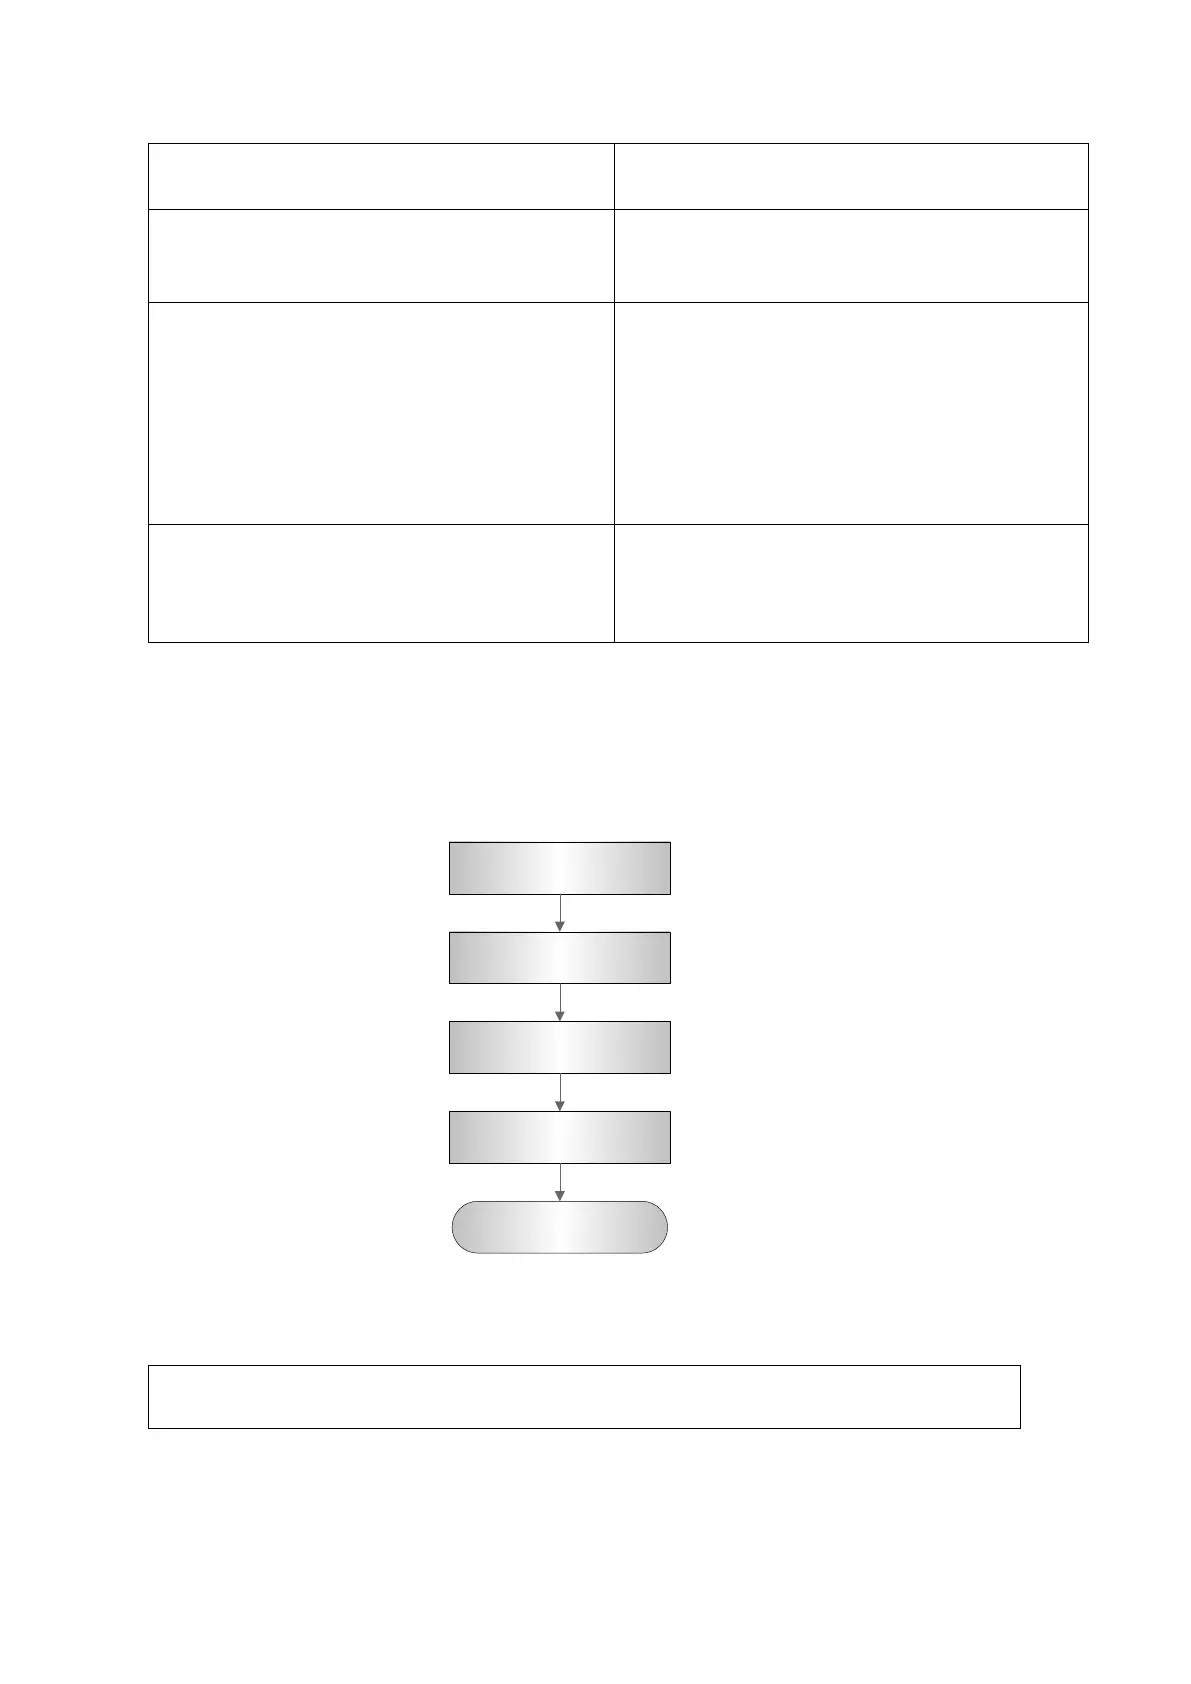
5.5.1 Test Process
Resolution
Detection depth
Geometric Position
Accuracy
Blackout area test
Record the exam
images
The image used here is only for reference, stick to the image effect in the real
situation.
Requirements:
1. Display: set the contrast and brightness at the clinical application value (or the default status)
 Loading...


