[ IX Troubleshooting ]
- 147 -
HWE10060 GB
[6] Water piping configuration in the unit and how to connect the piping
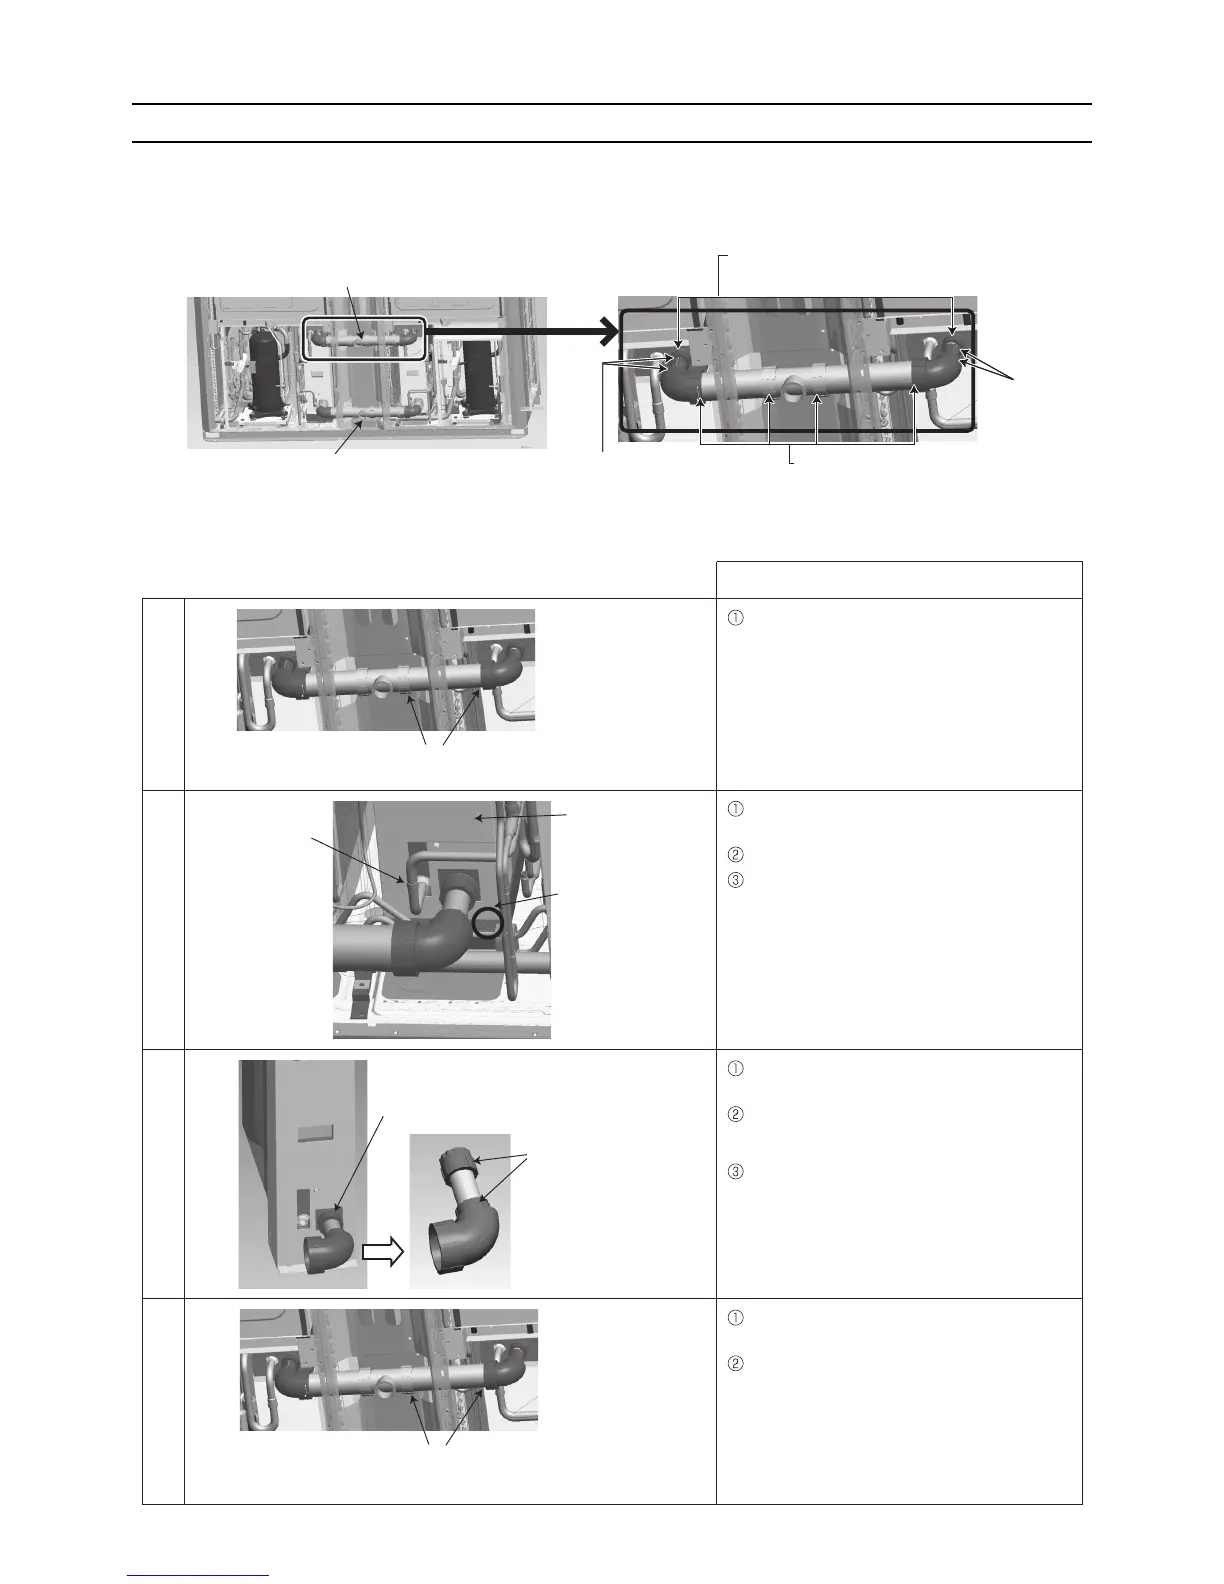
(1) Water piping configuration in the unit
The pipe that connects the two plate heat exchangers are connected to each heat exchanger with a joint with ferrules.
Note that the tightening torque for these joints are different than the ones for screw-in joints. Refer to the table below and
tighten them to the appropriate torque.
(2) Replacing the plate exchanger and connecting water piping
1-inch pipe
Ferrule on the joint
Tightening torque 169 N·m
1-inch pipe
Ferrule on the joint
Tightening torque
169 N·m
2-inch pipe
Ferrule on the joint
Tightening torque 217 N·m
Water outlet pipe (Connection to field-installed piping)
Screw-in type Rc1-1/2
Tightening torque 150 N·m
Water inlet pipe (Connection to field-installed piping)
Screw-in type Rc1-1/2
Tightening torque 150 N·m
Connection to plate heat exchanger
Screw-in type Rc1
Tightening torque 100 N·m
Steps
1 Remove the 2-inch pipe in the front of the unit.
Unscrew the fixing screws on the plate heat
exchanger mounting plate.
De-braze the refrigerant pipe from the unit.
Pull out the plate heat exchanger.
Disconnect the 1-inch pipe from the heat
exchanger.
Retighten the ferrule on the 1-inch pipe to a
torque of 169 N·m.
Screw the 1-inch pipe into the new heat
exchanger and tighten to a torque of 100 N·m.
(Wrap sealing tape around the pipe connection
to the plate heat exchanger four to five times.)
Install the plate heat exchanger, and connect
the refrigerant pipe to it by brazing.
Tighten the 2-inch pipe in the front of the unit
to 217 N·m.
Finish
Connection to plate heat exchanger
Screw-in type Rc1
Tightening torque 100 N·m
Connection to 1-inch pipe
Ferrule on the joint
Tightening torque 169 N·m
Connecting parts of the 2-inch pipe
Ferrule on the joint
Tightening torque 217 N·m
Connection to
refrigerant piping
Plate heat exchanger
Plate heat exchanger
mounting plate
Connecting parts of the 2-inch pipe
Ferrule on the joint
2
3
4
 Loading...