© MOOG 2019
This document is subject to MOOG INTELLECTUAL AND PROPRIETARY INFORMATION LEGEND . The details are on page II.
1.9.3.3. ACCUMULATOR MACHINE SETUP
The setup of the accumulator type blow machine is almost
same as the setup procedure of the continuous blow ma-
chine. The difference is where there is a calibration of the
accumulator position detector.
To shift to accumulator setup screen Move to [Accumulator]
with up/down key and press [SET] or directly touch [Accu-
mulator] on the screen. The setup screen as shown in Fig-
ure 1-46 is displayed.
* When selected continuous type machine, this parameter
is not displayed.
When starting accumulator setup, it is necessary to com-
plete setting of DCDT zero/span position, gain, and so on.
When shifting to Figure 1-46, some of the function switches
on the right side of the screen will change as follows. (Red
frame part)
DEL → PURGE
SHIFT → TOOLING
This is a function to smoothly set up the accumulator.
Please check the setting of EMPTY/SPAN for details.
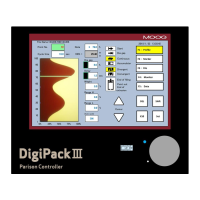
Figure 1-45 Accumulator Setup
Empty
Push the “PURGE” switch located at the lower right of the screen (Figure 1-46) to set the core to the open
state (purge position) so that the resin can be easily discharged. The core opening position by PURGE is
set on the F2 marker screen. (*When the core reaches the purge position, the PURGE key will return from
yellow to white.If you press the PURGE key again while moving to the purge position, the PURGE key will
return to white and the core will stop) Next, move the accumulator to the empty position using the host
controller. When Empty is highlighted, press the [SET] key when the accumulator is in the extrusion posi-
tion (empty position). The empty position is saved, and the [End of Extrusion] of the status monitoring area
lights up. The highlight moves to Full (Figure 1-47).
Figure 1-46 EMPTY Accumulator Set Up
 Loading...