Install a G-240W-G indoor ONT
62
7368 ISAM ONT G-240W-G Product Guide
3FE-47555-AAAA-TCZZA Issue: 01
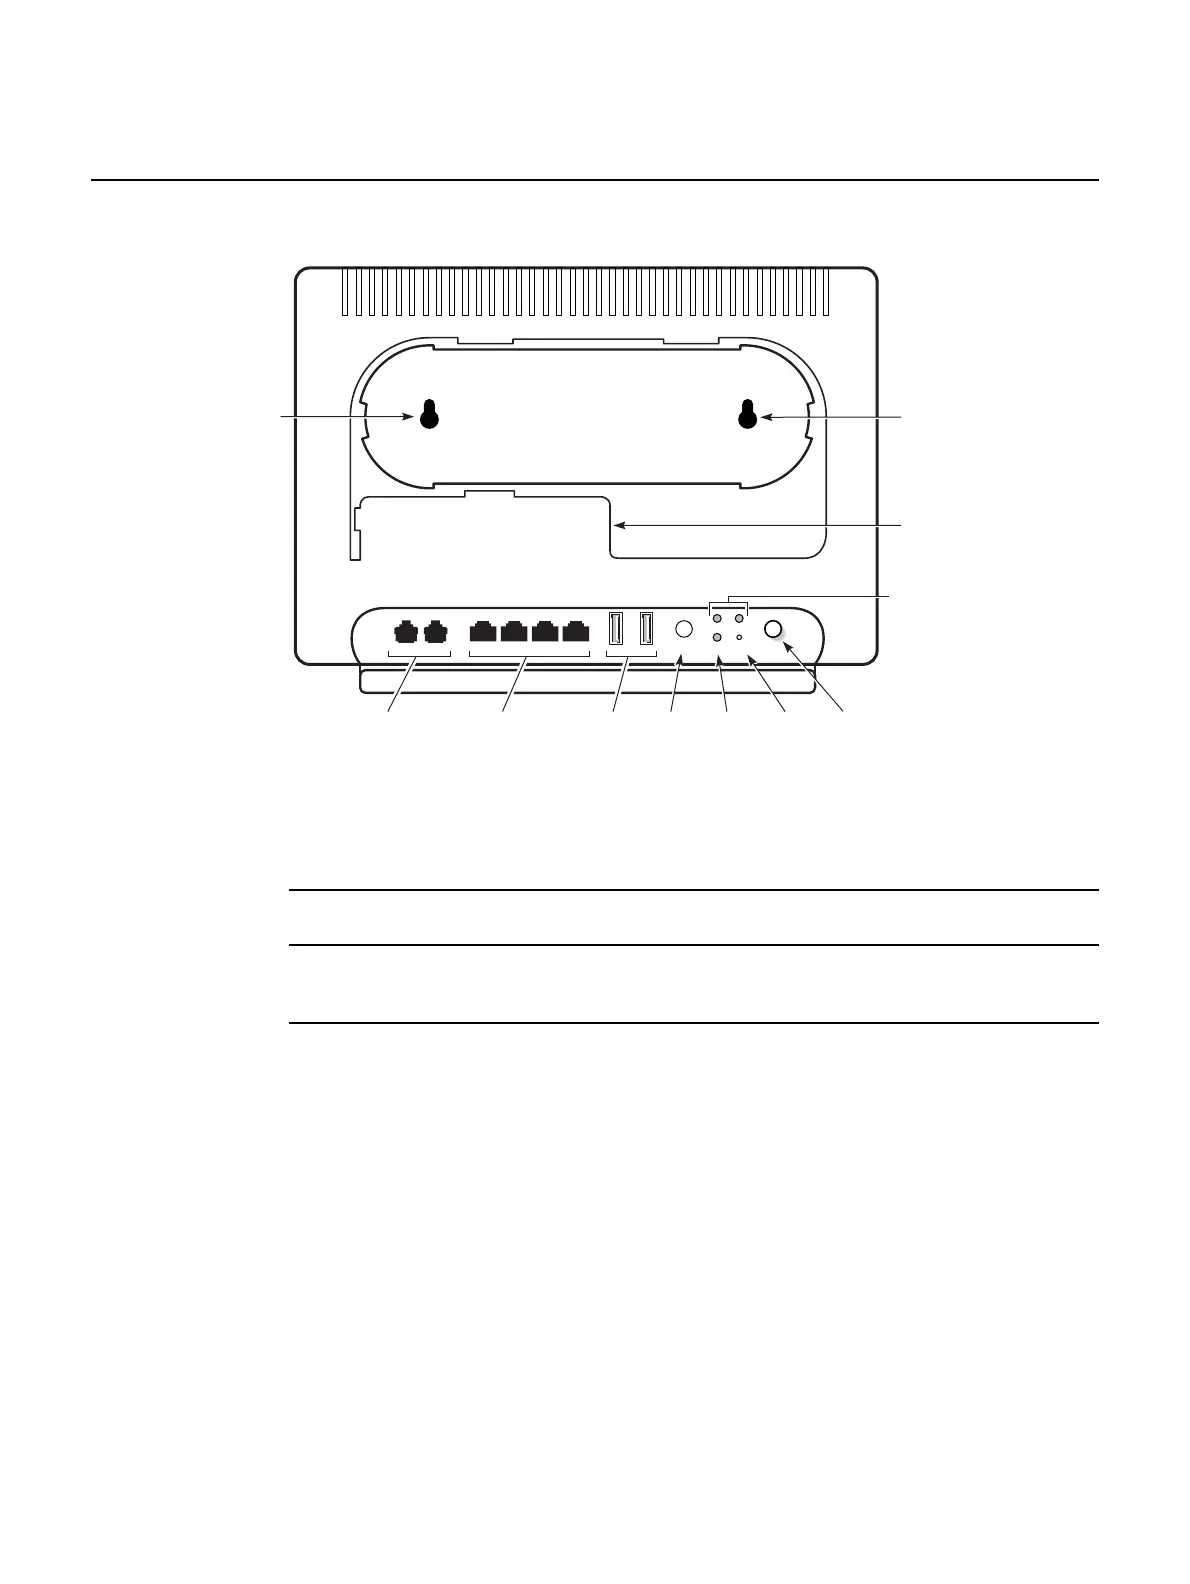
Figure 16 G-240W-G ONT with connections and key mounting holes
i Attach the wall mounting keyholes on the ONT.
ii Attach the ONT to the wall.
3 Review the connection locations, as shown in Figure 16.
4 Connect the Ethernet cables to the RJ-45 ports; see Figure 16 for the location of the RJ-45
ports.
5 Route the POTS cables directly to the RJ-11 ports as per local practices.
The POTS port to the left is labeled 1 for Line 1 while the port on the right is labeled 2 for Line
2, as shown in Figure 16.
28302
USB2USB1LAN4LAN3LAN2LAN1
TEL1 TEL2
Wall
mounting
hole
Wall
mounting
hole
POTS
ports (2)
(RJ-11)
Ethernet
ports (4)
(RJ-45)
USB
ports (2)
Wi-Fi security
buttons
Reset
button
Power
Fiber optic
port
Wireless
on/off
button
On/off
button
ON/OFFPOWER
LED
RESET
WPS
WLAN
Release 05.08.01a | August 2018 | Edition 01

 Loading...