Matrix 832 / 832+ / 424
Page 78 RINS428-5
SUPPLY
FAU L T
ARMED
P.A.READY
TAMPER
FIRE
DAY
ALARM
8
8
BCD
2
1
34
ET
FUNC
P.
.
FIRE
5678
90
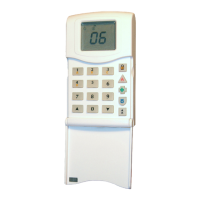
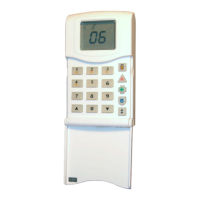
Keypad Programming Procedure
8.1.2 Account Codes & Account Partition Allocation
Enter BX followed by the one digit for the desired partition number from [1 - 4]. The current account
code will be displayed (To delete account code press
> button, to leave the same code press B). To
change the account code use the numerical buttons from [0 - 9] or Press the
C button followed by [2, 3, 4, 5,
6] for inputting letters from [B, C, D, E, F]. Press
B to save new Account Code. An acceptance tone will be
played.
8.1.3 Up / Down Loading Access Code
Enter BX. The current code will be displayed. Enter 4 digits for the code from [1 - 9]. An acceptance
tone will be played.
8.1.4 Digital Communicator Options 1
Enter BXT. To select Option No use > and ? buttons. To choose an option press the C button. To
save the changes press
B. An acceptance tone will be played.
Option Option Off = Alarm LED Off Option On = Alarm LED On Default
1 Telephone Line Monitoring disable Telephone Line Monitoring enable Off
2 Standard Handshake Filter Wide Handshake Filter Off
3 Tone Dial Pulse Dial Off
4 AMC Disable AMC Enable On
5 Reporting Events Low Priority Reporting event High Priority Off
6 Send Open After Alarm disabled Send Open After Alarm enabled On
8.1.5 Digital Communicator Options 2
Enter BX. To select Option No use > and ? buttons. To choose an option press the C button. To
save the changes press
B. An acceptance tone will be played.
Option Option Off = Alarm LED Off Option On = Alarm LED On Default
1 On Opening After Alarm Do Not Delete
Pending Events
On Opening After Alarm Delete
Pending Events
Off
8.1.6 Test Dial Time
Enter BXU. The current time will be displayed. Enter digits for the desired time [XXXX] (e.g. 2300 for
dial at 11’00pm). An acceptance tone will be played as the 4
th
digit is entered.
8.1.7 Test Dial Interval
Enter BXV. Enter the test dial interval from [00 - 99]*.
[00]* = the time in hours and minutes between each dial which is programmed into
BXU. I.e., 0030 =
30 minutes.
[01]…[99]* = once every day at the time programmed in
BXU. E.g. [28]* = once every 28 days at the
time programmed in
BXU
Press B to save new number. An acceptance tone will be heard.
8.1.8 Telephone Number 1 Allocation
Enter BXW. Enter a telephone number from [1 - 9] to be used as the 1
st
telephone number. Press B to
save the new number. An acceptance tone will be played.
8.1.9 Telephone Number 2 Allocation
Enter BXX. Enter a telephone number from [1 - 9] to be used as the 2
nd
telephone number. Press B to
save the new number. An acceptance tone will be played.

 Loading...