Recording Audio Signals
68
Recording
1 Set the AUDIO IN switches CH-1 and
CH-2 to EXT.
2 Connect external audio sources to the
AUDIO IN connectors CH-1 and CH-2.
3 Set the LINE/MIC/+48V switches CH-1
and CH-2 to LINE (line level: +4 dBu).
You can use an external microphone for
recording, such as the ECM-673 Electret
Condenser Microphone.
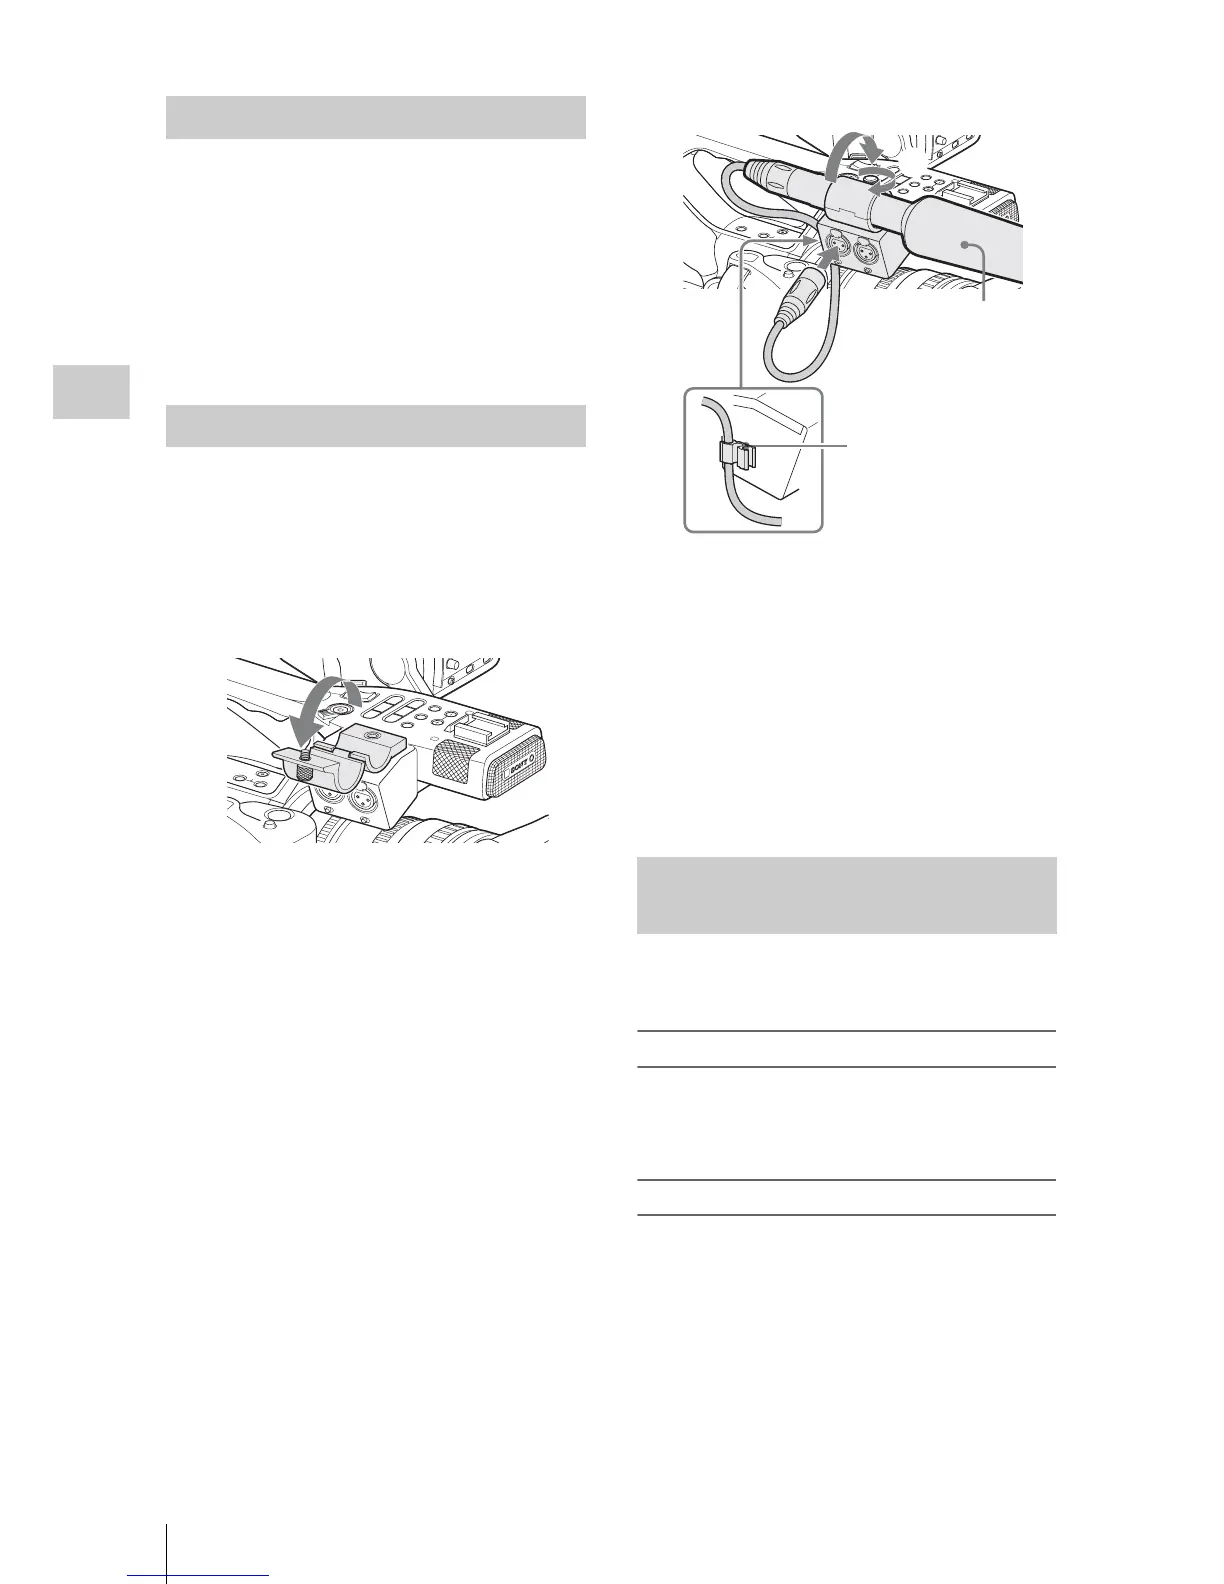
1 Loosen the screw of the microphone
h
older and open the cover.
2 Attach a microphone, close the
microphone holder cover for the
original condition to secure, then
connect the microphone cable to either
of the AUDIO IN connectors (CH-1 or
CH-2).
3 Set the corresponding AUDIO IN
switch (CH-1 or CH-2) to EXT.
4 Set the corresponding LINE/MIC/+48V
switch (CH-1 or CH-2) according to the
connected microphone.
MIC: For a microphone that requires no
power supply
+48V: For a microphone that requires +48V
power supply (such as the ECM-673)
You can select automatic or manual adjustment
mode independently for each channel.
To adjust the levels automatically (AGC)
When the AUDIO SELECT switches CH-1 and
CH-2 are set to AUTO, the audio recording levels
are automatically adjusted.
To adjust the levels manually
Set the AUDIO SELECT switches CH-1 and CH-
2 to MANUAL, and adjust the audio recording
levels by turning the AUDIO LEVEL controls.
The value is set to 0 dB when the control is set to
5. Setting to 10 maximizes the level (+12 dB) and
setting to 0 minimizes it (–∞).
The input levels are displayed on the screen when
you press the DISPLAY/BATT INFO button.
Using External Inputs
Using an External Microphone
M
IR
R
O
R IM
AGE
O
F
F
O
N
D
IS
PLA
Y/BA
T
T

 Loading...