6. Cylinder Head/Cylinder/Piston
6-8
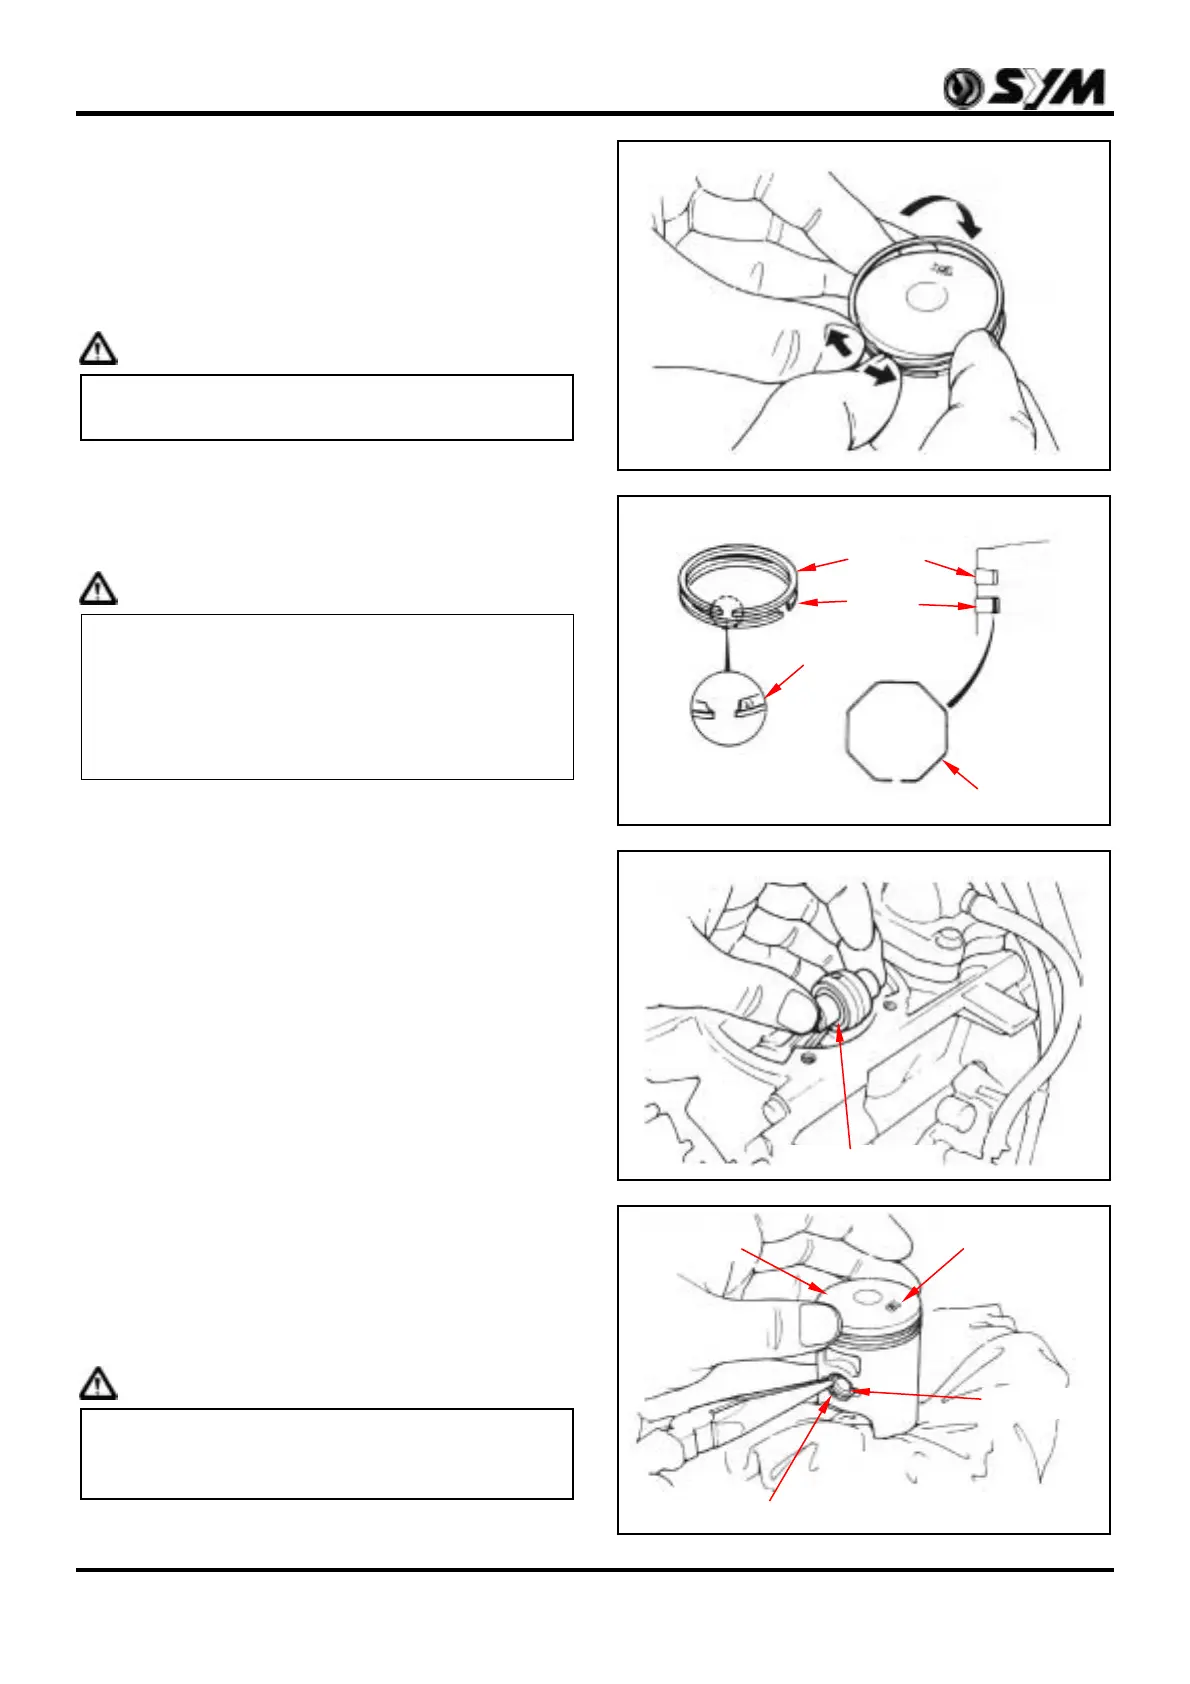
Piston/Cylinder Installation
Install the expanding ring into the groove of 2
nd
ring.
Align the ring end with the lock pin in the ring
groove.
Install the top ring and the 2
nd
ring onto the ring
groove respective.
Caution
The top ring and the 2
nd
ring cannot be
changeable each other.
Push the rings into ring groove and then check
rings’ mating condition.
If ring could not be push in the ring groove, it
means that ring groove is dirty or wrong ring
groove installation.
Caution
y All rings should be installed with the marks
facing up.
y All rings should be replaced at same time,
and it cannot be replaced one ring only.
y It should use same brand name piston ring in
an engine and cannot mix with other one.
Place a cleaning cloth onto the crankcase opening
to prevent the piston pin snap ring from falling into
the crankcase.
Apply with two-stroke engine oil onto needle
bearing and piston pin, and install needle bearing
into connecting rod small end.
Install piston, and place “EX” mark of the piston
toward to exhaust side, and then install the piston
pin onto piston and connecting rod.
Install new piston pin snap ring.
Clean all gaskets onto the interfaces of cylinder
and crankcase.
Place a new gasket onto the crankcase.
Make sure that the piston ring aligns with the lock
pin in piston ring groove.
Caution
Make sure that all rings in the piston ring groove
cannot be rotated around the lock pin to avoid
to damaging the rings, piston and cylinder.
Piston pin snap ring
Piston pin
Piston
〝EX〞mark
Top ring
2
n
ring
Expanding ring
Piston ring mark
1T: top ring
2T: 2
nd
ring
Needle bearing
 Loading...