DISASSEMBLY AND ASSEMBLY
ATTACHMENTS
5
4
ATTACHMENTS 4G0AX001
Removing the hoe attachment
Important:
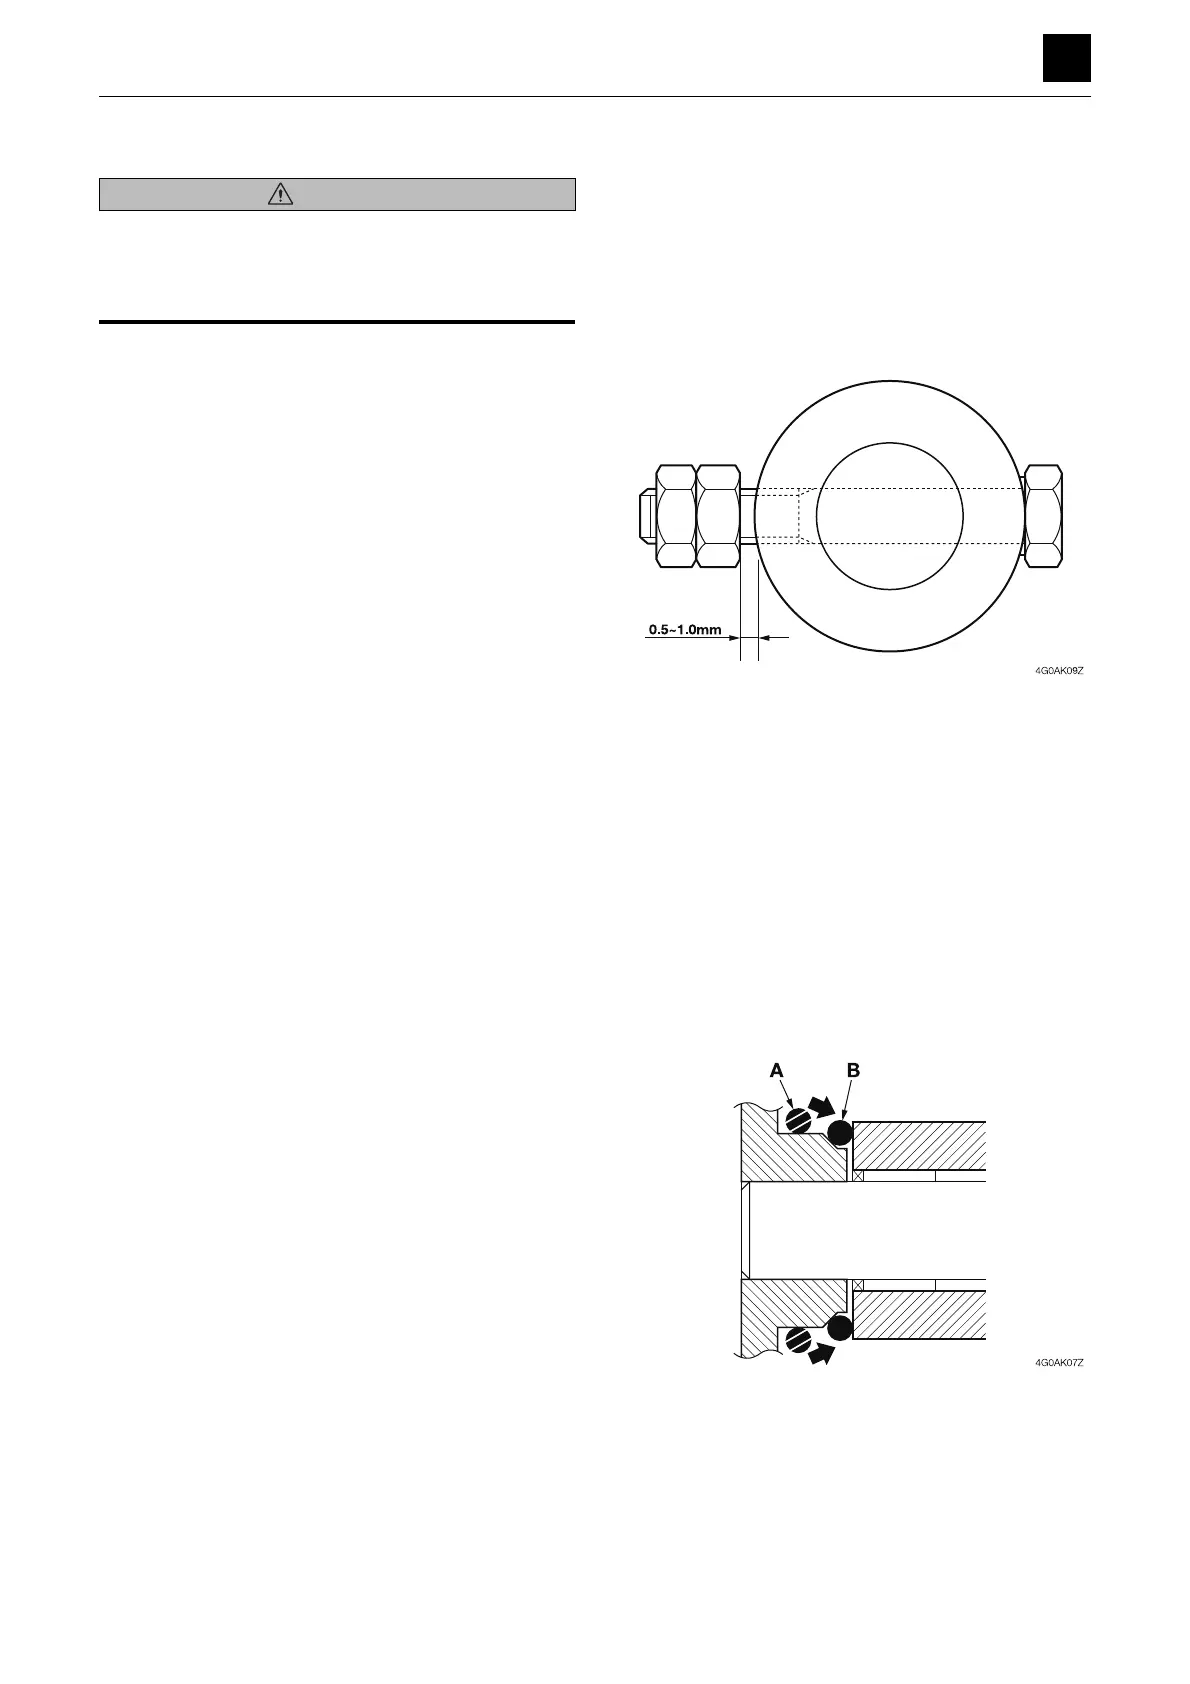
• When tightening the lock bolt with a double nut, allow a
clearance of 0.5 mm to 1.0 mm (0.0197 in. to 0.0394
in.) between the nut and the lock collar.
• Adjust the clearance for the pin connector to a width of
between 0.2 mm to 0.5 mm (0.0079 in. to 0.0197 in.)
using a shim.
• Be sure to bleed the air from the cylinder before starting
operation for the first time after reassembling hydraulic
devices such as the hydraulic cylinder or hydraulic pip-
ing.
• Grease the pins using lithium grease EP-2 supplied
from the grease nipples.
The numbers in parentheses, (), listed after the names of
parts throughout this document are used to refer to the
same parts as the numbers listed in the construction di-
agram and parts lists.
Removing the bucket
1. Orient the back of the bucket downward, and lower
the bucket all the way down to the ground.
2. Take out the bolts, and remove the pins.
3. Remove the bucket.
Installing the bucket
To install, follow the same procedures as for removal but
in the reverse order.
• Before starting to attach the bucket, place the O-ring
in the temporary placement position “A” in the outer
circumference of the bucket bushing, and move it to
the specified position “B” once attachment is complet-
ed.
WARNING
• Be sure to release any residual pressure in the piping
before disconnecting the hydraulic hose.
• Do not attempt to insert any fingers into the hole when
adjusting the pin hole position.
 Loading...