DISASSEMBLY AND ASSEMBLY
SWIVEL JOINT
2
4
SWIVEL JOINT 4O0AX00
DISASSEMBLY AND ASSEMBLY
General Cautions
• Carry out disassembly and assembly operations in
a clean place and provide clean containers to place
the disassembled parts in.
• Before disassembly, clean around the ports and
remove the paint from each joint using a wire
brush.
• Clean all disassembled parts in cleaning solvent.
Use a lint free cloth, or air dry the parts.
• Make match marks on each part so that they will be
assembled in the same positions when assembled.
• Replace all seals with new ones each time the
hydraulic units is disassembled.
• Check each part to make sure there is no abnormal
wear or seizing and use sandpaper, etc. to remove
any burrs, sharp edges, etc.
• Do not turn adjusting screws if not required.
• Apply hydraulic oil to sliding surfaces and apply a
thin coating of grease to seals when assembling
them.
The following describes the disassembly procedure.
For assembly, follow the disassembly procedure in
the reverse order.
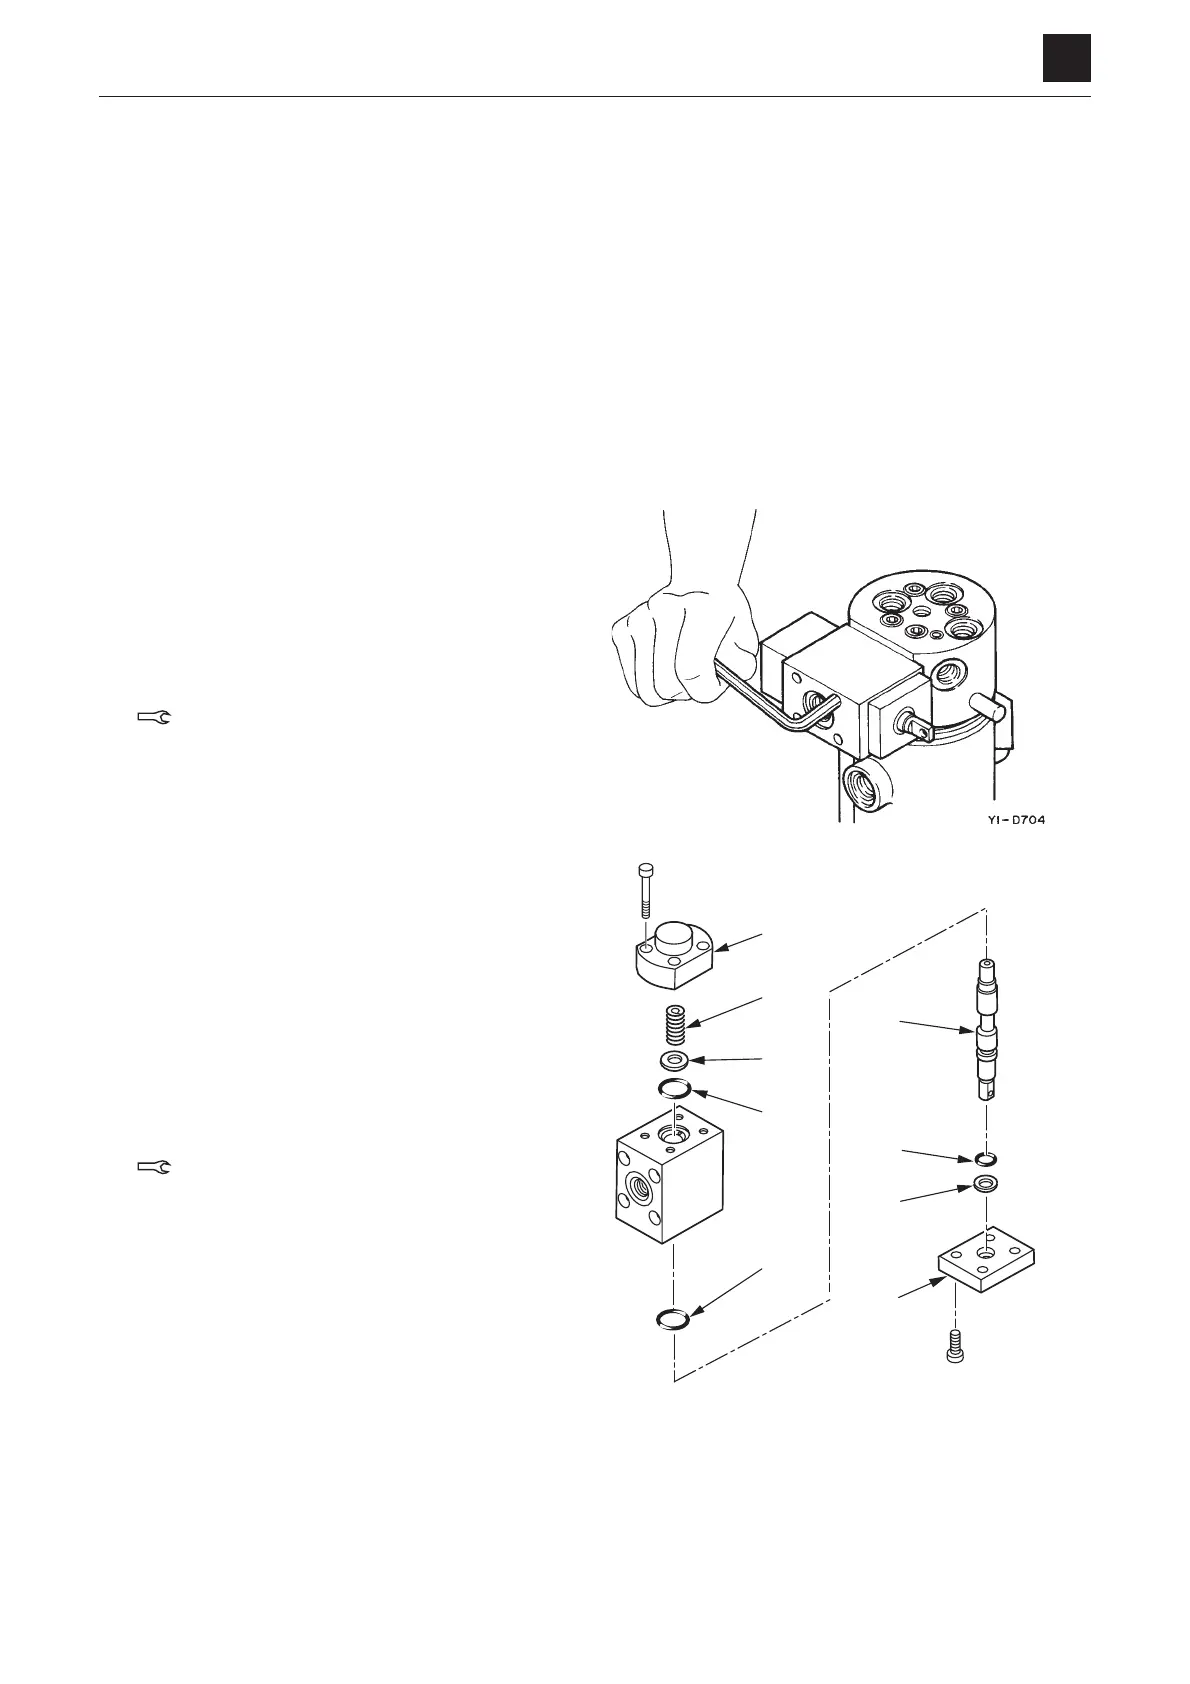
Disassembly
Selector
1. Remove the cap screw, and take off the selector
and O-ring from the shaft of the swivel joint.
Cap Screw: 6.9 N·m(5.1 ft-lb.)
2. Loosen the cap screw and remove the cover (1).
Then remove the spring (2) and washer (3) from
the spool (4).
3. Remove the spool (4) from the body.
4. Loosen the cap screw and remove the cover (5),
backup ring (6) and O-ring (7).
• When assembling, confirm that the spool moves
smoothly.
Cap Screw: 6.9 N·m(5.1 ft-lb.)
5. Remove the O-ring (8) from the body assembly.
 Loading...