TD 92930EN
13 December 2013 /Ver B
Configuration Manual
WL3 and WL3 Plus WLAN Handset
100
Appendix C: Easy Deployment
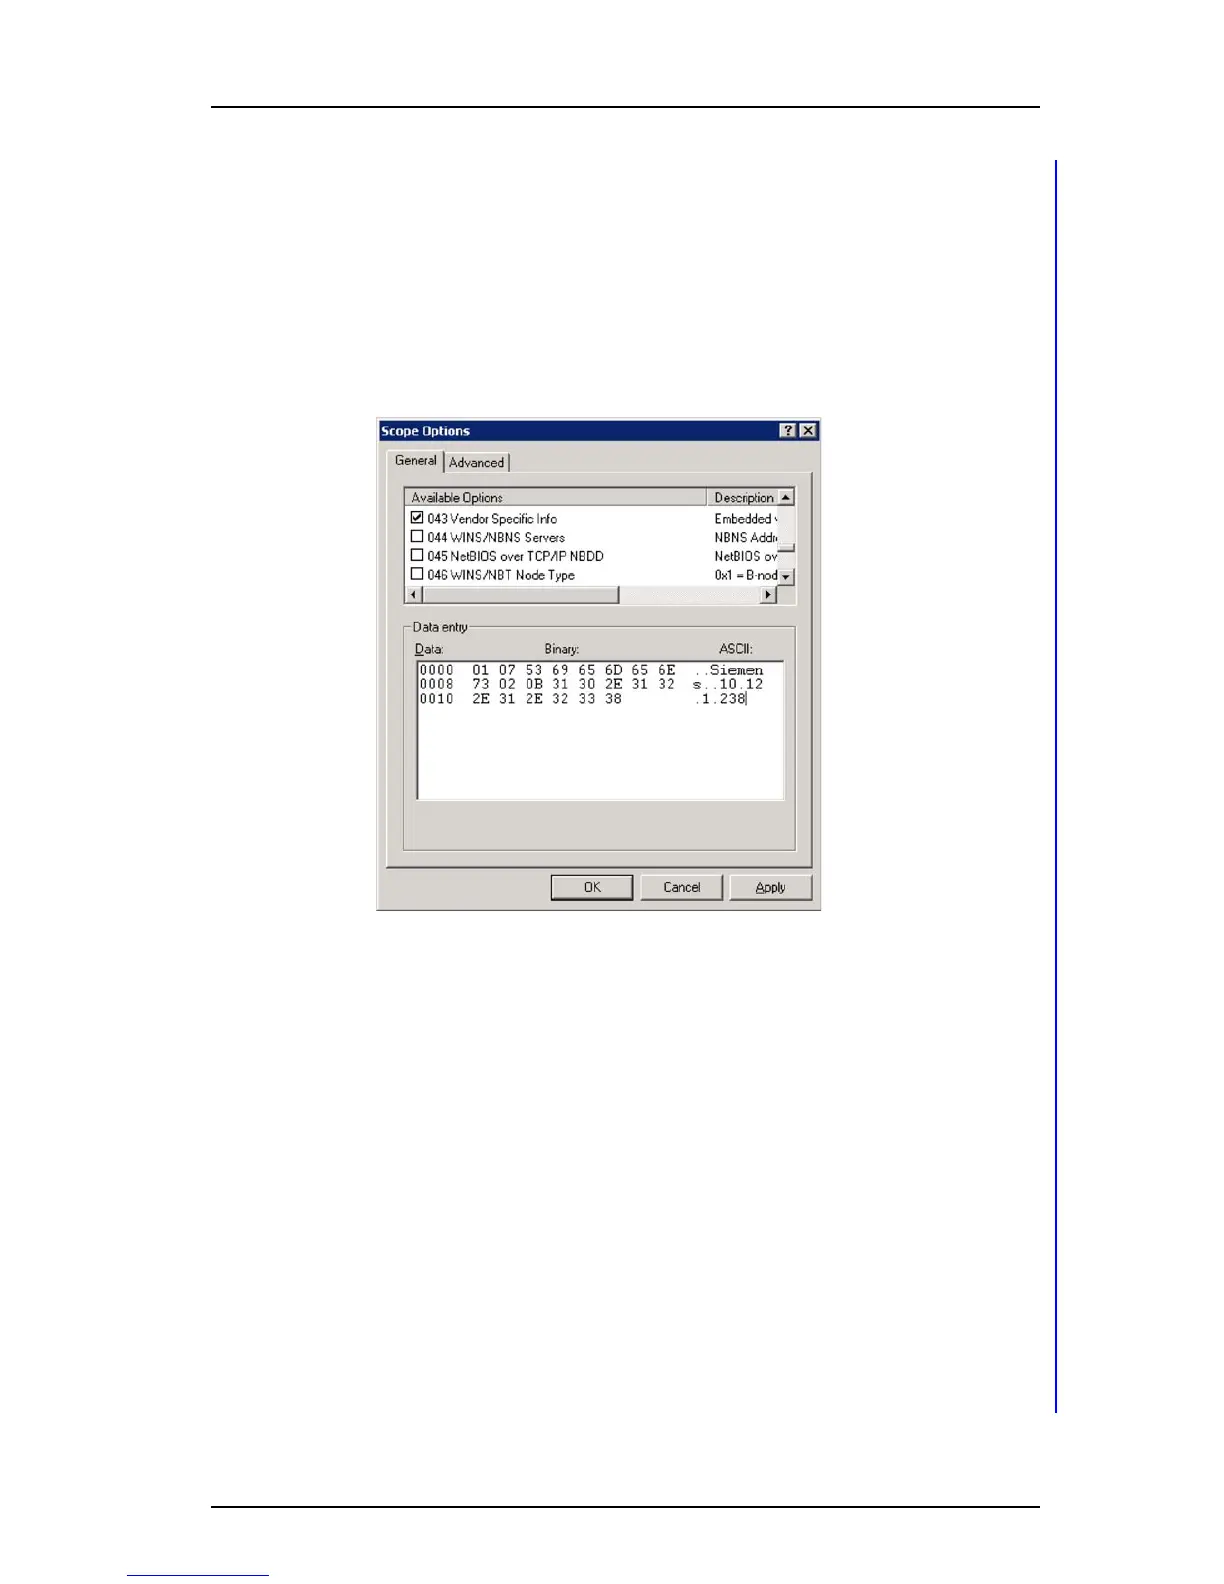
1 On the DHCP server, click the scope that the handsets should use, then right-
click on Scope Options, and select Configure Options.
2 On the “General tab” (the default Standard DHCP class), scroll down, and select
option 043 (which is the “Vendor Specific Info” option).
3 In the data entry field, there are two ways of entering the information. Click to the
left in the box, to enter the string in binary, and to the right, to enter the string in
ASCII. (It is possible to switch between them.)
Enter the values, as described in previous sections. Remember to get the length
values in the TLV string correct.
Figure 16. Option 43 using a standard DHCP vendor class.
TIP: If the length value is unknown, enter the TLV value as follows, as everything inside
the parenthesis is auto calculated using the “Auto-len” feature:
01 ("Siemens")02(192.168.5.1)
Then click OK and save the new option 43.
4 Check that the options are entered correctly. Note that the Vendor class is
“Standard”, which means that no specific class is used, and that the User class is
"None", which means that it is the default user class. The handset does not send
any request with a user class filled in.
NOTE: Do not enter the value 2b 14 (43 20), which is the option class and the
total length. This is added by the DHCP server, when this option is presented to
the client.
5 Test the configuration. If the Option 43 is not working as expected, verify the
behavior with a packet capturing tool.
C.5.6 Advanced Configuration of Option 60 and 43 using a new vendor class
The recommended way of setting up Vendor options, is to use Vendor classes, instead
of the Global standard Default DHCP class. With this solution, option 60 is not
configured as an option in a scope, instead a Vendor class is created.
 Loading...