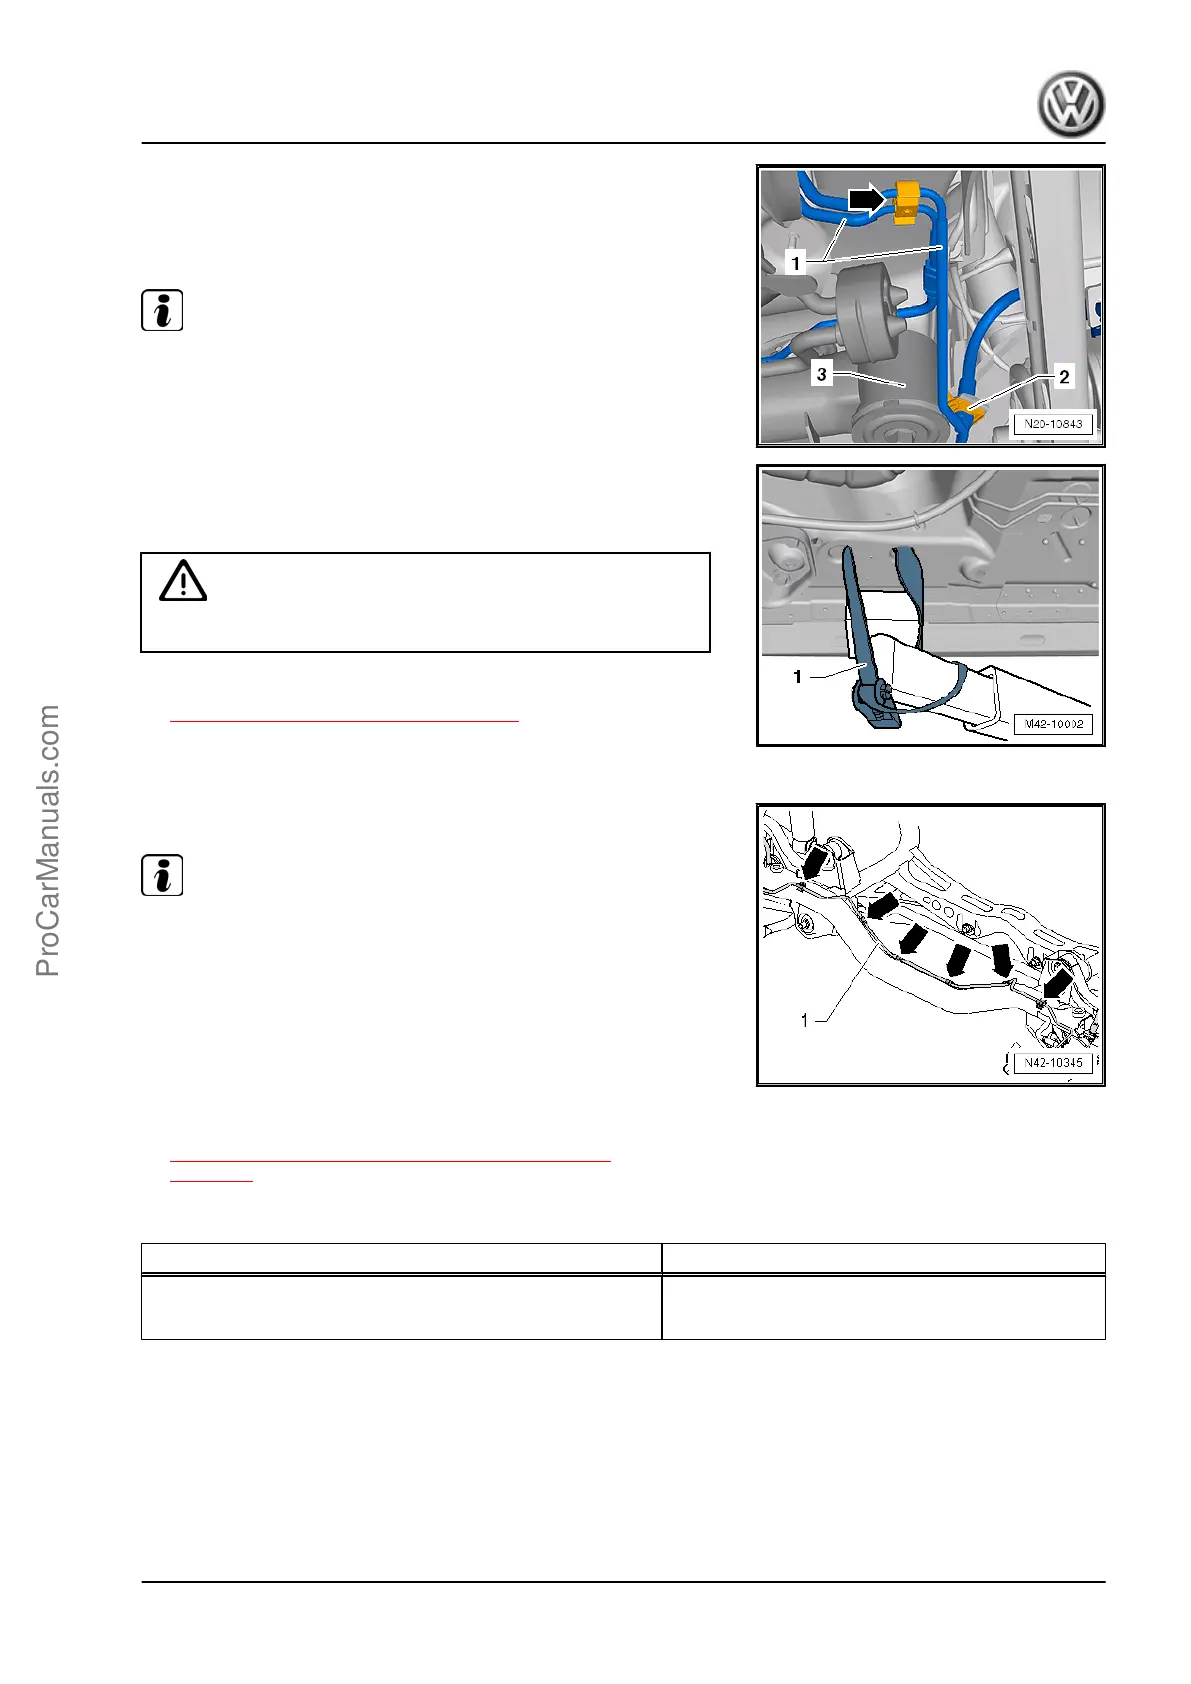
– Unclip the brake lines -1- from the bracket -arrow- on the left
side of the body.
– Remove the clip -2- from the subframe -3- and loosen the
brake hose from it.
Note
Do not disconnect the brake line.
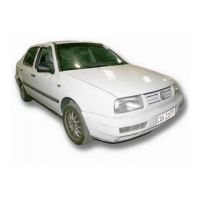
– Secure both sides of the vehicle on the hoist arms using Ten‐
sioning Straps - T10038- .
1 - Tensioning Strap - T10038-
WARNING
The vehicle could slide off the hoist if it is not secured.
– Secure the subframe. Refer to
⇒ “12.4 Subframe, Securing”, page 189 .
– Carefully lower the subframe with its attachments approxi‐
mately 2 cm.
– Remove the brake line -1- from the clips -arrows-.
Note
When doing this, the clips will be destroyed and must be replaced.
– Carefully lower the subframe with its components approxi‐
mately 140 mm.
Installing the Subframe with Attachments
Install in reverse order of removal. Note the following when doing
so:
– Install the wheels and tighten to the tightening specification.
Refer to
⇒ “2 Wheel Installation Tightening Specifications”,
page 237 .
Tightening Specifications
Component Tightening Specification
Subframe to body
♦ Use new bolts.
70 Nm + 180° turn
12.6 Rear Axle, Removing and Installing
Special tools and workshop equipment required
♦ Torque Wrench 1332 40-200Nm - VAG1332-
♦ Engine and Gearbox Jack - VAS6931 -
♦ Tensioning Strap - T10038-
Jetta 2011 ➤ , Jetta 2013 ➤
Suspension, Wheels, Steering - Edition 08.2015
12. Subframe, Transverse Link and Tie Rod (Multi-Link Suspension) 191
ProCarManuals.com