12 - Front Bonded Rubber Bushing
❑ Removing and installing. Refer to
⇒ “5.6 Control Arm Front Bonded Rubber Bushing, Replacing”, page 48 .
13 - Rear Bonded Rubber Bushing
❑ Removing and installing. Refer to
⇒ “5.7 Control Arm Rear Bonded Rubber Bushing, Replacing”, page 50 .
14 - Coupling Rod
5.2 Ball Joint, Checking
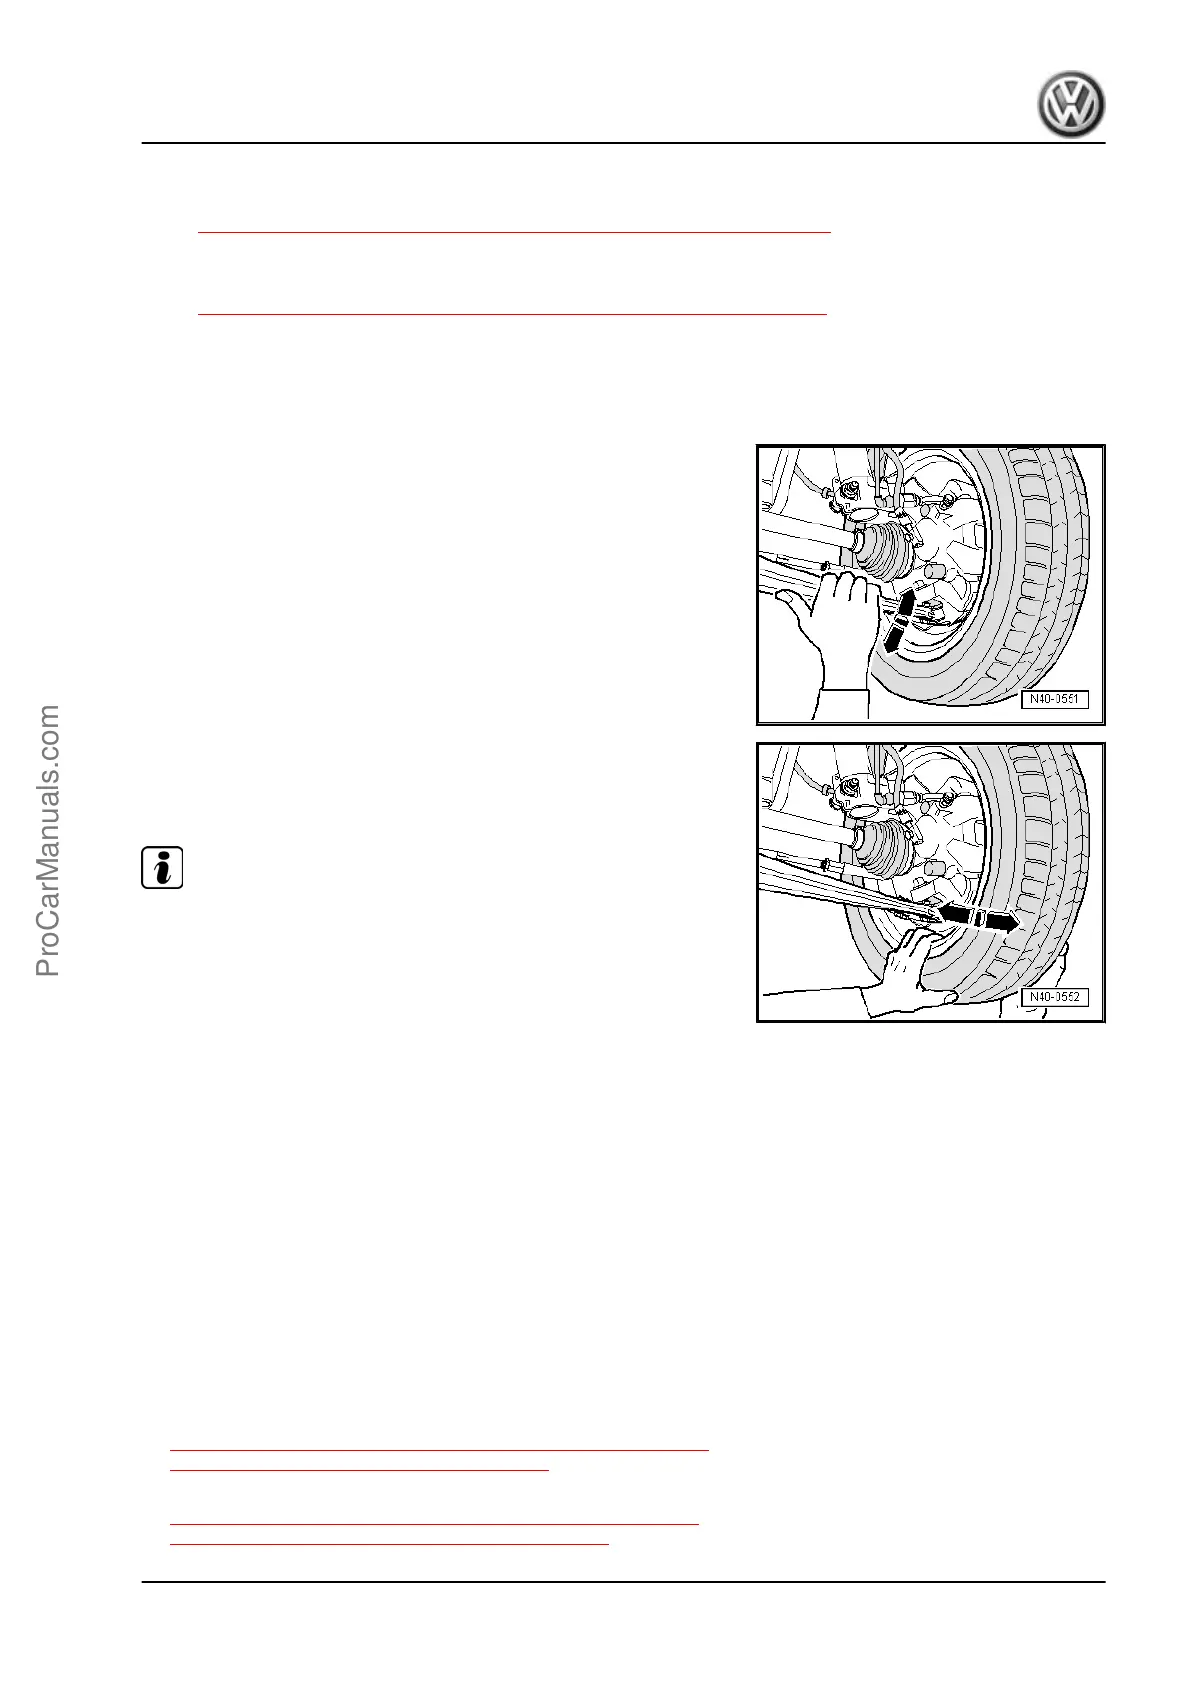
Axial Play, Checking
– Forcefully pull the control arm down in the direction of
-arrow- and press it up again.
Radial Clearance, Checking
– Forcefully push the lower part of wheel inward and outward in
the direction of -arrow-.
Note
♦
There should not be any noticeable or visible “play” in either
of the two checks.
♦
Pay attention to the ball joint while performing checks.
♦
Make allowance for any wheel bearing play or “play” in the
upper strut mount
♦
Check the rubber boot for damage and replace the lower ball
joint, if necessary.
5.3 Ball Joint, Removing and Installing
Special tools and workshop equipment required
♦ Puller - Ball Joint - 3287A-
♦ Torque Wrench 1332 40-200Nm - VAG1332-
♦ Engine and Gearbox Jack - VAS6931-
♦ Digital Torque Wrench - VAG1756A-
♦ Drive Shaft Remover - T10520-
Removing
♦ Twelve-point bolt with ribs. Refer to
⇒ “9.1 Twelve-Point Bolt with Ribs, Loosening and Tightening,
Drive Axle Threaded Connection”, page 77 .
♦ Twelve-point bolt without ribs. Refer to
⇒ “9.2 Twelve-Point Bolt without Ribs, Loosening and Tight‐
ening, Drive Axle Threaded Connection”, page 78 .
Jetta 2011 ➤ , Jetta 2013 ➤
Suspension, Wheels, Steering - Edition 08.2015
5. Front Suspension and Control Arm 39
ProCarManuals.com

 Loading...