8 - Clamp
❑ Always replace if removed
❑ Tensioning. Refer to ⇒ Fig. ““Tensioning Clamp on Small Diameter”“ , page 119 .
9 - Drive Axle
10 - Clamp
❑ Always replace if removed
❑ Tensioning. Refer to ⇒ Fig. ““Tensioning Clamp on Small Diameter”“ , page 119 .
11 - CV Boot for CV Joint
❑ Material: Hytrel polyelastomer
❑ Without vent hole
❑ Check for tears and scuffing
12 - Circlip
❑ Always replace if removed
❑ Insert in shaft groove
13 - Clamp
❑ Always replace if removed
❑ Tensioning. Refer to ⇒ Fig. ““Tightening Clamp on Outer Joint”“ , page 119 .
14 - CV Joint
❑ Replace only as a complete unit.
❑ Removing. Refer to ⇒ page 118 .
❑ Installing: Using a plastic hammer, drive onto the shaft as far as the stop
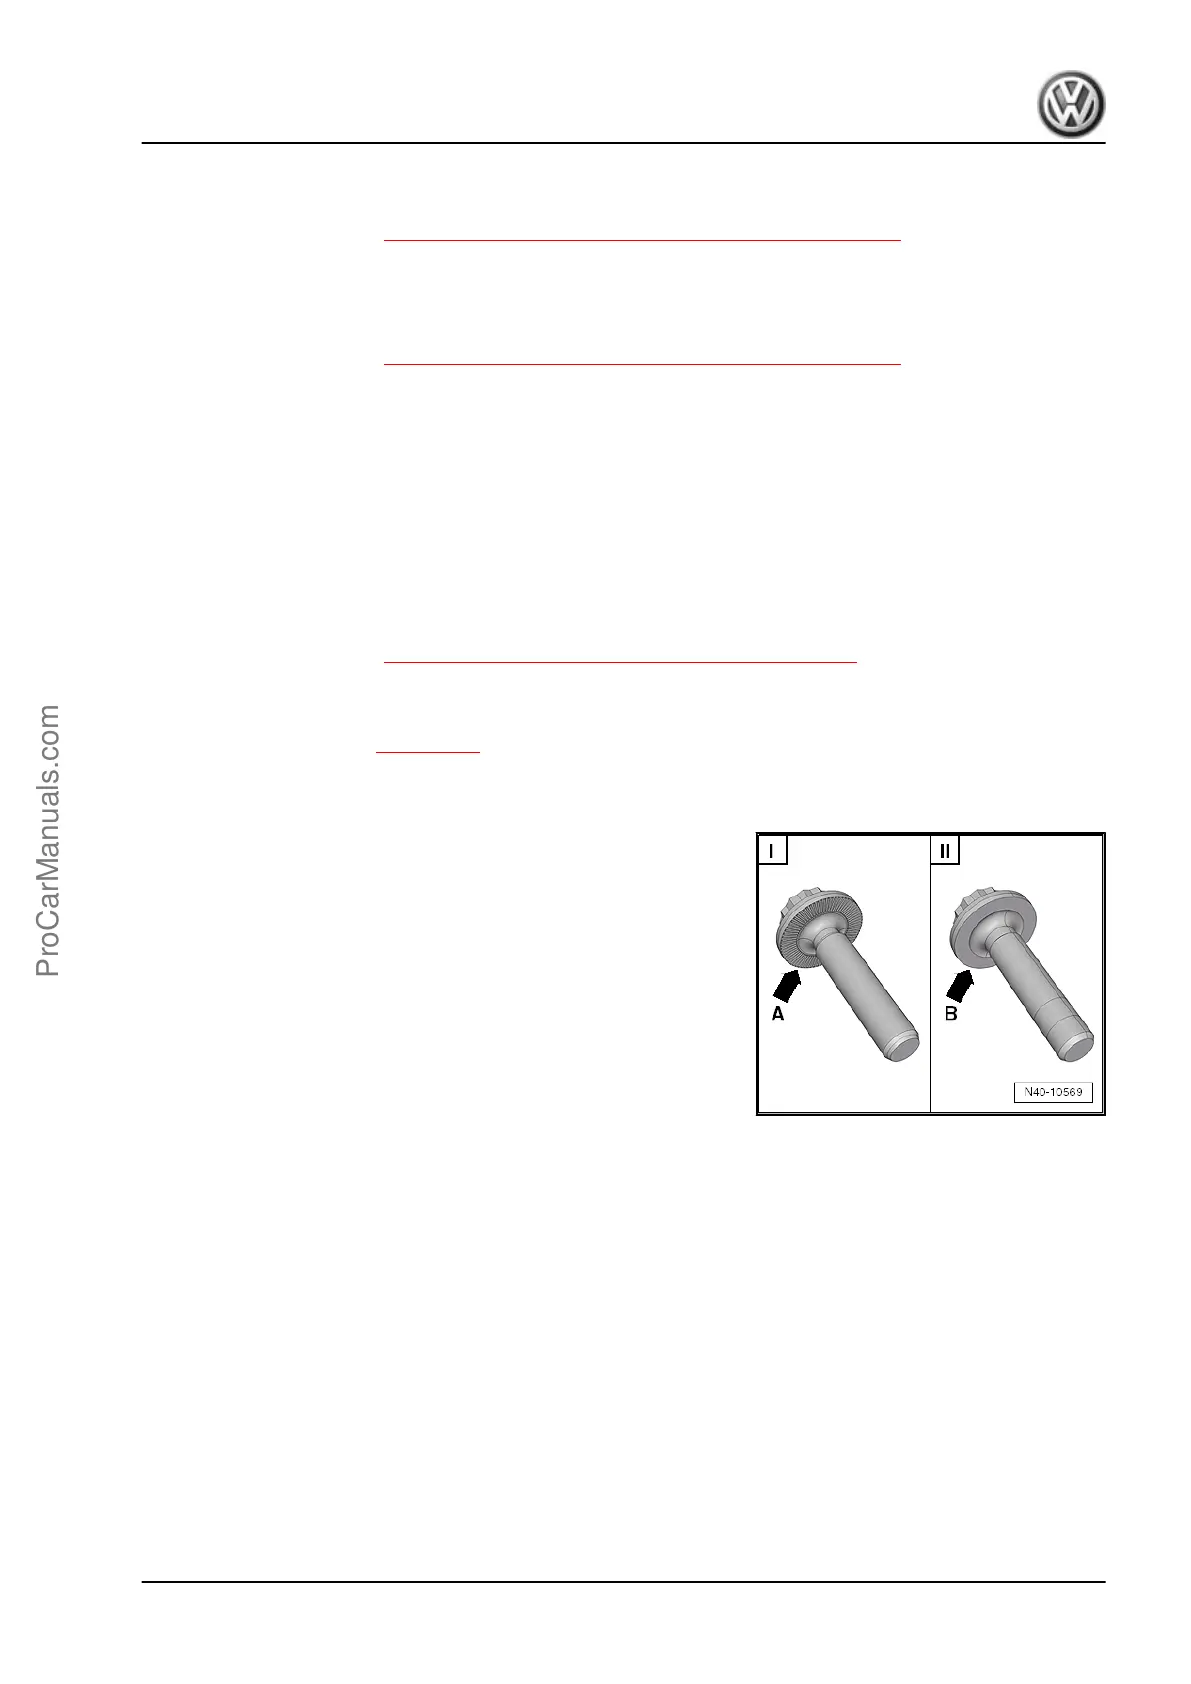
Difference Between A Twelve-Point Bolt with Ribs and A Twelve-
Point Bolt without Ribs
The contact surfaces -arrow A- and -arrow B- are different on the
two-point bolts.
I - Twelve-point bolt with ribs -arrow A-
II - Twelve-point bolt without ribs -arrow B-
13.2 Drive Axle with CV Joint VL107 Attach‐
ed, Disassembling and Assembling
Special tools and workshop equipment required
♦ Slide Hammer Set - VW771-
♦ Puller - Drive Axle - T10382-
Removing the Outer CV Joint
– Clamp the drive axle with protective jaws in a vise clamp.
– Fold back boot.
– Align the Puller - Drive Axle - T10382- so that the flat side of
the Puller - Drive Axle - T10382/1- faces the Spindles -
T10382/2- .
– Attach the Puller - Drive Axle - T10382- to the Slide Hammer
Set - VW771- .
Jetta 2011 ➤ , Jetta 2013 ➤
Suspension, Wheels, Steering - Edition 08.2015
13. Drive Axle with CV Joint VL107 (attached) 117
ProCarManuals.com

 Loading...