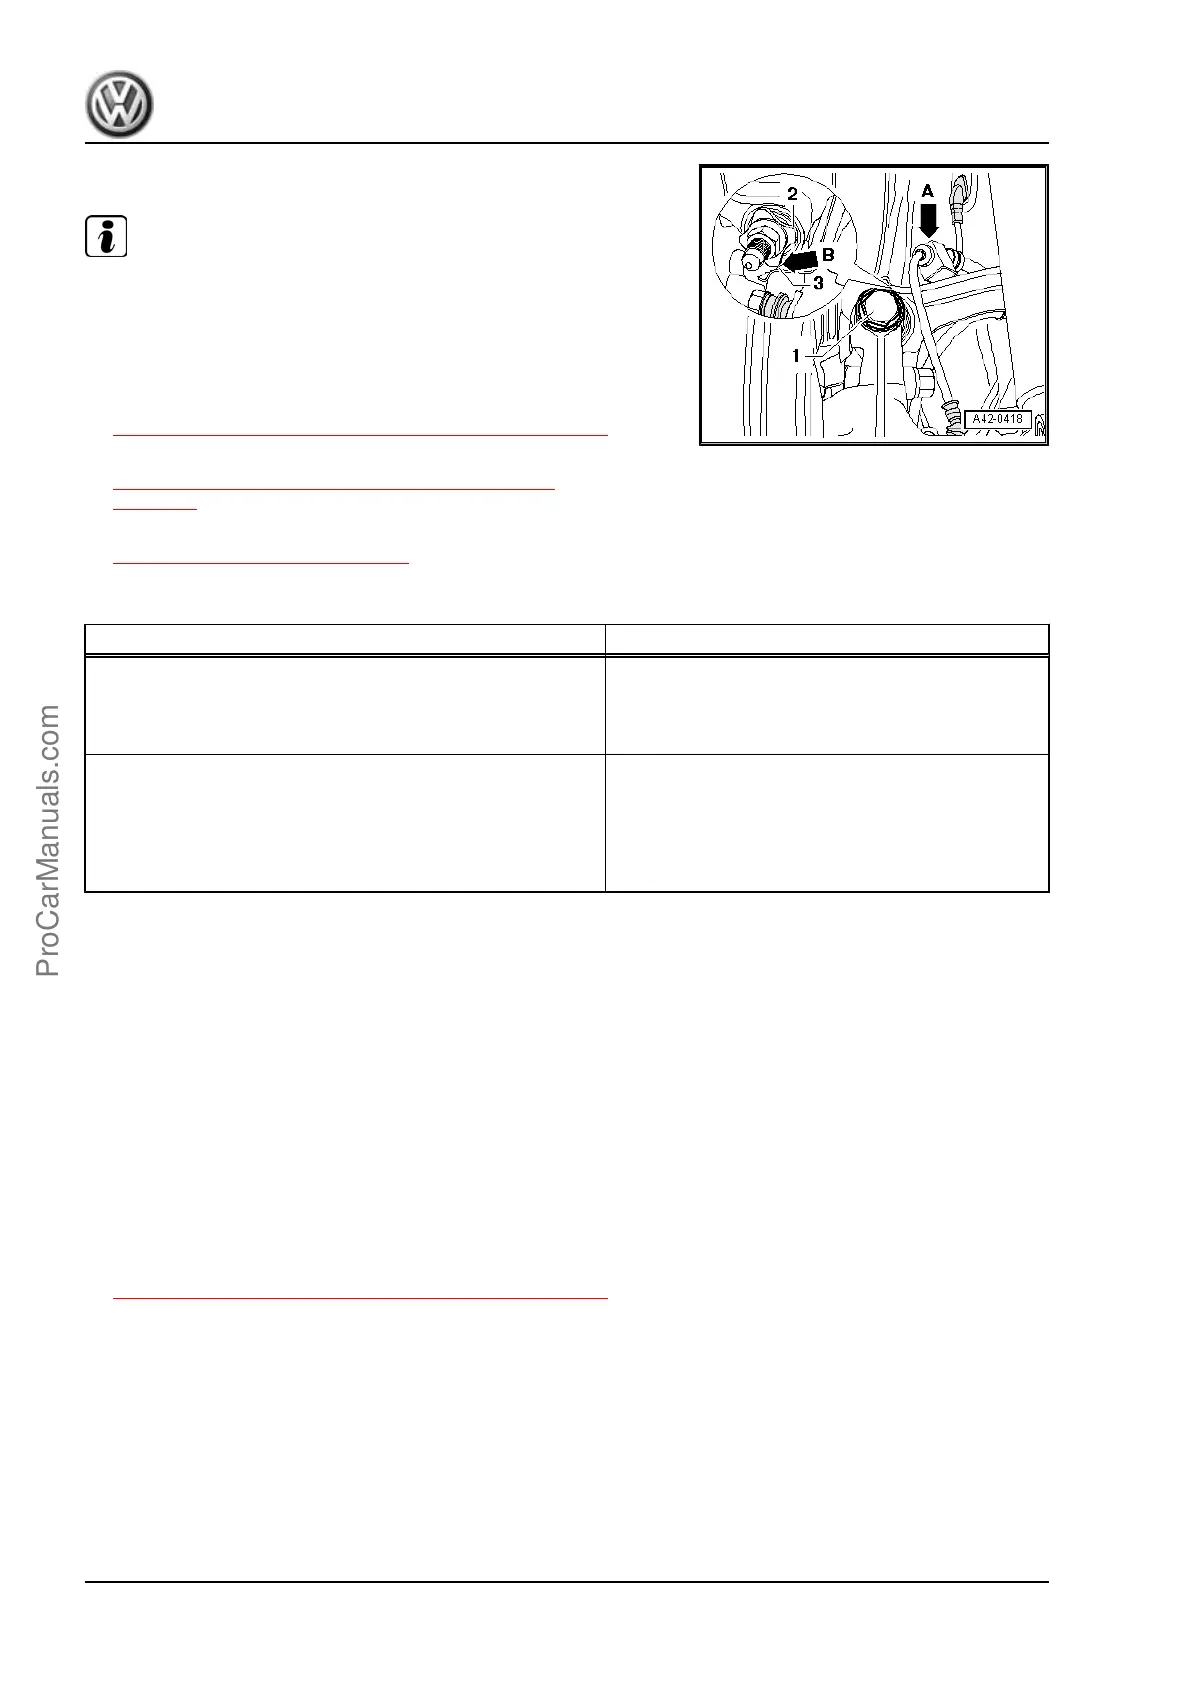
– Tighten the bolt -1- on the upper transverse link.
Note
Washer -2- must be installed so that there is a gap -arrow B- be‐
tween washer and cover plate -3-.
– Engage the speed sensor wire -arrow A- on top of the trans‐
verse link.
– Install coil spring. Refer to
⇒ “14.2 Coil Spring, Removing and Installing”, page 215 .
– Install the wheel and tighten. Refer to
⇒ “2 Wheel Installation Tightening Specifications”,
page 237 .
– Perform vehicle alignment. Refer to
⇒ “8 Wheel Alignment”, page 256 .
Tightening Specifications
Component Tightening Specification
Upper transverse link to wheel bearing housing
♦ Use a new bolt and nut
♦ Tighten bolts in curb weight position
130 Nm + 90° turn
Upper transverse link to subframe
♦ Use new nut
♦ Tighten bolts in curb weight position
95 Nm
♦ Adjust the Torque Wrench 40-200Nm -
VAG1332- to 80 Nm when tightening the nut.
♦ Only applies in conjunction with Insert Tool -
18mm - T10179- .
12.8 Lower Transverse Link, Removing and
Installing
Special tools and workshop equipment required
♦ Torque Wrench 1332 40-200Nm - VAG1332-
Perform the Following
Removing
– Loosen the wheel bolts.
– Raise the vehicle.
– Remove the wheel.
– Remove the coil spring. Refer to
⇒ “14.2 Coil Spring, Removing and Installing”, page 215 .
Jetta 2011 ➤ , Jetta 2013 ➤
Suspension, Wheels, Steering - Edition 08.2015
196 Rep. Gr.42 - Rear Suspension
ProCarManuals.com

 Loading...