– Raise the vehicle.
– Remove the wheel.
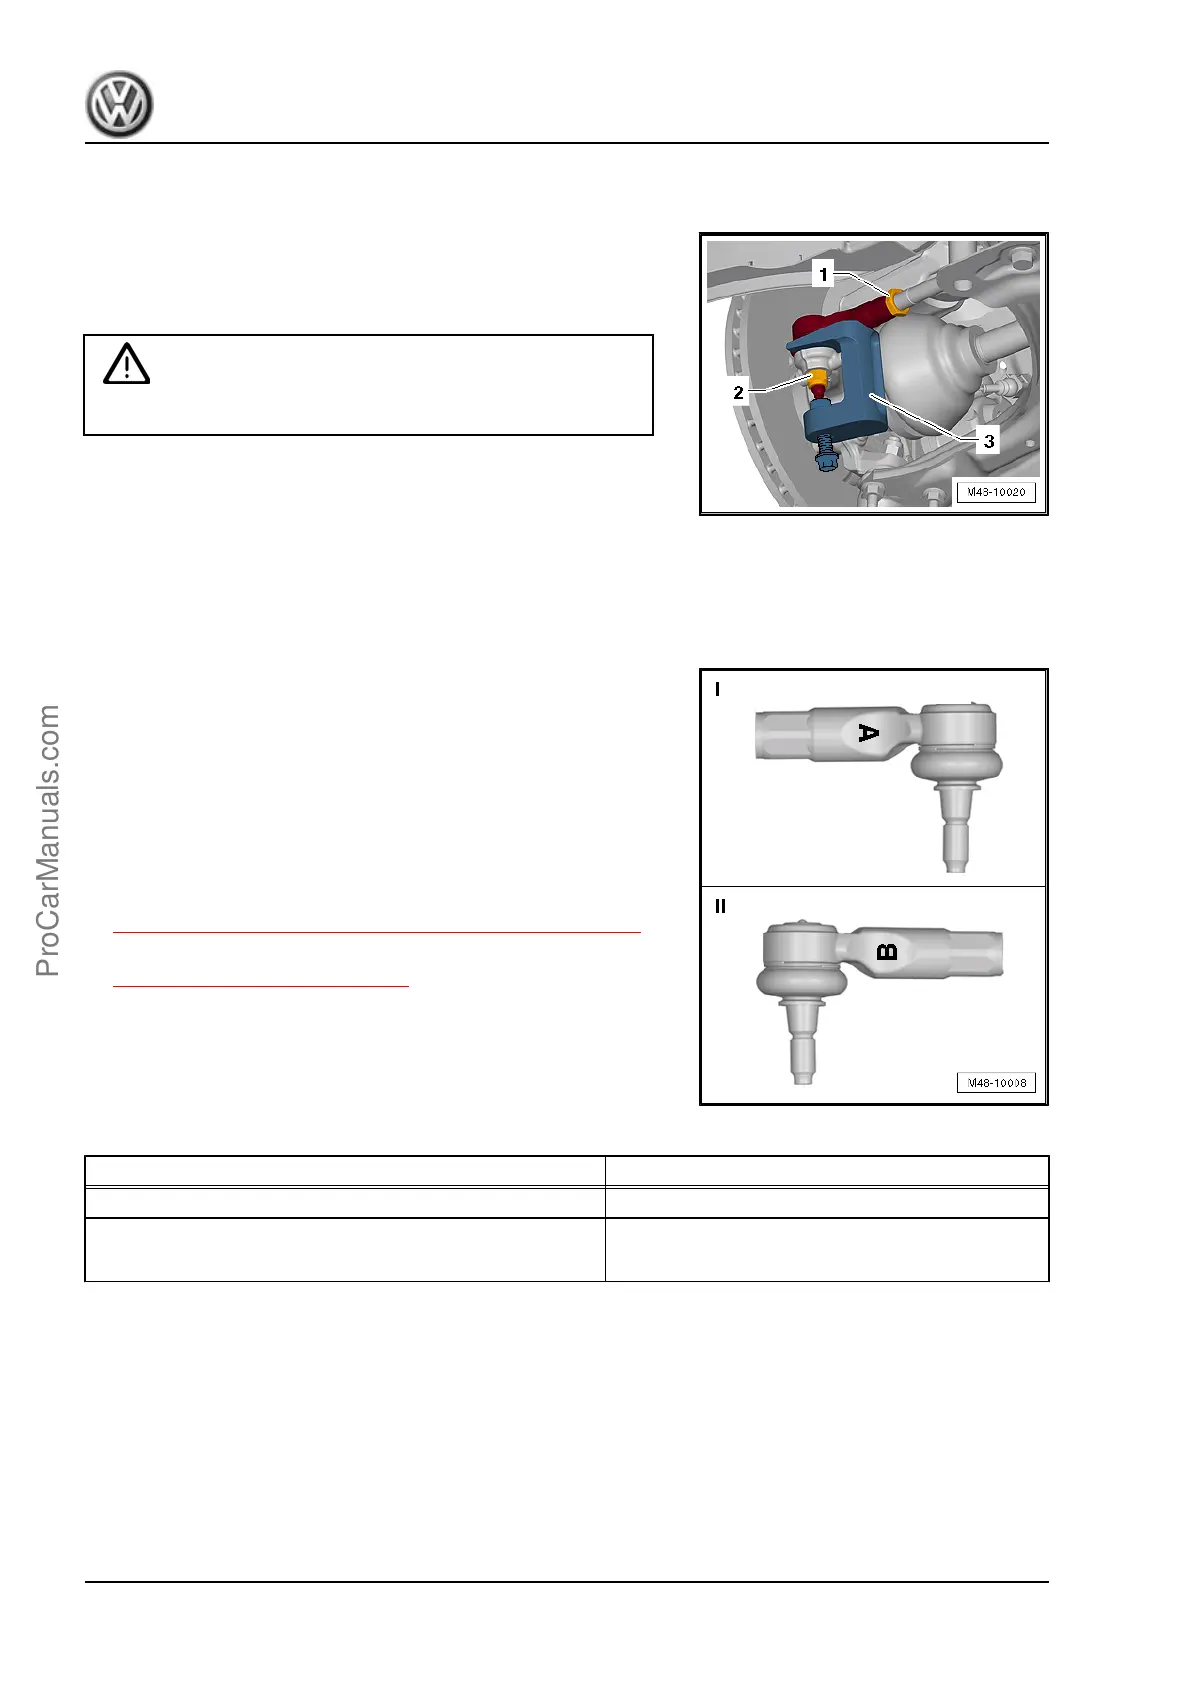
– Loosen nut -1-.
– Mark the position of the tie rod end on the tie rod.
– Loosen the nut -2- from the tie rod end, but do not remove it.
Caution
To protect the thread, screw the nut on the pin a few turns.
– Remove the tie rod from the wheel bearing housing and re‐
move the nut.
1 - Puller - Ball Joint - T10187-
– Remove the tie rod end from the tie rod.
Installing
Install in reverse order of removal. Note the following:
– Make sure the correct tie rod end is installed on each side.
I - Right tie rod end identified with an “A”
II - Left tie rod end identified with a “B”
– Turn the tie rod end to marking made earlier on the tie rod and
secure it with a locking nut.
– Install the tie rod end into the wheel bearing housing.
– Install the tie rod end with a new nut.
– Install the front wheel and tighten. Refer to
⇒ “2 Wheel Installation Tightening Specifications”, page 237 .
– Perform a vehicle alignment. Refer to
⇒ “8 Wheel Alignment”, page 256 .
Tightening Specifications
Component Tightening Specification
Tie rod end to tie rod 70 Nm
Tie rod end to wheel bearing housing
♦ Use new nut
20 Nm + 90° turn
8.4 Boot, Removing and Installing
Special tools and workshop equipment required
♦ Hose Clip Pliers - VAG1275A-
♦ Torque Wrench 1332 40-200Nm - VAG1332-
♦ Open Ring Wrench - 24mm - VAG1332/11-
♦ Locking Pliers - VAS6199-
Jetta 2011 ➤ , Jetta 2013 ➤
Suspension, Wheels, Steering - Edition 08.2015
340 Rep. Gr.48 - Steering
ProCarManuals.com

 Loading...