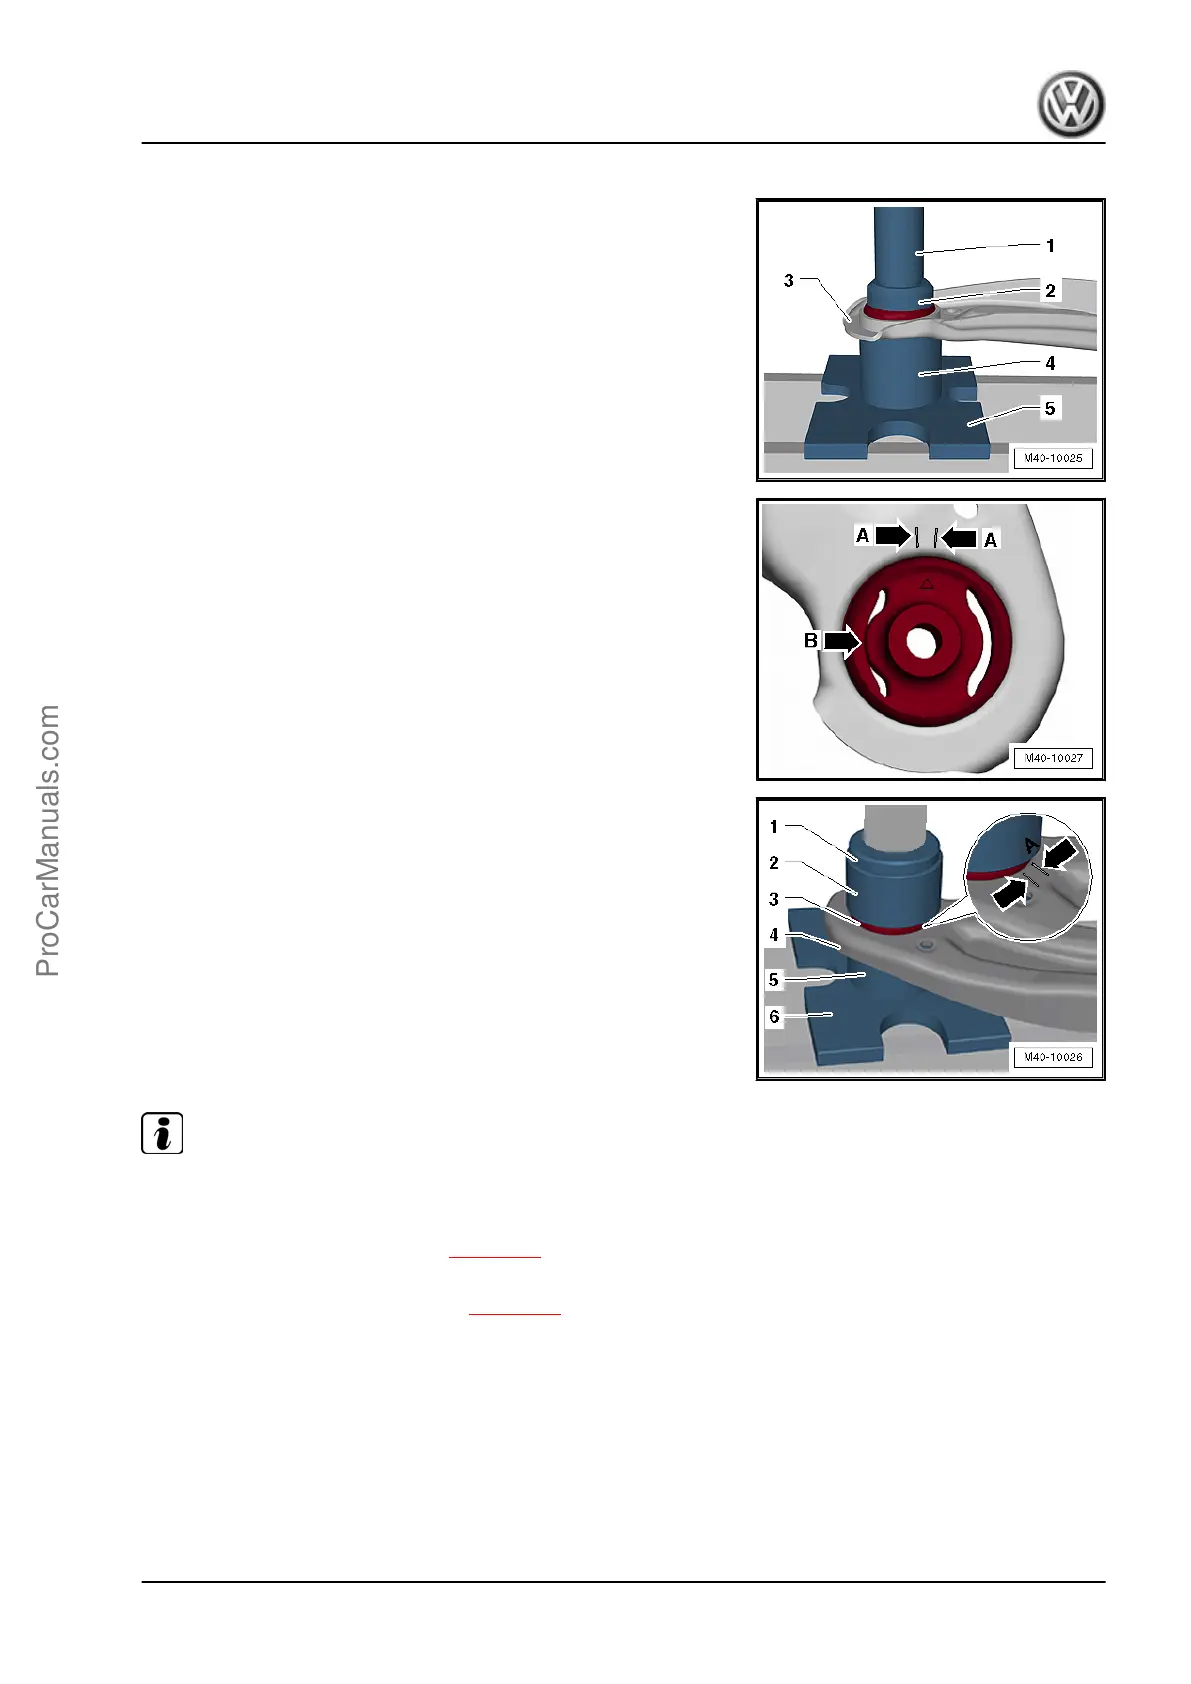
Pressing Out the Bonded Rubber Bushing
– Press out the bonded rubber bushings as shown.
1 - Press Piece - Rod - VW407-
2 - Hydraulic Press - Bushing Assembly Tool Kit - Thrust Piece
- T10230/8-
3 - Control arm - the opening in the control arm must face up‐
ward
4 - Bearing Installer - Front Wheel Bearing - 2039-
5 - Press Plate - VW402-
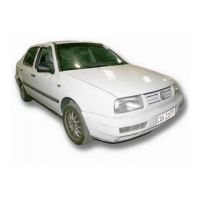
Installation Position for the Rear Bearing In the Control Arm
One of the stamped arrows points between the markings
-A arrows- in the control arm.
The cam -arrow B- must always point to the outside of the vehicle.
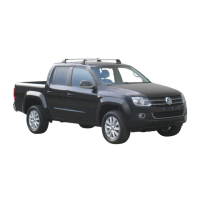
Installing the Bonded Rubber Bushings
– Install the bonded rubber bushing as shown.
1 - Press Piece - Multiple Use - VW412-
2 - Press Piece - Rear Track Control Arm - T10453- - the -A-
on the thrust piece must face the markings -arrows- on the
control arm.
3 - Bonded rubber bushing
4 - Control arm - the opening in the control arm must face
downward
5 - Front Subframe Mount Kit - 3372-
6 - Press Plate - VW402-
Note
Install the bonded rubber bushing far enough until the Press Piece
- Rear Track Control Arm - T10453- contacts the control arm.
– Install the control arm. Refer to ⇒ page 43 .
–
Install the control arm (left side of the vehicle with DSG
®
or
automatic transmission). Refer to ⇒ page 47 .
Jetta 2011 ➤ , Jetta 2013 ➤
Suspension, Wheels, Steering - Edition 08.2015
5. Front Suspension and Control Arm 51
ProCarManuals.com

 Loading...