8-78 Xerox Internal Use Only Phaser 6500/WorkCentre 6505 Service Manual
Service Parts Disassembly
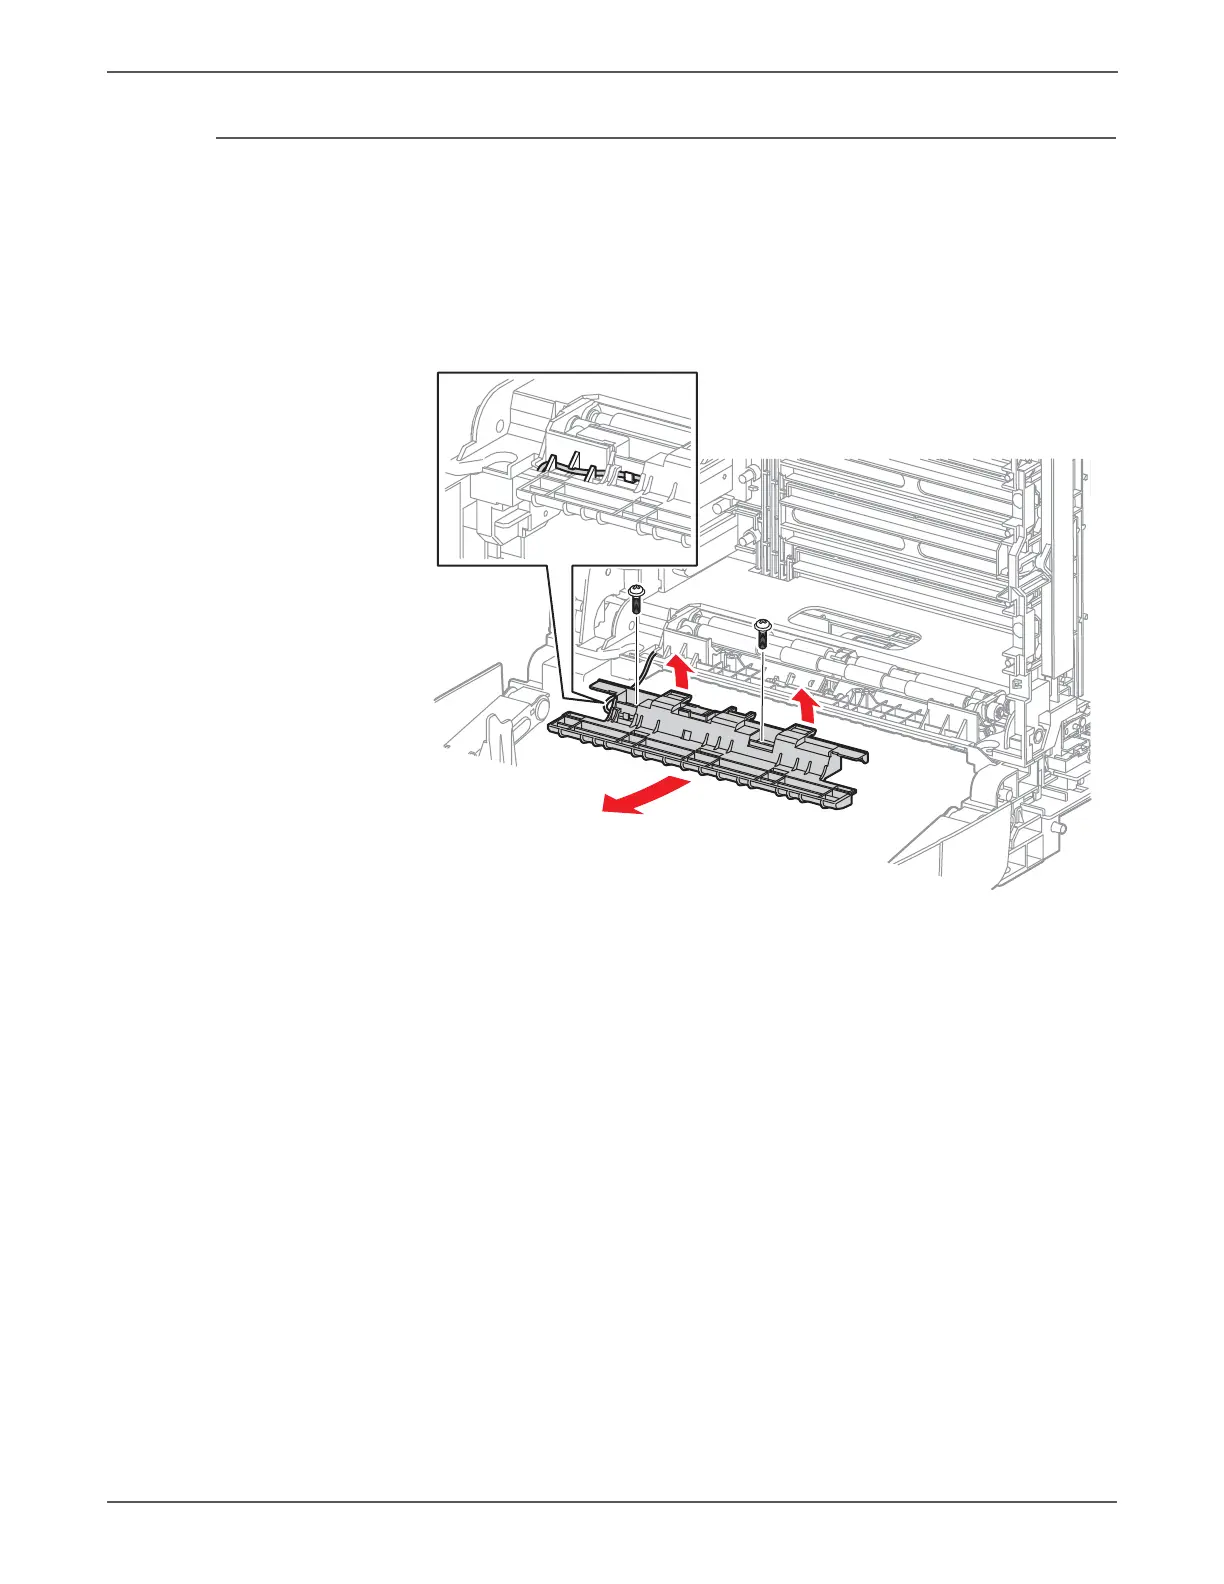
Manual Feed No Paper Sensor
PL3.2.13 (Sensor Photo)
1. Perform the service preparation steps on page 8-3.
2. Open the Front Cover.
3. Lower the Transfer Belt.
4. Remove two screws (silver, tap, 8mm) that secure the bracket.
5. Lift the bracket to release 2 bosses that align the bracket in the chute.
6. Raise and latch the Transfer Belt and remove the bracket.
7. Release 3 hooks that secure the sensor to the bracket. Release the harness
wires from the restraint on the bracket and set the bracket aside.
8. Unplug the sensor from the harness connector (P/J233).
When installing a new sensor:
1. Plug the sensor into the harness connector.
2. Install the sensor into the bracket. Tip: insert the end hook first, then
snap the side hooks in place.
3. Route the harness wires into the restraint in the bracket.
4. Set the bracket in place and secure it with the two screws.
http://www.manuals4you.com
 Loading...