June 2014
4-38
Xerox® WorkCentre® 3215/3225 Multifunction Printer Service Manual
REP 1.27, REP 1.28
Repairs
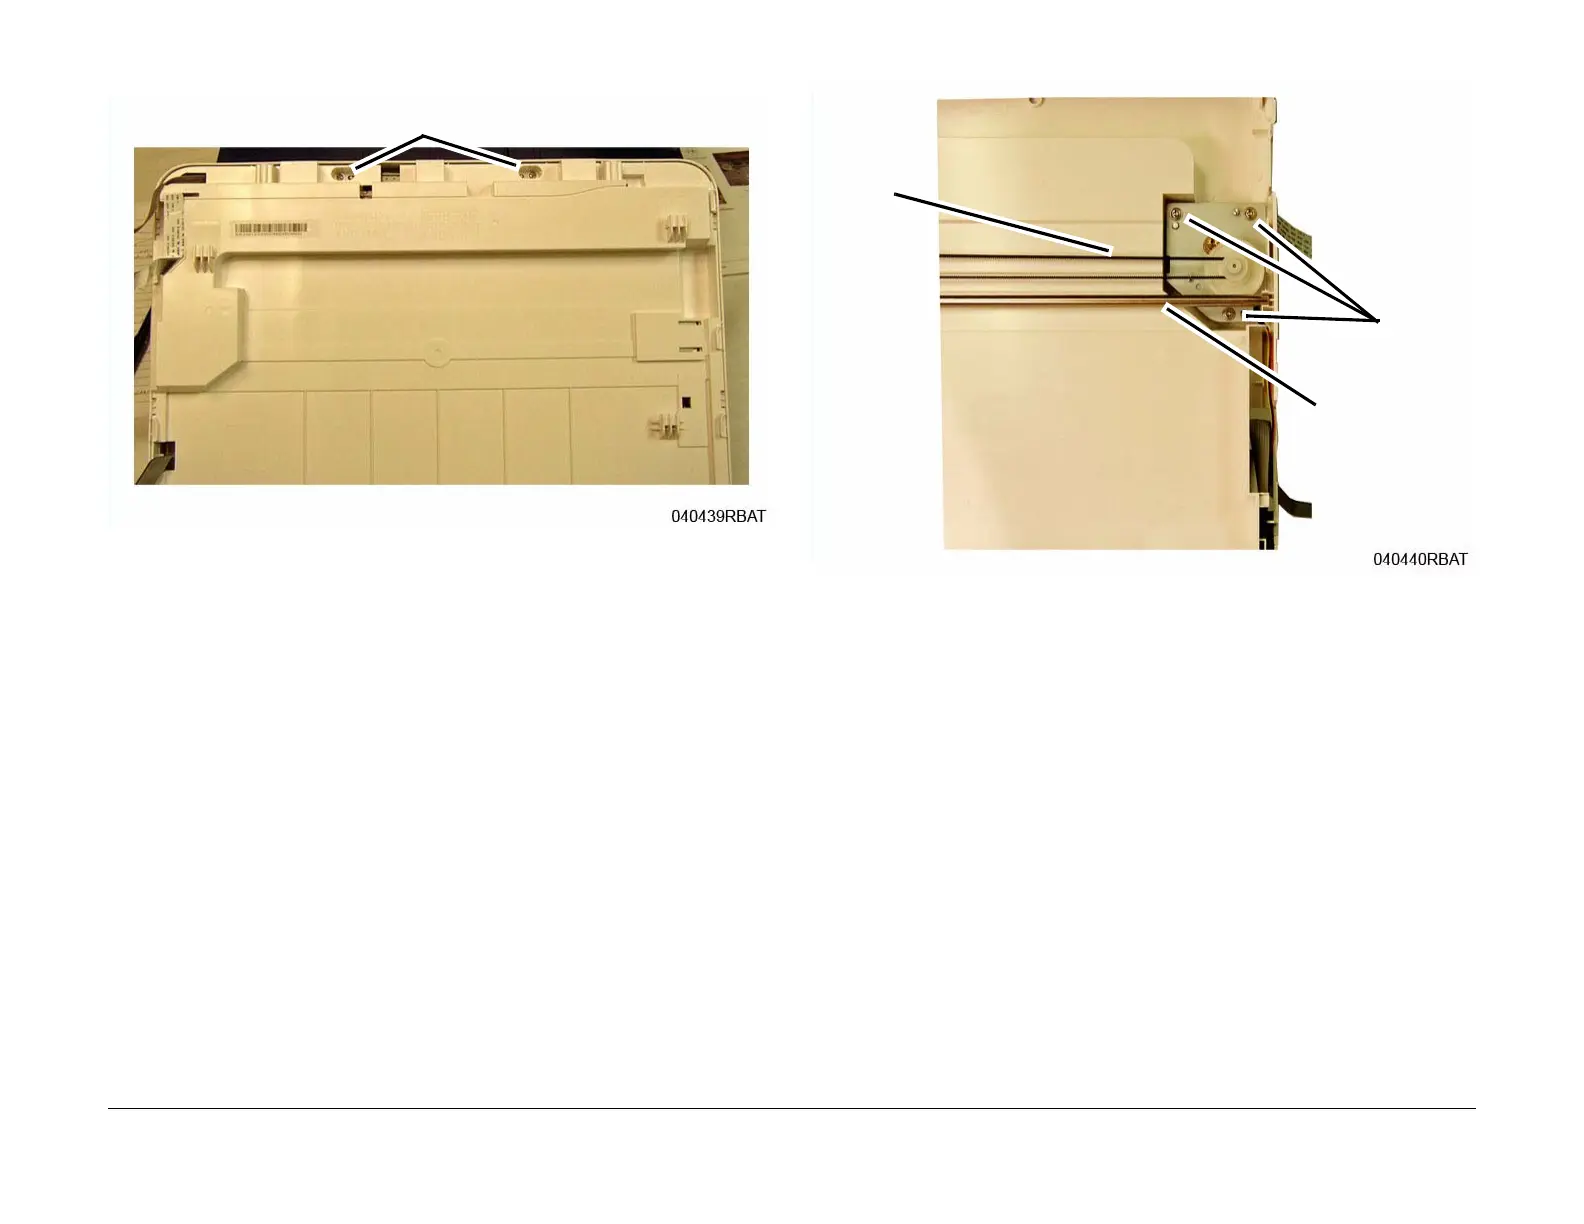
4. Remove the Scanner Assembly Frame bottom screws (2) (Figure 2).
Figure 2 Scanner Frame Bottom Screws (Bottom View)
5. Separate the Scanner Assembly Upper Frame from the Lower Frame:
a. Place the Scanner with the bottom facing up.
b. Release the latches (8) around the frame.
6. Remove the Scan Motor (Figure 3):
NOTE: There is tension on the motor from the ISM Drive Belt, hold the motor down when
removing the screws.
a. Move the Shaft out of the slot.
b. Remove the screws (3).
c. Remove the Drive Belt from the motor.
d. Release the wires from the cable guides.
Figure 3 Scanner Drive Motor (Top View)
Replacement
NOTE: Tapered Plastic Screws and Round Machine Screws are used to hold the cover to the
frame. Make sure that the Plastic Screws go into plastic components and Machine Screws go
into the metal frame.
1. Clean the CIS (Contact Image Sensor) Bar and the underside of the Platen Glass before
reassembling the ISM Module Frame.
2. Install the components in the reverse of removal.
Screws
Screws
Shaft
Drive
Belt
 Loading...