Graphic EQ, Parametric EQ, effects, and Premium Rack
Reference Manual
123
Inserting a GEQ in a channel
This section explains how to insert a GEQ into the selected channel for use.
NOTE
• If you are using a stereo source, you can mount a Flex15GEQ, or mount two 31BandGEQ units
in adjacent odd-numbered/even-numbered racks. This will let you link the two GEQ units in a later
step.
• You can view the input and output levels of the GEQ in the rack in the GEQ field.
• For details on GEQ operations, refer to the following section “Using the 31BandGEQ” or “Using
the Flex15GEQ” on page 126.
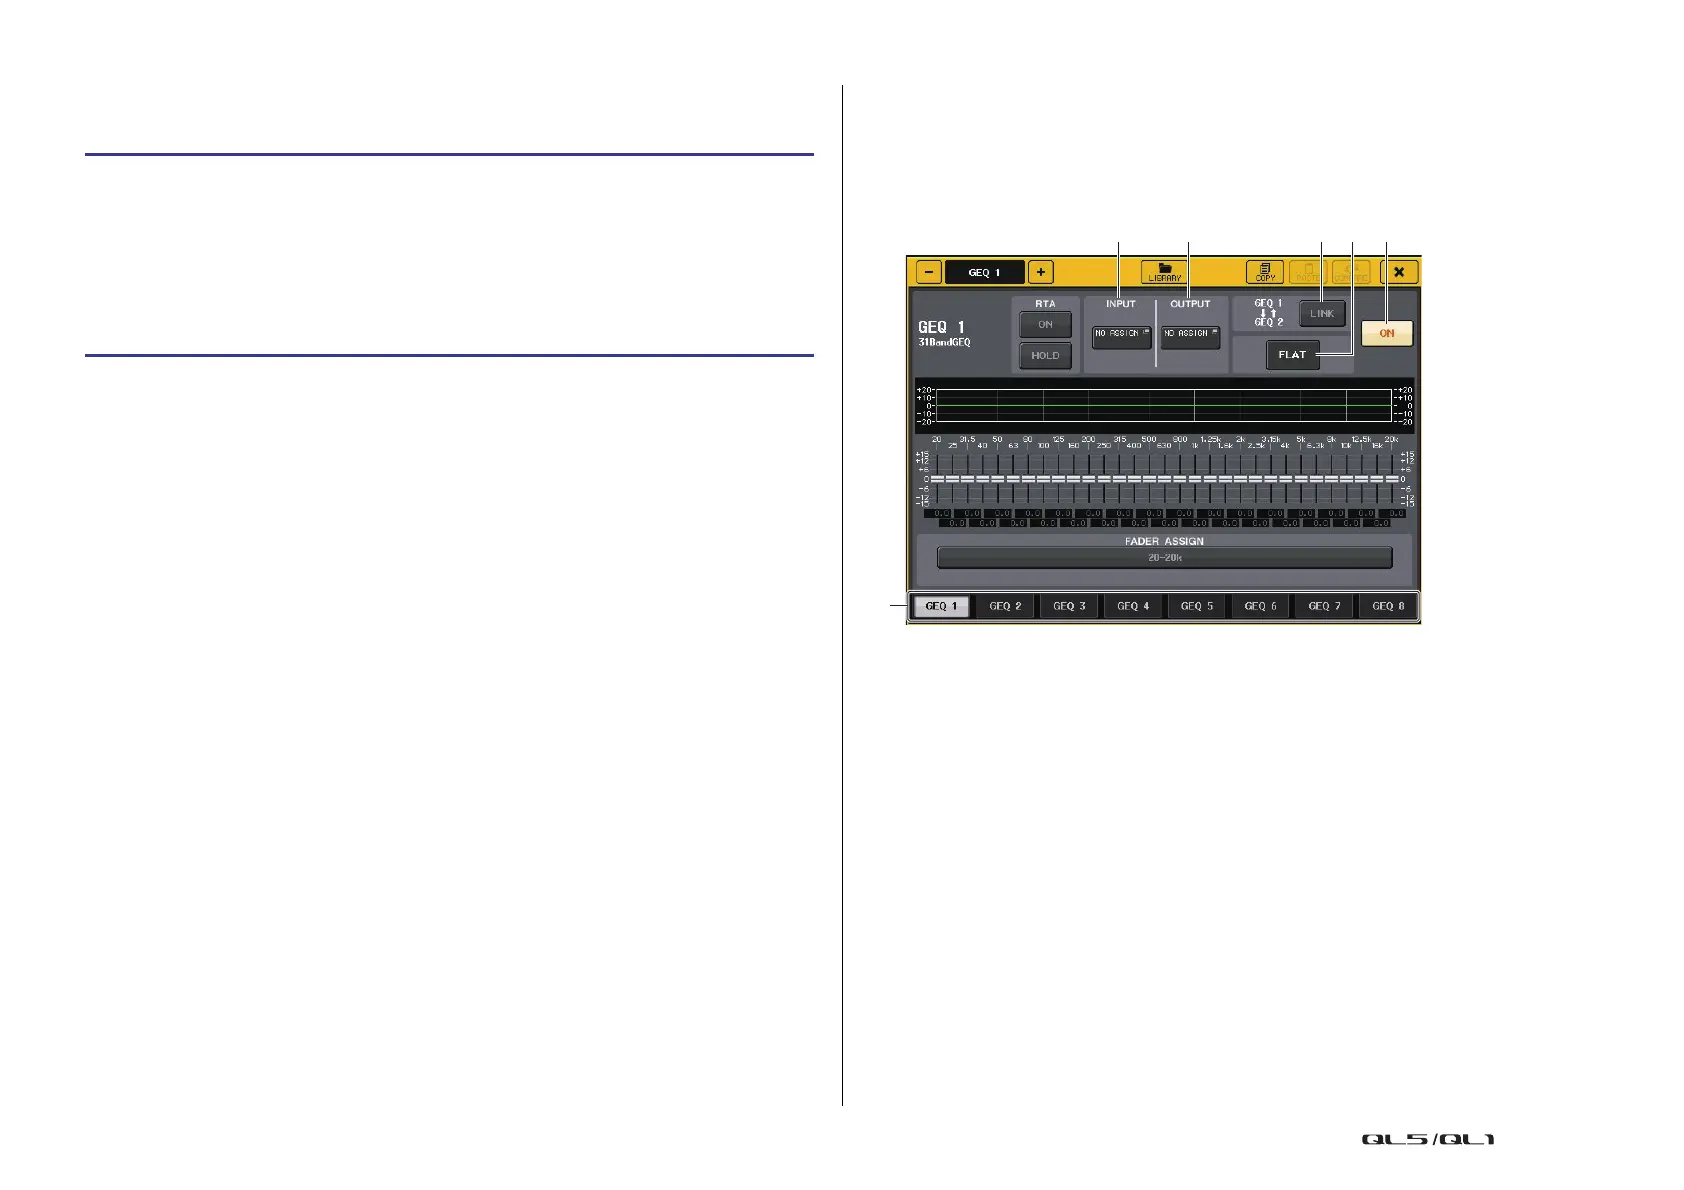
GEQ EDIT window
NOTE
• The windows for the 31BandGEQ and the Flex15GEQ are nearly identical. However, the
Flex15GEQ individually displays two GEQ units (A and B) mounted in a single rack.
• Pressing a top panel [SEL] key while operating the GEQ will switch to the popup window of GEQ,
effect, or premium rack that is inserted in that channel.
1 Rack select tabs
Switch among GEQ 1–8, or among EFFECT 1–8. For a rack in which a Flex15GEQ is
mounted, the tabs will be split as xA and xB (x is the rack number).
2 INPUT button
Press this button to open the CH SELECT window, in which you can select the input
source of the rack. The operating procedure is the same as for the INPUT button in the
GEQ field.
3 OUTPUT button
Press this button to open the CH SELECT window, in which you can select the output
destination of the rack. The operating procedure is the same as for the OUTPUT button
in the GEQ field.
STEP
1. Refer to steps 1–8 in “Virtual rack operations” on page 119 to mount a GEQ in a rack
and set its input source and output destination.
2. In the GEQ field rack or the EFFECT field rack, press the rack container in which you
mounted the GEQ.
3. If you’re using a stereo source, press the RACK LINK button to link the two GEQ
units.
4. Press the GEQ ON/OFF button to turn the GEQ on.
 Loading...


