I/O devices and external head amps
Reference Manual
156
3 DANTE SETUP button
Press this button to open the DANTE SETUP window, in which you can make settings
for the audio network.
Using an external head amp
If an I/O card (such as an MY16-ES64 card) supports the remote protocol of an external head
amp in the QL’s slot, you will be able to remotely control from the QL console some parameters
of the external head amp (Yamaha SB168-ES or AD8HR), such as phantom power (+48V)
on/off status, gain, and HPF.
For details on the I/O card settings, refer to the Owner’s Manual for the I/O card.
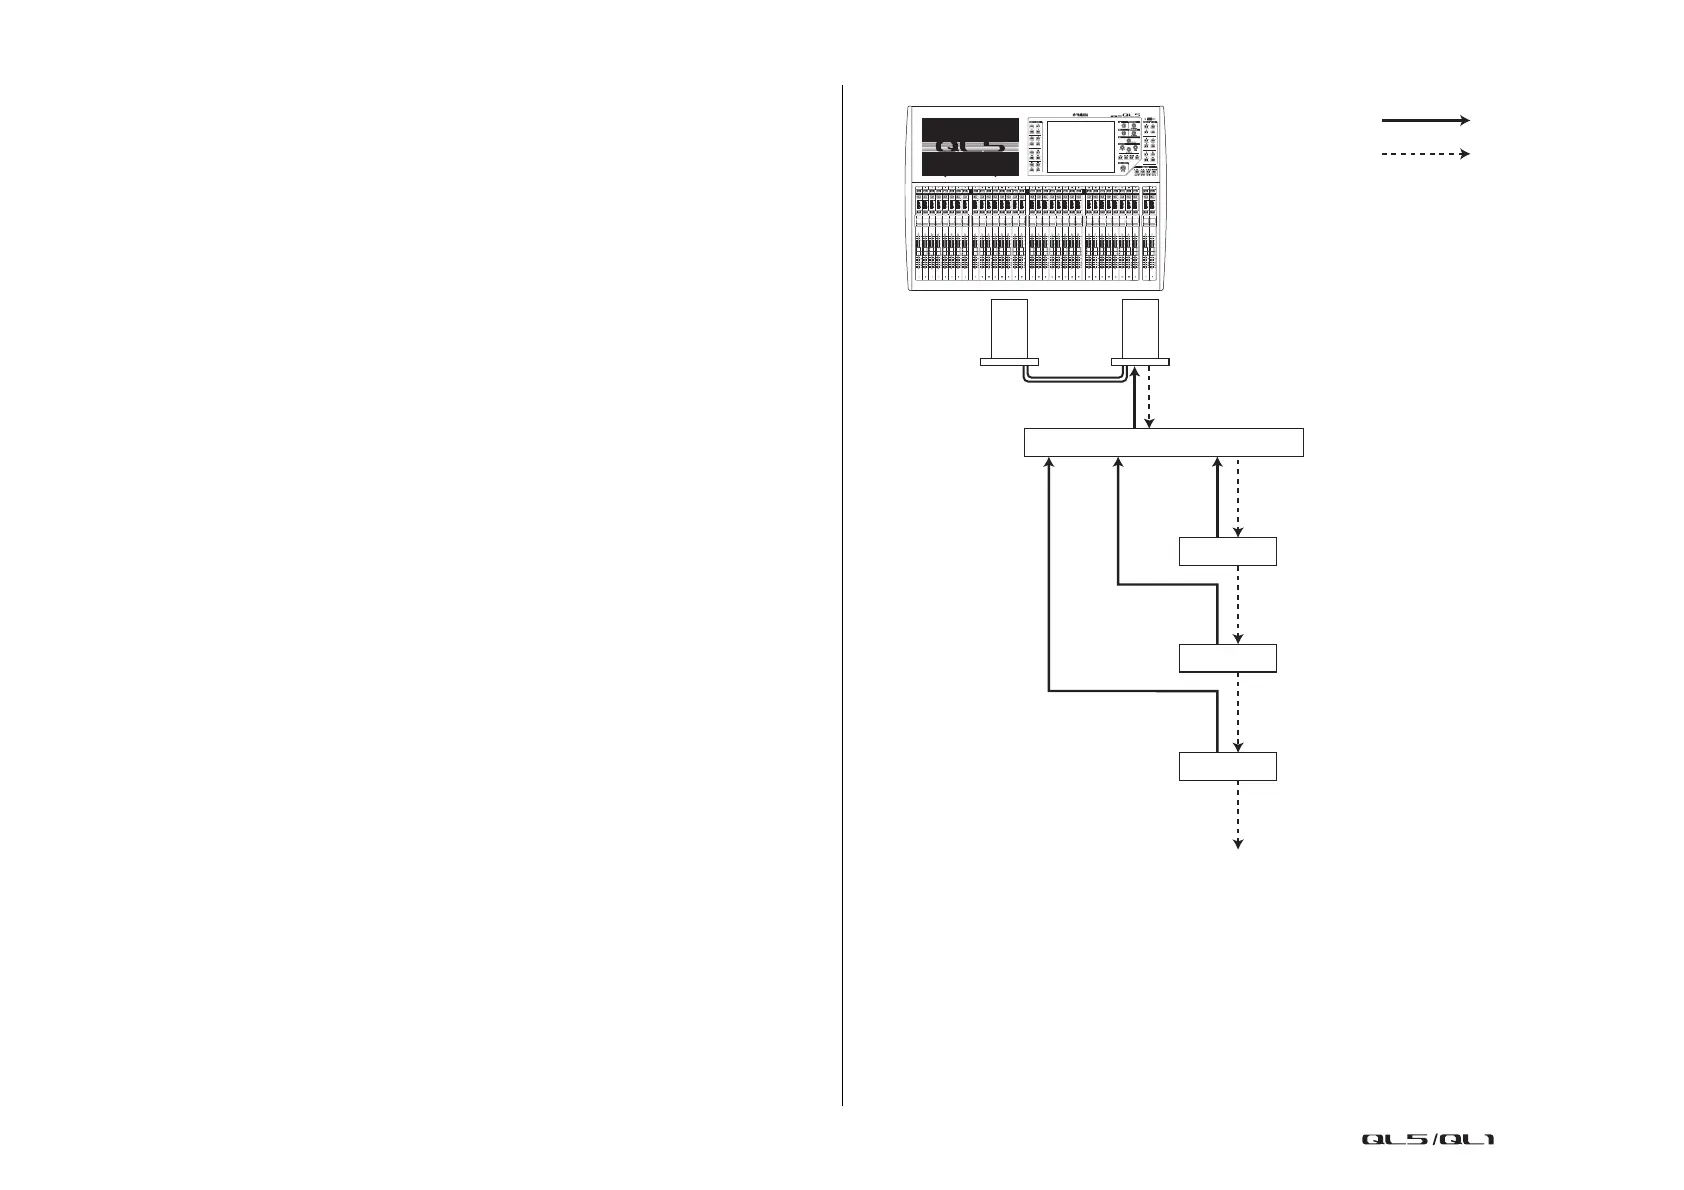
Connecting the QL series console to an AD8HR
To remotely control the AD8HR from the QL series console, install an MY16-ES64
EtherSound card in Slot 1 on the QL unit, then use an Ethernet cable to connect the QL unit
to the NAI48-ES. Then, connect the HA REMOTE connector on the NAI48-ES to the HA
REMOTE 1 connector on the AD8HR using an RS422 D-sub 9-pin cable. This connection
enables you to remotely control the AD8HR from the QL series console. To transmit audio
signals (input to the AD8HR) to the QL series console, connect the DIGITAL OUT A (or B)
connector on the AD8HR to the AES/EBU connector on the NAI48-ES using a D-sub 25-pin
AES/EBU cable. Signals will be sent or received between the NAI48-ES and the QL series
console via the MY16-ES64 card.
Alternatively, you can use a “daisy chain” connection to remotely control multiple AD8HR units
simultaneously. To do this, connect the AD8HR’s HA REMOTE 2 connector to the second
AD8HR’s HA REMOTE 1 connector. If you use the NAI48-ES, you can connect up to four
AD8HR units. Each slot of the QL series console provides up to 16 channels of input, so if you
want the audio signals from the AD8HR to be input to the QL series console, you’ll need to
install two MY16-EX cards in the console and connect the MY16-ES64 via an Ethernet cable.
QL5
AD8HR 1
NAI48-ES
AD8HR 2
AD8HR 3
MY16-EX MY16- ES64
DIGITAL OUT A
connector
DIGITAL OUT A
connector
DIGITAL
OUT A
connector
HA REMOTE connector
HA REMOTE 1 connector
HA REMOTE 2 connector
Up to four units
Audio signal
Remote signal
HA REMOTE 2 connector
HA REMOTE 2 connector
HA REMOTE 1 connector
HA REMOTE 1 connector
 Loading...


